Quickstart: Use Azure Cache for Redis in Python
In this article, you incorporate Azure Cache for Redis into a Python app to have access to a secure, dedicated cache that is accessible from any application within Azure.
Skip to the code on GitHub
If you want to skip straight to the code, see the Python quickstart on GitHub.
Prerequisites
- Azure subscription - create one for free
- Python 3
- For macOS or Linux, download from python.org.
- For Windows 11, use the Windows Store.
Create an Azure Cache for Redis instance
To create a cache, sign in to the Azure portal and select Create a resource.

On the Get Started page, type Azure Cache for Redis in the search box. Then, select Create.

On the New Redis Cache page, configure the settings for your cache.
Setting Choose a value Description Subscription Drop down and select your subscription. The subscription under which to create this new Azure Cache for Redis instance. Resource group Drop down and select a resource group, or select Create new and enter a new resource group name. Name for the resource group in which to create your cache and other resources. By putting all your app resources in one resource group, you can easily manage or delete them together. DNS name Enter a unique name. The cache name must be a string between 1 and 63 characters that contain only numbers, letters, or hyphens. The name must start and end with a number or letter, and can't contain consecutive hyphens. Your cache instance's host name is <DNS name>.redis.cache.windows.net. Location Drop down and select a location. Select a region near other services that use your cache. Cache SKU Drop down and select a SKU. The SKU determines the size, performance, and features parameters that are available for the cache. For more information, see Azure Cache for Redis Overview. Cache size Drop down and select a size of your cache For more information, see Azure Cache for Redis Overview. Select the Networking tab or select the Networking button at the bottom of the page.
In the Networking tab, select your connectivity method.
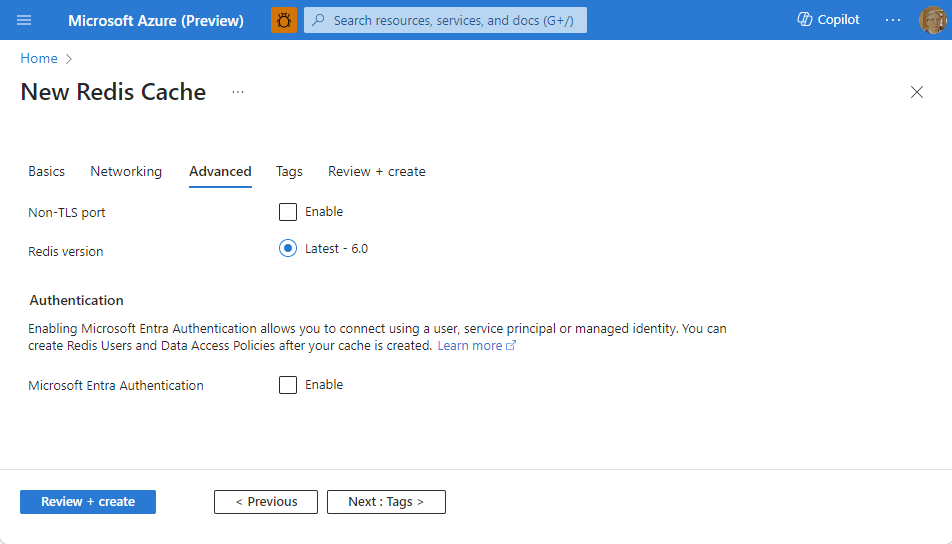
Select the Next: Advanced tab or select the Next: Advanced button on the bottom of the page to see the Advanced tab.

- For Basic or Standard caches, toggle the selection for a non-TLS port. You can also select if you want to enable Microsoft Entra Authentication.
- For a Premium cache, configure the settings for non-TLS port, clustering, managed identity, and data persistence. You can also select if you want to enable Microsoft Entra Authentication.
Select the Next: Tags tab or select the Next: Tags button at the bottom of the page.
Optionally, in the Tags tab, enter the name and value if you wish to categorize the resource.
Select Review + create. You're taken to the Review + create tab where Azure validates your configuration.
After the green Validation passed message appears, select Create.
It takes a while for a cache to create. You can monitor progress on the Azure Cache for Redis Overview page. When Status shows as Running, the cache is ready to use.
Retrieve host name, ports, and access keys from the Azure portal
To connect your Azure Cache for Redis server, the cache client needs the host name, ports, and a key for the cache. Some clients might refer to these items by slightly different names. You can get the host name, ports, and keys from the Azure portal.
To get the access keys, select Authentication from the Resource menu. Then, select the Access keys tab.

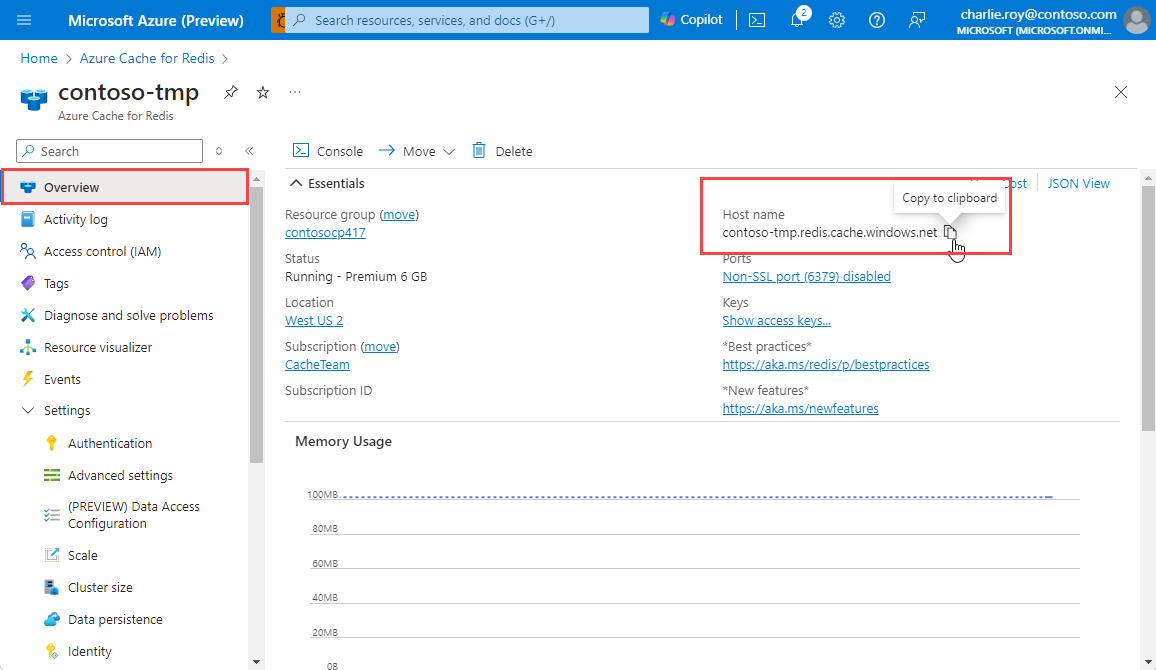
To get the host name and ports for your cache, select Overview from the Resource menu. The host name is of the form <DNS name>.redis.cache.windows.net.

Install redis-py
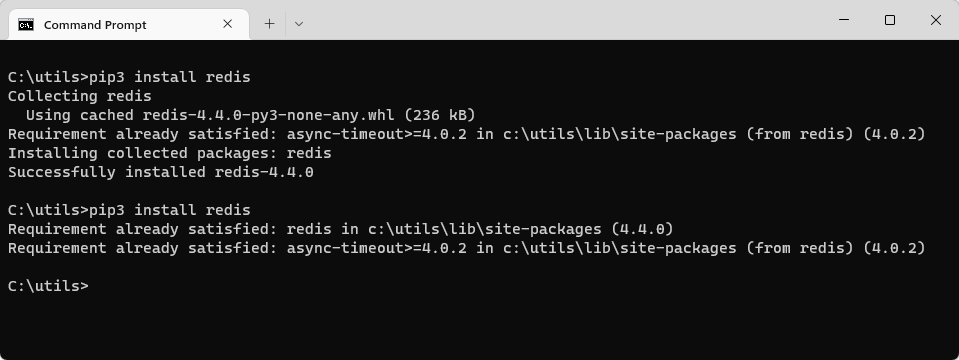
Redis-py is a Python interface to Azure Cache for Redis. Use the Python packages tool, pip, to install the redis-py package from a command prompt.
The following example used pip3 for Python 3 to install redis-py on Windows 11 from an Administrator command prompt.

Read and write to the cache
Run Python from the command line and test your cache by using the following code. Replace <Your Host Name> and <Your Access Key> with the values from your Azure Cache for Redis instance. Your host name is of the form <DNS name>.redis.cache.windows.net.
>>> import redis
>>> r = redis.StrictRedis(host='<Your Host Name>',
        port=6380, db=0, password='<Your Access Key>', ssl=True)
>>> r.set('foo', 'bar')
True
>>> r.get('foo')
b'bar'
Important
For Azure Cache for Redis version 3.0 or higher, TLS/SSL certificate check is enforced. ssl_ca_certs must be explicitly set when connecting to Azure Cache for Redis. For RedHat Linux, ssl_ca_certs are in the /etc/pki/tls/certs/ca-bundle.crt certificate module.
Create a Python sample app
Create a new text file, add the following script, and save the file as PythonApplication1.py. Replace <Your Host Name> and <Your Access Key> with the values from your Azure Cache for Redis instance. Your host name is of the form <DNS name>.redis.cache.windows.net.
import redis

myHostname = "<Your Host Name>"
myPassword = "<Your Access Key>"

r = redis.StrictRedis(host=myHostname, port=6380,
                      password=myPassword, ssl=True)

result = r.ping()
print("Ping returned : " + str(result))

result = r.set("Message", "Hello!, The cache is working with Python!")
print("SET Message returned : " + str(result))

result = r.get("Message")
print("GET Message returned : " + result.decode("utf-8"))

result = r.client_list()
print("CLIENT LIST returned : ")
for c in result:
    print(f"id : {c['id']}, addr : {c['addr']}")
Run PythonApplication1.py with Python. You should see results like the following example:

Clean up resources
If you're finished with the Azure resource group and resources you created in this quickstart, you can delete them to avoid charges.
Important
Deleting a resource group is irreversible, and the resource group and all the resources in it are permanently deleted. If you created your Azure Cache for Redis instance in an existing resource group that you want to keep, you can delete just the cache by selecting Delete from the cache Overview page.
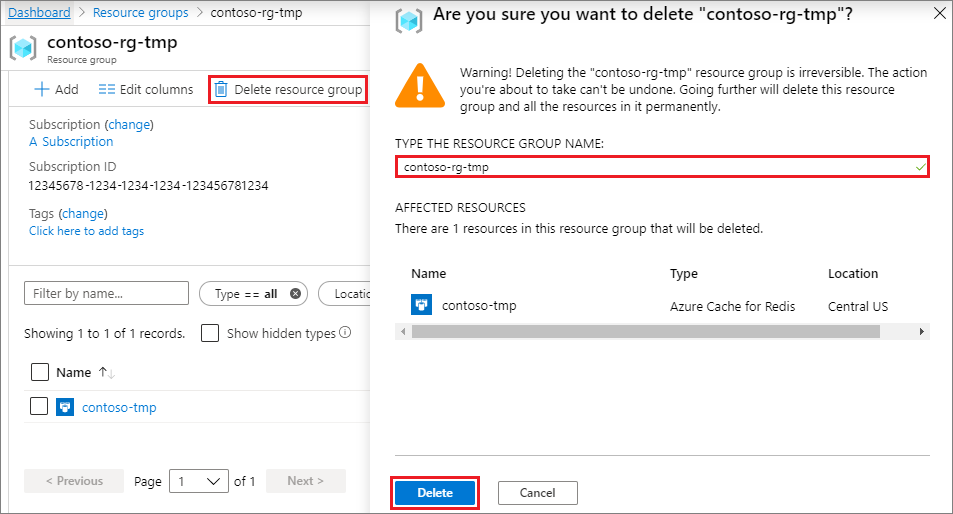
To delete the resource group and its Redis Cache for Azure instance:
From the Azure portal, search for and select Resource groups.
In the Filter by name text box, enter the name of the resource group that contains your cache instance, and then select it from the search results.
On your resource group page, select Delete resource group.
Type the resource group name, and then select Delete.

Next steps
Feedback
Coming soon: Throughout 2024 we will be phasing out GitHub Issues as the feedback mechanism for content and replacing it with a new feedback system. For more information see: https://aka.ms/ContentUserFeedback.
Submit and view feedback for