Build your first custom Microsoft Graph connector
Microsoft Graph connectors let you add your own data into Microsoft Graph and have it power various Microsoft 365 experiences.
This .NET application shows you how to use the Microsoft Graph connectors API to create a custom connector and use it to power Microsoft Search. This tutorial uses a sample data appliance parts inventory for the Contoso Appliance Repair organization.
Prerequisites
The .NET SDK installed on your development machine.
You should have a Microsoft work or school account with the Global administrator role. If you don't have a Microsoft 365 tenant, you might qualify for one through the Microsoft 365 Developer Program; for details, see the FAQ. Alternatively, you can sign up for a 1-month free trial or purchase a Microsoft 365 plan.
Install the Entity Framework Core Tools as a global tool using the following command:
dotnet tool install --global dotnet-efInstall a tool to update a SQLite database. For example, the DB Browser for SQLite.
Download the ApplianceParts.csv file from the Search connector sample repo.
Register the app in the portal
In this exercise you'll register a new application in Microsoft Entra ID to enable app-only authentication. Microsoft Graph connectors use app-only authentication to access the connector APIs.
Register application for app-only authentication
In this section you'll register an application that supports app-only authentication using client credentials flow.
Sign in to the Microsoft Entra admin center.
Expand the Identity menu > select Applications > App registrations > New registration.
Enter a name for your application, for example,
Parts Inventory Connector.Set Supported account types to Accounts in this organizational directory only.
Leave Redirect URI empty.
Select Register. On the application's Overview page, copy the value of the Application (client) ID and Directory (tenant) ID and save them, you'll need these values in the next step.
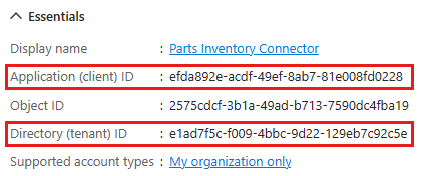
Select API permissions under Manage.
Remove the default User.Read permission under Configured permissions by selecting the ellipses (...) in its row and selecting Remove permission.
Select Add a permission, then Microsoft Graph.
Select Application permissions.
Select ExternalConnection.ReadWrite.OwnedBy and ExternalItem.ReadWrite.OwnedBy, then select Add permissions.
Select Grant admin consent for..., then select Yes to provide admin consent for the selected permission.

Select Certificates and secrets under Manage, then select New client secret.
Enter a description, choose a duration, and select Add.
Copy the secret from the Value column, you'll need it in the next steps.
Important
This client secret is never shown again, so make sure you copy it now.
Create the application
Begin by creating a new .NET console project using the .NET CLI.
Open your command-line interface (CLI) in a directory where you want to create the project. Run the following command.
dotnet new console -o PartsInventoryConnectorOnce the project is created, verify that it works by changing the current directory to the PartsInventoryConnector directory and running the following command in your CLI.
dotnet runIf it works, the app should output
Hello, World!.
Install dependencies
Before moving on, add some additional dependencies that you use later.
- .NET configuration packages to read application configuration from appsettings.json.
- Azure Identity client library for .NET to authenticate the user and acquire access tokens.
- Microsoft Graph .NET client library to make calls to the Microsoft Graph.
- Entity Framework packages for accessing a local database.
- CsvHelper for reading CSV files.
Run the following commands in your CLI to install the dependencies.
dotnet add package Microsoft.Extensions.Configuration.Binder
dotnet add package Microsoft.Extensions.Configuration.UserSecrets
dotnet add package Azure.Identity
dotnet add package Microsoft.Graph
dotnet add package Microsoft.EntityFrameworkCore.Design
dotnet add package Microsoft.EntityFrameworkCore.Sqlite
dotnet add package CsvHelper
Load application settings
In this section, you add the details of your app registration to the project.
Add your client ID, tenant ID, and client secret to the .NET Secret Manager. In your command-line interface, change the directory to the location of PartsInventoryConnector.csproj and run the following commands, replacing <client-id> with your client ID from your app registration, <tenant-id> with your tenant ID, and <client-secret> with your client secret.
dotnet user-secrets init
dotnet user-secrets set settings:clientId <client-id>
dotnet user-secrets set settings:tenantId <tenant-id>
dotnet user-secrets set settings:clientSecret <client-secret>
Create a file in the PartsInventoryConnector directory named Settings.cs and add the following code.
using Microsoft.Extensions.Configuration;

namespace PartsInventoryConnector;

public class Settings
{
    public string? ClientId { get; set; }
    public string? ClientSecret { get; set; }
    public string? TenantId { get; set; }

    public static Settings LoadSettings()
    {
        // Load settings
        IConfiguration config = new ConfigurationBuilder()
            .AddUserSecrets<Program>()
            .Build();

        return config.GetRequiredSection("Settings").Get<Settings>() ??
            throw new Exception("Could not load app settings. See README for configuration instructions.");
    }
}
Design the app
In this section you create a console-based menu.
Open ./Program.cs and replace its entire contents with the following code.
using System.Text.Json;
using Microsoft.EntityFrameworkCore;
using Microsoft.Graph;
using Microsoft.Graph.Models.ExternalConnectors;
using Microsoft.Graph.Models.ODataErrors;
using PartsInventoryConnector;
using PartsInventoryConnector.Data;
using PartsInventoryConnector.Graph;

Console.WriteLine("Parts Inventory Search Connector\n");

var settings = Settings.LoadSettings();

// Initialize Graph
InitializeGraph(settings);

ExternalConnection? currentConnection = null;
int choice = -1;

while (choice != 0)
{
    Console.WriteLine($"Current connection: {(currentConnection == null ? "NONE" : currentConnection.Name)}\n");
    Console.WriteLine("Please choose one of the following options:");
    Console.WriteLine("0. Exit");
    Console.WriteLine("1. Create a connection");
    Console.WriteLine("2. Select an existing connection");
    Console.WriteLine("3. Delete current connection");
    Console.WriteLine("4. Register schema for current connection");
    Console.WriteLine("5. View schema for current connection");
    Console.WriteLine("6. Push updated items to current connection");
    Console.WriteLine("7. Push ALL items to current connection");
    Console.Write("Selection: ");

    try
    {
        choice = int.Parse(Console.ReadLine() ?? string.Empty);
    }
    catch (FormatException)
    {
        // Set to invalid value
        choice = -1;
    }

    switch(choice)
    {
        case 0:
            // Exit the program
            Console.WriteLine("Goodbye...");
            break;
        case 1:
            currentConnection = await CreateConnectionAsync();
            break;
        case 2:
            currentConnection = await SelectExistingConnectionAsync();
            break;
        case 3:
            await DeleteCurrentConnectionAsync(currentConnection);
            currentConnection = null;
            break;
        case 4:
            await RegisterSchemaAsync();
            break;
        case 5:
            await GetSchemaAsync();
            break;
        case 6:
            await UpdateItemsFromDatabaseAsync(true, settings.TenantId);
            break;
        case 7:
            await UpdateItemsFromDatabaseAsync(false, settings.TenantId);
            break;
        default:
            Console.WriteLine("Invalid choice! Please try again.");
            break;
    }
}

static string? PromptForInput(string prompt, bool valueRequired)
{
    string? response;

    do
    {
        Console.WriteLine($"{prompt}:");
        response = Console.ReadLine();
        if (valueRequired && string.IsNullOrEmpty(response))
        {
            Console.WriteLine("You must provide a value");
        }
    } while (valueRequired && string.IsNullOrEmpty(response));

    return response;
}

static DateTime GetLastUploadTime()
{
    if (File.Exists("lastuploadtime.bin"))
    {
        return DateTime.Parse(
            File.ReadAllText("lastuploadtime.bin")).ToUniversalTime();
    }

    return DateTime.MinValue;
}

static void SaveLastUploadTime(DateTime uploadTime)
{
    File.WriteAllText("lastuploadtime.bin", uploadTime.ToString("u"));
}
Add the following placeholder methods at the end of the file. You implement them in later steps.
void InitializeGraph(Settings settings)
{
    // TODO
}

async Task<ExternalConnection?> CreateConnectionAsync()
{
    // TODO
    throw new NotImplementedException();
}

async Task<ExternalConnection?> SelectExistingConnectionAsync()
{
    // TODO
    throw new NotImplementedException();
}

async Task DeleteCurrentConnectionAsync(ExternalConnection? connection)
{
    // TODO
}

async Task RegisterSchemaAsync()
{
    // TODO
}

async Task GetSchemaAsync()
{
    // TODO
}

async Task UpdateItemsFromDatabaseAsync(bool uploadModifiedOnly, string? tenantId)
{
    // TODO
}
This implements a basic menu and reads the user's choice from the command line.
Create the database
In this section you will define the model for the appliance part inventory records and Entity Framework context, and use the dotnet ef tool to initialize the database.
Define the model
Create a new directory in the PartsInventoryConnector directory named Data.
Create a file in the Data directory named AppliancePart.cs and add the following code.
using System.ComponentModel.DataAnnotations;
using System.Text.Json.Serialization;
using Microsoft.Graph.Models.ExternalConnectors;

namespace PartsInventoryConnector.Data;

public class AppliancePart
{
    [JsonPropertyName("appliances@odata.type")]
    private const string AppliancesODataType = "Collection(String)";

    [Key]
    public int PartNumber { get; set; }
    public string? Name { get; set; }
    public string? Description { get; set; }
    public double Price { get; set; }
    public int Inventory { get; set; }
    public List<string>? Appliances { get; set; }

    public Properties AsExternalItemProperties()
    {
        _ = Name ?? throw new MemberAccessException("Name cannot be null");
        _ = Description ?? throw new MemberAccessException("Description cannot be null");
        _ = Appliances ?? throw new MemberAccessException("Appliances cannot be null");

        var properties = new Properties
        {
            AdditionalData = new Dictionary<string, object>
            {
                { "partNumber", PartNumber },
                { "name", Name },
                { "description", Description },
                { "price", Price },
                { "inventory", Inventory },
                { "appliances@odata.type", "Collection(String)" },
                { "appliances", Appliances }
            }
        };

        return properties;
    }
}
Create a file in the Data directory named ApplianceDbContext.cs and add the following code.
using System.Text.Json;
using Microsoft.Data.Sqlite;
using Microsoft.EntityFrameworkCore;
using Microsoft.EntityFrameworkCore.ChangeTracking;

namespace PartsInventoryConnector.Data;

public class ApplianceDbContext : DbContext
{
    public DbSet<AppliancePart> Parts => Set<AppliancePart>();

    public void EnsureDatabase()
    {
        if (Database.EnsureCreated() || !Parts.Any())
        {
            // File was just created (or is empty),
            // seed with data from CSV file
            var parts = CsvDataLoader.LoadPartsFromCsv("ApplianceParts.csv");
            Parts.AddRange(parts);
            SaveChanges();
        }
    }

    protected override void OnConfiguring(DbContextOptionsBuilder options)
    {
        options.UseSqlite("Data Source=parts.db");
    }

    protected override void OnModelCreating(ModelBuilder modelBuilder)
    {
        // EF Core can't store lists, so add a converter for the Appliances
        // property to serialize as a JSON string on save to DB
        modelBuilder.Entity<AppliancePart>()
            .Property(ap => ap.Appliances)
            .HasConversion(
                v => JsonSerializer.Serialize(v, JsonSerializerOptions.Default),
                v => JsonSerializer.Deserialize<List<string>>(v, JsonSerializerOptions.Default)
            );

        // Add LastUpdated and IsDeleted shadow properties
        modelBuilder.Entity<AppliancePart>()
            .Property<DateTime>("LastUpdated")
            .HasDefaultValueSql("datetime()")
            .ValueGeneratedOnAddOrUpdate();
        modelBuilder.Entity<AppliancePart>()
            .Property<bool>("IsDeleted")
            .IsRequired()
            .HasDefaultValue(false);

        // Exclude any soft-deleted items (IsDeleted = 1) from
        // the default query sets
        modelBuilder.Entity<AppliancePart>()
            .HasQueryFilter(a => !EF.Property<bool>(a, "IsDeleted"));
    }

    public override int SaveChanges()
    {
        // Prevent deletes of data, instead mark the item as deleted
        // by setting IsDeleted = true.
        foreach(var entry in ChangeTracker.Entries()
            .Where(e => e.State == EntityState.Deleted))
        {
            if (entry.Entity.GetType() == typeof(AppliancePart))
            {
                SoftDelete(entry);
            }

        }

        return base.SaveChanges();
    }

    private void SoftDelete(EntityEntry entry)
    {
        var partNumber = new SqliteParameter("@partNumber",
            entry.OriginalValues["PartNumber"]);

        Database.ExecuteSqlRaw(
            "UPDATE Parts SET IsDeleted = 1 WHERE PartNumber = @partNumber",
            partNumber);

        entry.State = EntityState.Detached;
    }
}
Create a file in the Data directory named CsvDataLoader.cs and add the following code.
using System.Globalization;
using CsvHelper;
using CsvHelper.Configuration;
using CsvHelper.TypeConversion;

namespace PartsInventoryConnector.Data;

public static class CsvDataLoader
{
    public static List<AppliancePart> LoadPartsFromCsv(string filePath)
    {
        using var reader = new StreamReader(filePath);
        using var csv = new CsvReader(reader, CultureInfo.InvariantCulture);
        csv.Context.RegisterClassMap<AppliancePartMap>();

        return new List<AppliancePart>(csv.GetRecords<AppliancePart>());
    }
}

public class ApplianceListConverter : DefaultTypeConverter
{
    public override object? ConvertFromString(string? text, IReaderRow row, MemberMapData memberMapData)
    {
        var appliances = text?.Split(';') ?? Array.Empty<string>();
        return new List<string>(appliances);
    }
}

public class AppliancePartMap : ClassMap<AppliancePart>
{
    public AppliancePartMap()
    {
        Map(m => m.PartNumber);
        Map(m => m.Name);
        Map(m => m.Description);
        Map(m => m.Price);
        Map(m => m.Inventory);
        Map(m => m.Appliances).TypeConverter<ApplianceListConverter>();
    }
}
Initialize the database
Open your command line interface (CLI) in the directory where PartsInventoryConnector.csproj is located.
Run the following commands:
dotnet ef migrations add InitialCreate
dotnet ef database update
Note
Run the following commands if a schema changes in the CSV file, and reflect those changes into the SQLite database.
 dotnet ef database drop
 dotnet ef database update
Configure Microsoft Graph
In this section, you configure the Microsoft Graph SDK client to use app-only authentication.
Create a helper class
Create a new directory in the PartsInventoryConnector directory named Graph.
Create a file in the Graph directory named GraphHelper.cs and add the following
usingstatements.using Azure.Identity; using Microsoft.Graph; using Microsoft.Graph.Models.ExternalConnectors; using Microsoft.Kiota.Authentication.Azure;Add a namespace and class definition.
namespace PartsInventoryConnector.Graph;

public static class GraphHelper
{
}
Add the following code to the
GraphHelperclass to configure aGraphServiceClientwith app-only authentication.private static GraphServiceClient? graphClient; private static HttpClient? httpClient; public static void Initialize(Settings settings) { // Create a credential that uses the client credentials // authorization flow var credential = new ClientSecretCredential( settings.TenantId, settings.ClientId, settings.ClientSecret); // Create an HTTP client httpClient = GraphClientFactory.Create(); // Create an auth provider var authProvider = new AzureIdentityAuthenticationProvider( credential, scopes: new[] { "https://graph.microsoft.com/.default" }); // Create a Graph client using the credential graphClient = new GraphServiceClient(httpClient, authProvider); }Replace the empty
InitializeGraphfunction in Program.cs with the following.void InitializeGraph(Settings settings) { try { GraphHelper.Initialize(settings); } catch (Exception ex) { Console.WriteLine($"Error initializing Graph: {ex.Message}"); } }
Manage connections
In this section you add methods to manage external connections.
Create a connection
Add the following function to the
GraphHelperclass in GraphHelper.cs.public static async Task<ExternalConnection?> CreateConnectionAsync(string id, string name, string? description) { _ = graphClient ?? throw new MemberAccessException("graphClient is null"); var newConnection = new ExternalConnection { Id = id, Name = name, Description = description, }; return await graphClient.External.Connections.PostAsync(newConnection); }Replace the placeholder function
CreateConnectionAsyncin Program.cs with the following.async Task<ExternalConnection?> CreateConnectionAsync() { var connectionId = PromptForInput( "Enter a unique ID for the new connection (3-32 characters)", true) ?? "ConnectionId"; var connectionName = PromptForInput( "Enter a name for the new connection", true) ?? "ConnectionName"; var connectionDescription = PromptForInput( "Enter a description for the new connection", false); try { // Create the connection var connection = await GraphHelper.CreateConnectionAsync( connectionId, connectionName, connectionDescription); Console.WriteLine($"New connection created - Name: {connection?.Name}, Id: {connection?.Id}"); return connection; } catch (ODataError odataError) { Console.WriteLine($"Error creating connection: {odataError.ResponseStatusCode}: {odataError.Error?.Code} {odataError.Error?.Message}"); return null; } }
Select an existing connection
Add the following function to the
GraphHelperclass in GraphHelper.cs.public static async Task<ExternalConnectionCollectionResponse?> GetExistingConnectionsAsync() { _ = graphClient ?? throw new MemberAccessException("graphClient is null"); return await graphClient.External.Connections.GetAsync(); }Replace the placeholder function
SelectExistingConnectionAsyncin Program.cs with the following.async Task<ExternalConnection?> SelectExistingConnectionAsync() { // TODO Console.WriteLine("Getting existing connections..."); try { var response = await GraphHelper.GetExistingConnectionsAsync(); var connections = response?.Value ?? new List<ExternalConnection>(); if (connections.Count <= 0) { Console.WriteLine("No connections exist. Please create a new connection"); return null; } // Display connections Console.WriteLine("Choose one of the following connections:"); var menuNumber = 1; foreach(var connection in connections) { Console.WriteLine($"{menuNumber++}. {connection.Name}"); } ExternalConnection? selection = null; do { try { Console.Write("Selection: "); var choice = int.Parse(Console.ReadLine() ?? string.Empty); if (choice > 0 && choice <= connections.Count) { selection = connections[choice - 1]; } else { Console.WriteLine("Invalid choice."); } } catch (FormatException) { Console.WriteLine("Invalid choice."); } } while (selection == null); return selection; } catch (ODataError odataError) { Console.WriteLine($"Error getting connections: {odataError.ResponseStatusCode}: {odataError.Error?.Code} {odataError.Error?.Message}"); return null; } }
Delete a connection
Add the following function to the
GraphHelperclass in GraphHelper.cs.public static async Task DeleteConnectionAsync(string? connectionId) { _ = graphClient ?? throw new MemberAccessException("graphClient is null"); _ = connectionId ?? throw new ArgumentException("connectionId is required"); await graphClient.External.Connections[connectionId].DeleteAsync(); }Replace the placeholder function
DeleteCurrentConnectionAsyncin Program.cs with the following.async Task DeleteCurrentConnectionAsync(ExternalConnection? connection) { if (connection == null) { Console.WriteLine( "No connection selected. Please create a new connection or select an existing connection."); return; } try { await GraphHelper.DeleteConnectionAsync(connection.Id); Console.WriteLine($"{connection.Name} deleted successfully."); } catch (ODataError odataError) { Console.WriteLine($"Error deleting connection: {odataError.ResponseStatusCode}: {odataError.Error?.Code} {odataError.Error?.Message}"); } }
Manage schema
In this section, you'll add methods to register the schema for the connector.
Register the schema
Add the following functions to the
GraphHelperclass in GraphHelper.cs.public static async Task RegisterSchemaAsync(string? connectionId, Schema schema) { _ = graphClient ?? throw new MemberAccessException("graphClient is null"); _ = httpClient ?? throw new MemberAccessException("httpClient is null"); _ = connectionId ?? throw new ArgumentException("connectionId is required"); // Use the Graph SDK's request builder to generate the request URL var requestInfo = graphClient.External .Connections[connectionId] .Schema .ToGetRequestInformation(); requestInfo.SetContentFromParsable(graphClient.RequestAdapter, "application/json", schema); // Convert the SDK request to an HttpRequestMessage var requestMessage = await graphClient.RequestAdapter .ConvertToNativeRequestAsync<HttpRequestMessage>(requestInfo); _ = requestMessage ?? throw new Exception("Could not create native HTTP request"); requestMessage.Method = HttpMethod.Post; requestMessage.Headers.Add("Prefer", "respond-async"); // Send the request var responseMessage = await httpClient.SendAsync(requestMessage) ?? throw new Exception("No response returned from API"); if (responseMessage.IsSuccessStatusCode) { // The operation ID is contained in the Location header returned // in the response var operationId = responseMessage.Headers.Location?.Segments.Last() ?? throw new Exception("Could not get operation ID from Location header"); await WaitForOperationToCompleteAsync(connectionId, operationId); } else { throw new ServiceException("Registering schema failed", responseMessage.Headers, (int)responseMessage.StatusCode); } } private static async Task WaitForOperationToCompleteAsync(string connectionId, string operationId) { _ = graphClient ?? throw new MemberAccessException("graphClient is null"); do { var operation = await graphClient.External .Connections[connectionId] .Operations[operationId] .GetAsync(); if (operation?.Status == ConnectionOperationStatus.Completed) { return; } else if (operation?.Status == ConnectionOperationStatus.Failed) { throw new ServiceException($"Schema operation failed: {operation?.Error?.Code} {operation?.Error?.Message}"); } // Wait 5 seconds and check again await Task.Delay(5000); } while (true); }Replace the placeholder function
RegisterSchemaAsyncin Program.cs with the following.async Task RegisterSchemaAsync() { if (currentConnection == null) { Console.WriteLine("No connection selected. Please create a new connection or select an existing connection."); return; } Console.WriteLine("Registering schema, this may take a moment..."); try { // Create the schema var schema = new Schema { BaseType = "microsoft.graph.externalItem", Properties = new List<Property> { new Property { Name = "partNumber", Type = PropertyType.Int64, IsQueryable = true, IsSearchable = false, IsRetrievable = true, IsRefinable = true }, new Property { Name = "name", Type = PropertyType.String, IsQueryable = true, IsSearchable = true, IsRetrievable = true, IsRefinable = false, Labels = new List<Label?>() { Label.Title }}, new Property { Name = "description", Type = PropertyType.String, IsQueryable = false, IsSearchable = true, IsRetrievable = true, IsRefinable = false }, new Property { Name = "price", Type = PropertyType.Double, IsQueryable = true, IsSearchable = false, IsRetrievable = true, IsRefinable = true }, new Property { Name = "inventory", Type = PropertyType.Int64, IsQueryable = true, IsSearchable = false, IsRetrievable = true, IsRefinable = true }, new Property { Name = "appliances", Type = PropertyType.StringCollection, IsQueryable = true, IsSearchable = true, IsRetrievable = true, IsRefinable = false } }, }; await GraphHelper.RegisterSchemaAsync(currentConnection.Id, schema); Console.WriteLine("Schema registered successfully"); } catch (ServiceException serviceException) { Console.WriteLine($"Error registering schema: {serviceException.ResponseStatusCode} {serviceException.Message}"); } catch (ODataError odataError) { Console.WriteLine($"Error registering schema: {odataError.ResponseStatusCode}: {odataError.Error?.Code} {odataError.Error?.Message}"); } }
Get the schema for a connection
Add the following function to the
GraphHelperclass in GraphHelper.cs.public static async Task<Schema?> GetSchemaAsync(string? connectionId) { _ = graphClient ?? throw new MemberAccessException("graphClient is null"); _ = connectionId ?? throw new ArgumentException("connectionId is null"); return await graphClient.External .Connections[connectionId] .Schema .GetAsync(); }Replace the placeholder function
GetSchemaAsyncin Program.cs with the following.async Task GetSchemaAsync() { if (currentConnection == null) { Console.WriteLine("No connection selected. Please create a new connection or select an existing connection."); return; } try { var schema = await GraphHelper.GetSchemaAsync(currentConnection.Id); Console.WriteLine(JsonSerializer.Serialize(schema)); } catch (ODataError odataError) { Console.WriteLine($"Error getting schema: {odataError.ResponseStatusCode}: {odataError.Error?.Code} {odataError.Error?.Message}"); } }
Manage items
In this section, you'll add methods to add or delete items to the connector.
Upload or delete items
Add the following function to the
GraphHelperclass in GraphHelper.cs.public static async Task AddOrUpdateItemAsync(string? connectionId, ExternalItem item) { _ = graphClient ?? throw new MemberAccessException("graphClient is null"); _ = connectionId ?? throw new ArgumentException("connectionId is null"); await graphClient.External .Connections[connectionId] .Items[item.Id] .PutAsync(item); }Add the following function to the
GraphHelperclass in GraphHelper.cs.public static async Task DeleteItemAsync(string? connectionId, string? itemId) { _ = graphClient ?? throw new MemberAccessException("graphClient is null"); _ = connectionId ?? throw new ArgumentException("connectionId is null"); _ = itemId ?? throw new ArgumentException("itemId is null"); await graphClient.External .Connections[connectionId] .Items[itemId] .DeleteAsync(); }Replace the placeholder function
UpdateItemsFromDatabaseAsyncin Program.cs with the following.async Task UpdateItemsFromDatabaseAsync(bool uploadModifiedOnly, string? tenantId) { if (currentConnection == null) { Console.WriteLine("No connection selected. Please create a new connection or select an existing connection."); return; } _ = tenantId ?? throw new ArgumentException("tenantId is null"); List<AppliancePart>? partsToUpload = null; List<AppliancePart>? partsToDelete = null; var newUploadTime = DateTime.UtcNow; var partsDb = new ApplianceDbContext(); partsDb.EnsureDatabase(); if (uploadModifiedOnly) { var lastUploadTime = GetLastUploadTime(); Console.WriteLine($"Uploading changes since last upload at {lastUploadTime.ToLocalTime()}"); partsToUpload = partsDb.Parts .Where(p => EF.Property<DateTime>(p, "LastUpdated") > lastUploadTime) .ToList(); partsToDelete = partsDb.Parts .IgnoreQueryFilters() .Where(p => EF.Property<bool>(p, "IsDeleted") && EF.Property<DateTime>(p, "LastUpdated") > lastUploadTime) .ToList(); } else { partsToUpload = partsDb.Parts.ToList(); partsToDelete = partsDb.Parts .IgnoreQueryFilters() .Where(p => EF.Property<bool>(p, "IsDeleted")) .ToList(); } Console.WriteLine($"Processing {partsToUpload.Count} add/updates, {partsToDelete.Count} deletes."); var success = true; foreach (var part in partsToUpload) { var newItem = new ExternalItem { Id = part.PartNumber.ToString(), Content = new ExternalItemContent { Type = ExternalItemContentType.Text, Value = part.Description }, Acl = new List<Acl> { new Acl { AccessType = AccessType.Grant, Type = AclType.Everyone, Value = tenantId, } }, Properties = part.AsExternalItemProperties(), }; try { Console.Write($"Uploading part number {part.PartNumber}..."); await GraphHelper.AddOrUpdateItemAsync(currentConnection.Id, newItem); Console.WriteLine("DONE"); } catch (ODataError odataError) { success = false; Console.WriteLine("FAILED"); Console.WriteLine($"Error: {odataError.ResponseStatusCode}: {odataError.Error?.Code} {odataError.Error?.Message}"); } } foreach (var part in partsToDelete) { try { Console.Write($"Deleting part number {part.PartNumber}..."); await GraphHelper.DeleteItemAsync(currentConnection.Id, part.PartNumber.ToString()); Console.WriteLine("DONE"); } catch (ODataError odataError) { success = false; Console.WriteLine("FAILED"); Console.WriteLine($"Error: {odataError.ResponseStatusCode}: {odataError.Error?.Code} {odataError.Error?.Message}"); } } // If no errors, update our last upload time if (success) { SaveLastUploadTime(newUploadTime); } }
Run the application
In this step, you will build and run the sample. This code sample will create a new connection, register the schema, and then push items from the ApplianceParts.csv file into that connection.
- Open your command-line interface (CLI) in the PartsInventoryConnector directory.
- Use the command
dotnet buildto build the sample. - Use the command
dotnet runto run the sample. - Select 1. Create a connection. Enter a unique identifier, name, and description for that connection.
- Select 2. Register schema for the current connection option, and then wait for the operation to complete.
- Select 3. Push all items to current connection.
Note
If step 5 results in an error, wait a few minutes, and then select 3. Push all items to current connection.
Surface the data in search
In this step, you will create search verticals and result types to customize the search results in Microsoft SharePoint, Microsoft Office, and Microsoft Search in Bing.
Create a vertical
Sign in to the Microsoft 365 admin center by using the global administrator role, and do the following:
Go to Settings > Search & intelligence > Customizations.
Go to Verticals, and then select Add.
Enter
Appliance Partsin the Name field and select Next.
Select Connectors, then select the Parts Inventory connector. Select Next.
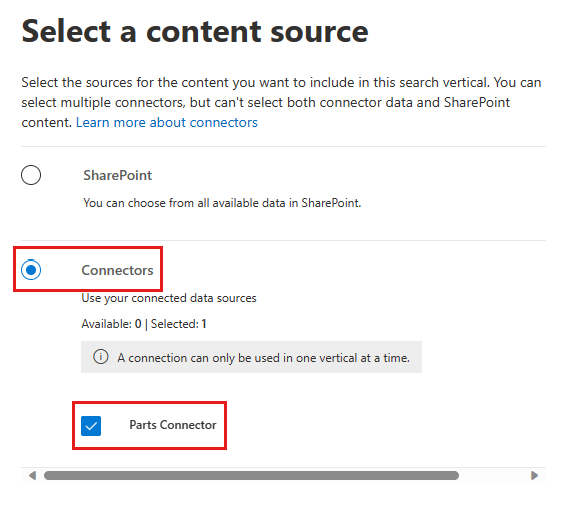
On the Add a query page, leave the query blank. Select Next.
On the Filters page, select Next.
Select Add Vertical.
Select Enable vertical, then select Done.
Create a result type
To create a result type:
Go to Settings > Search & intelligence > Customizations.
Go to the Result type tab, and then select Add.
Enter
Appliance Partin the Name field and select Next.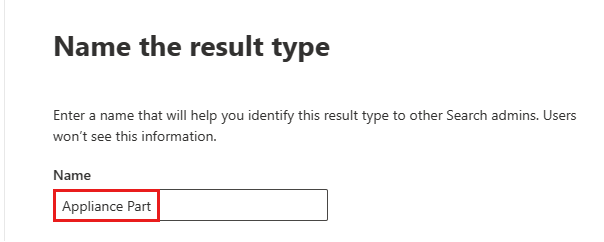
On the Content source page, select Parts Connector. Select Next.
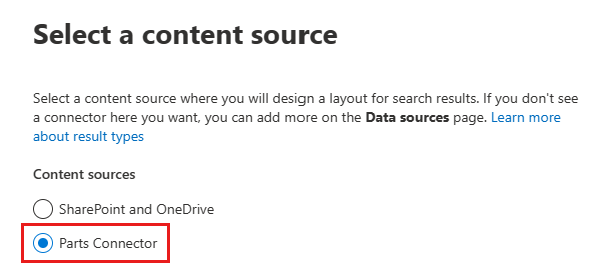
On the Rules page, select Next.
On the Design your layout page, paste the following JSON, then select Next.
{
  "type": "AdaptiveCard",
  "version": "1.3",
  "body": [
    {
      "type": "ColumnSet",
      "columns": [
        {
          "type": "Column",
          "width": 6,
          "items": [
            {
              "type": "TextBlock",
              "text": "__${name} (Part #${partNumber})__",
              "color": "accent",
              "size": "medium",
              "spacing": "none",
              "$when": "${name != \"\"}"
            },
            {
              "type": "TextBlock",
              "text": "${description}",
              "wrap": true,
              "maxLines": 3,
              "$when": "${description != \"\"}"
            }
          ],
          "horizontalAlignment": "Center",
          "spacing": "none"
        },
        {
          "type": "Column",
          "width": 2,
          "items": [
            {
              "type": "FactSet",
              "facts": [
                {
                  "title": "Price",
                  "value": "$${price}"
                },
                {
                  "title": "Current Inventory",
                  "value": "${inventory} units"
                }
              ]
            }
          ],
          "spacing": "none",
          "horizontalAlignment": "right"
        }
      ]
    }
  ],
  "$schema": "http://adaptivecards.io/schemas/adaptive-card.json"
}
Select Add result type, then select Done.
Search for results
In this step, you search for parts in SharePoint.
Go to the root SharePoint site for your tenant.
Using the search box at the top of the page, search for hinge.
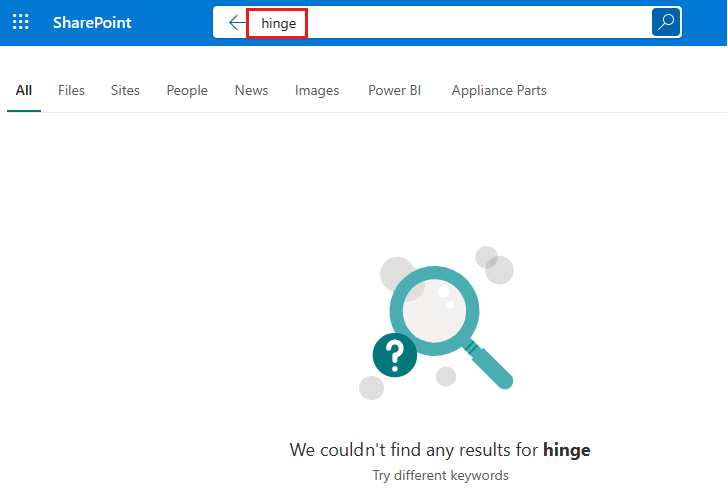
When the search completes with 0 results, select the Appliance Parts tab. Results from the connector are displayed.
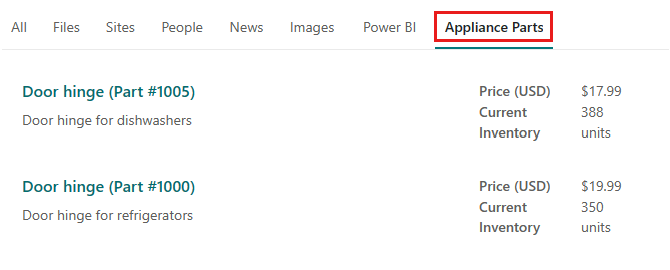
Congratulations!
You have successfully completed the .NET Microsoft Graph connectors tutorial: you created a custom connector and used it to power Microsoft Search.
Next steps
- To find out more about custom connectors, see Microsoft Graph connectors overview.
- Browse our sample connectors.
- Explore sample connectors from the community.
Have an issue with this section? If so, please give us some feedback so we can improve this section.
Feedback
Coming soon: Throughout 2024 we will be phasing out GitHub Issues as the feedback mechanism for content and replacing it with a new feedback system. For more information see: https://aka.ms/ContentUserFeedback.
Submit and view feedback for