Create and manage a project
A project contains translation models for one language pair. Each project includes all documents that were uploaded into that workspace with the correct language pair.
Creating a project is the first step in building and publishing a model.
Create a project
After you sign in, your default workspace is loaded. To create a project in different workspace, select My workspaces, then select a workspace name.
Select Create project.
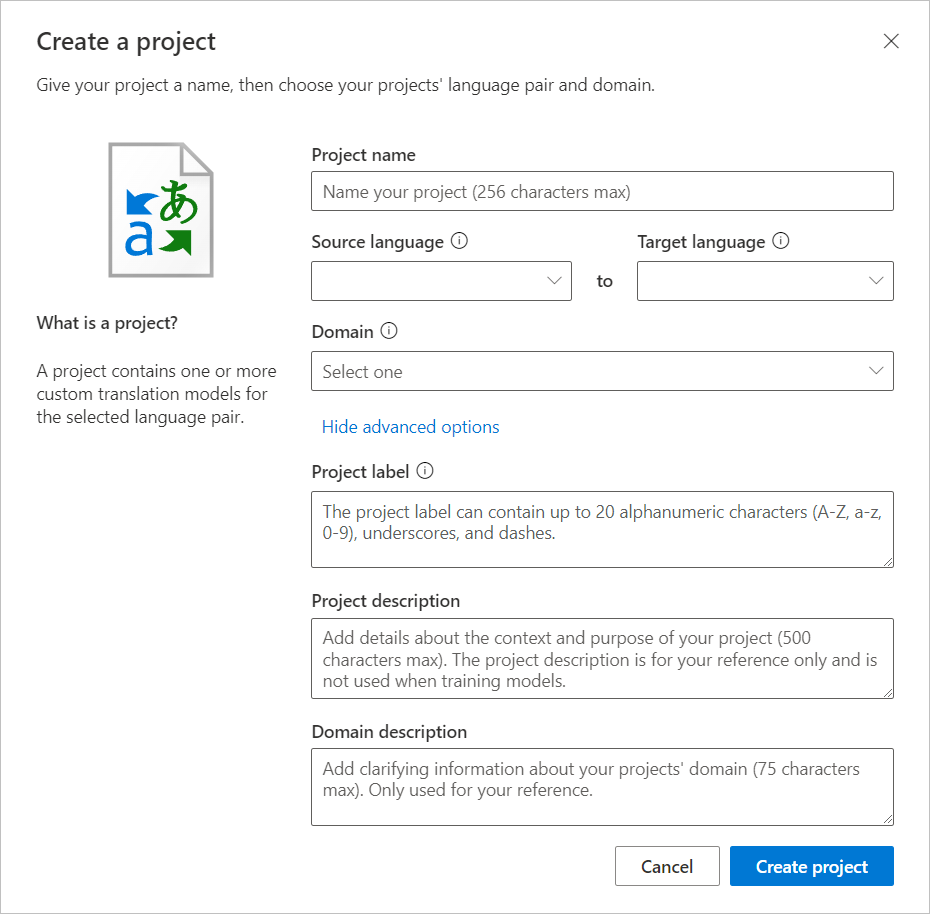
Enter the following details about your project in the creation dialog:
Project name (required): Give your project a unique, meaningful name. It's not necessary to mention the languages within the title.
Language pair (required): Select the source and target languages from the dropdown list
Domain (required): Select the domain from the dropdown list that's most appropriate for your project. The domain describes the terminology and style of the documents you intend to translate.
Note
Select Show advanced options to add project label, project description, and domain description
Project label: The project label distinguishes between projects with the same language pair and domain. As a best practice, here are a few tips:
Use a label only if you're planning to build multiple projects for the same language pair and same domain and want to access these projects with a different Domain ID.
Don't use a label if you're building systems for one domain only.
A project label isn't required and not helpful to distinguish between language pairs.
You can use the same label for multiple projects.
Project description: A short summary about the project. This description has no influence over the behavior of the Custom Translator or your resulting custom system, but can help you differentiate between different projects.
Domain description: Use this field to better describe the particular field or industry in which you're working. or example, if your category is medicine, you might add details about your subfield, such as surgery or pediatrics. The description has no influence over the behavior of the Custom Translator or your resulting custom system.
Select Create project.
Edit a project
To modify the project name, project description, or domain description:
Select the workspace name.
Select the project name, for example, English-to-German.
The Edit and Delete buttons should now be visible.
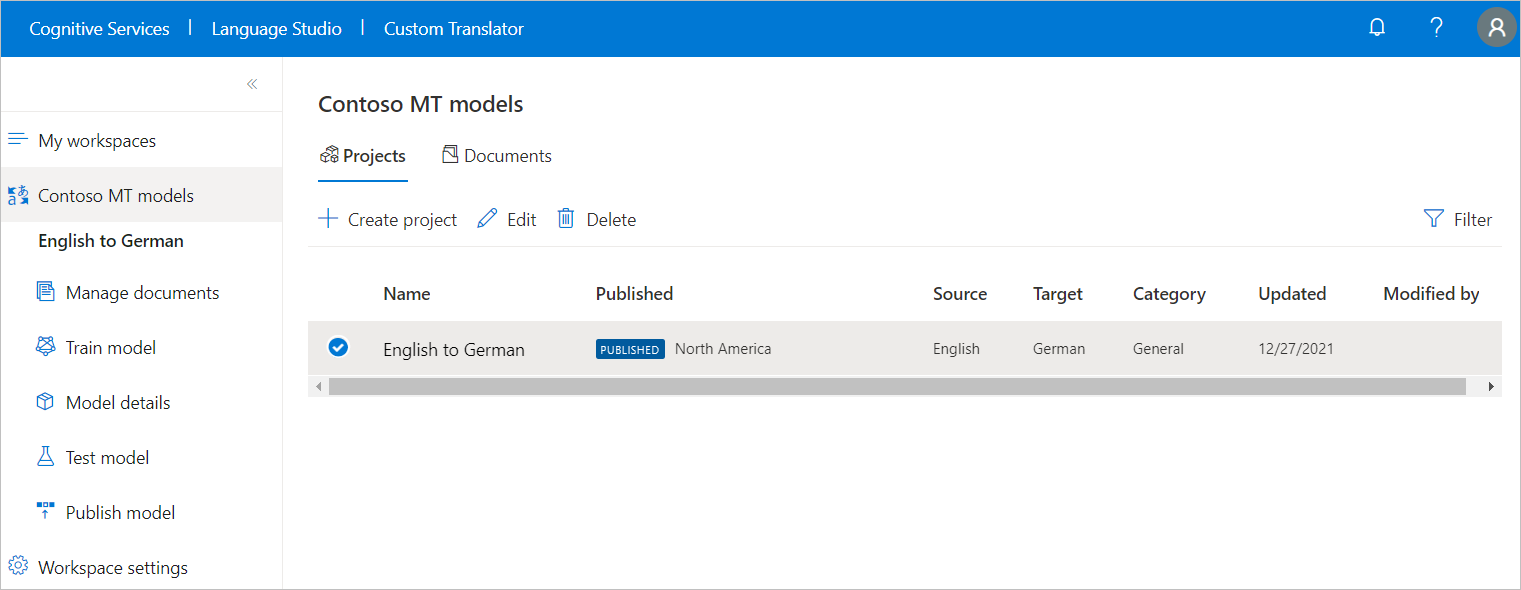
Select Edit and fill in or modify existing text.
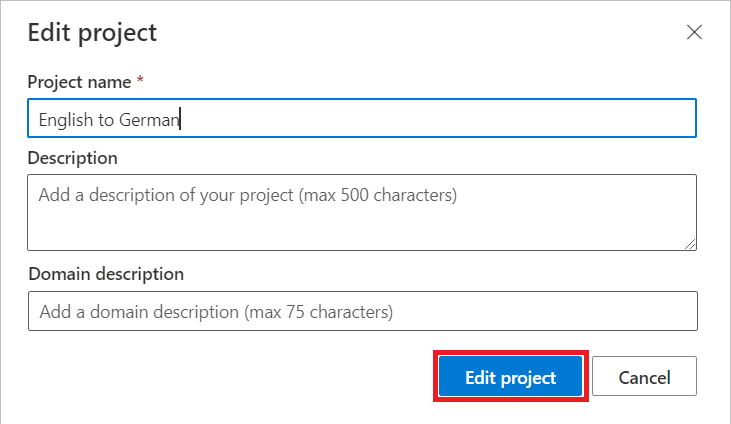
Select Edit project to save.
Delete a project
Follow the Edit a project steps 1-3 above.
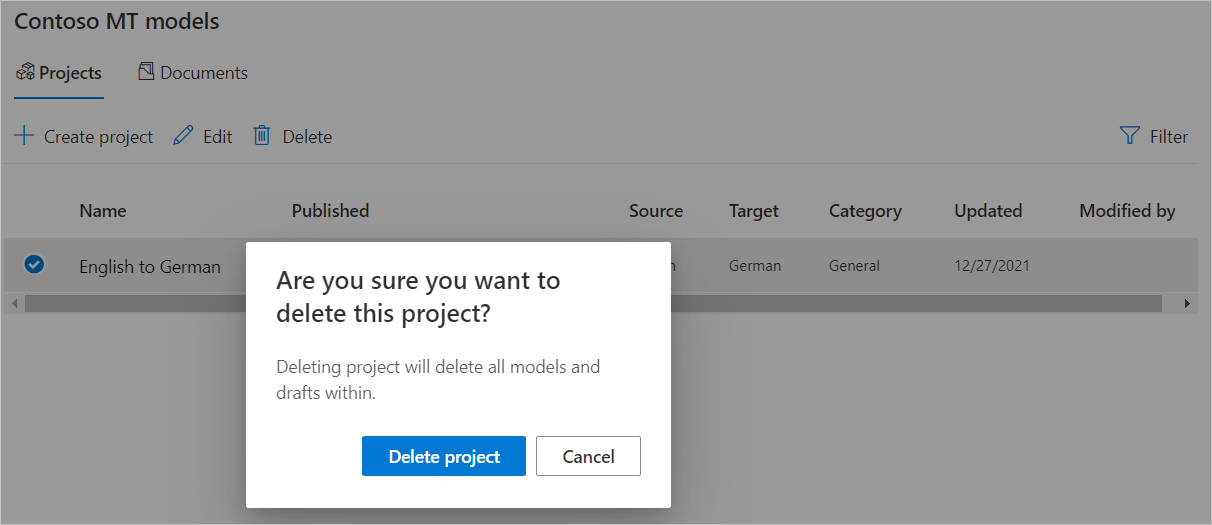
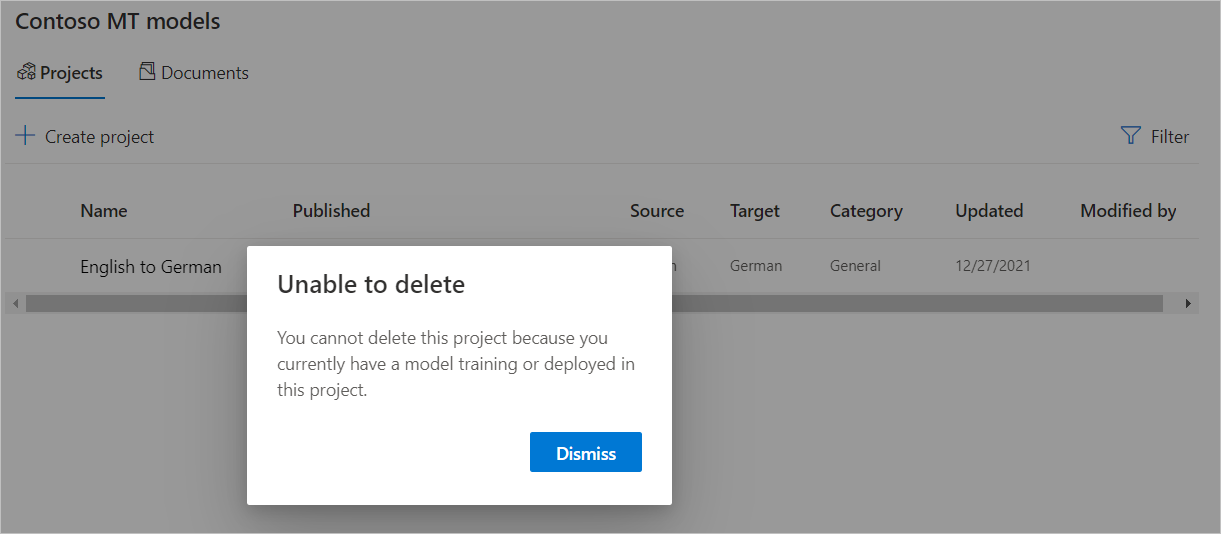
Select Delete and read the delete message before you select Delete project to confirm.
Note
If your project has a published model or a model that is currently in training, you will only be able to delete your project once your model is no longer published or training.
Next steps
- Learn how to manage project documents.
- Learn how to train a model.
- Learn how to test and evaluate model quality.
- Learn how to publish model.
- Learn how to translate with custom models.
Feedback
Coming soon: Throughout 2024 we will be phasing out GitHub Issues as the feedback mechanism for content and replacing it with a new feedback system. For more information see: https://aka.ms/ContentUserFeedback.
Submit and view feedback for