Create a new project in Visual Studio
In this article, we'll show you how to quickly create a new project in Visual Studio from a template.
Open the "Create a new project" dialog
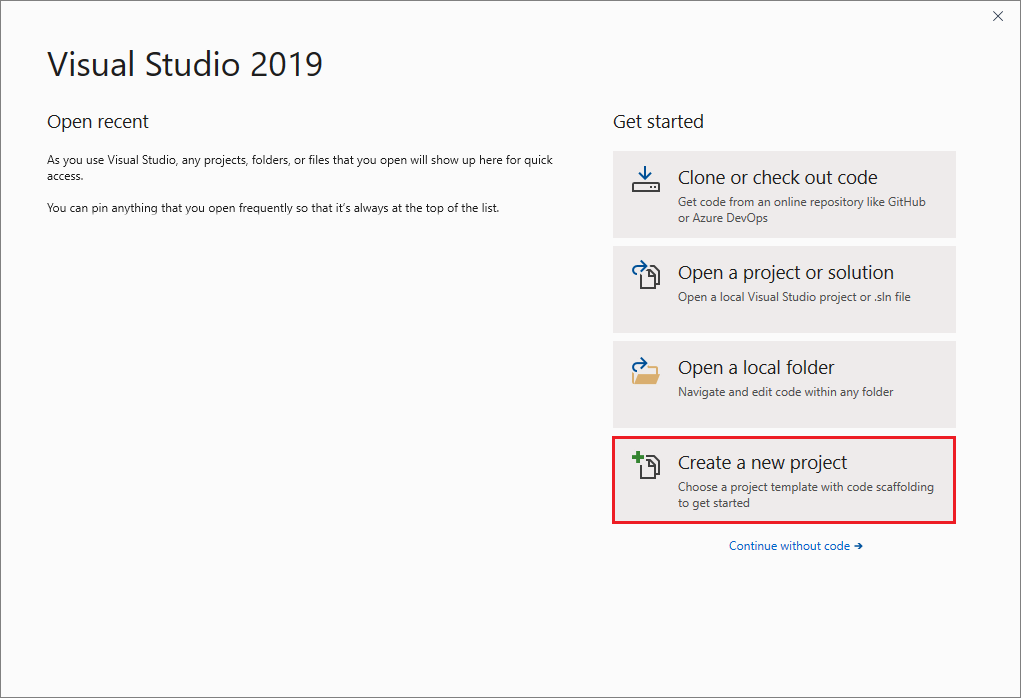
There are multiple ways to create a new project in Visual Studio. When you first open Visual Studio, the start window appears, and from there, you can select Create a new project.

If the Visual Studio development environment is already open, you can create a new project by choosing File > New > Project on the menu bar. You can also select the New Project button on the toolbar, or press Ctrl+Shift+N.

Open the "Create a new project" dialog
There are multiple ways to create a new project in Visual Studio. When you first open Visual Studio, the start window appears, and from there, you can select Create a new project.

If the Visual Studio development environment is already open, you can create a new project by choosing File > New > Project on the menu bar. You can also select the New Project button on the toolbar, or press Ctrl+Shift+N.

Select a template type
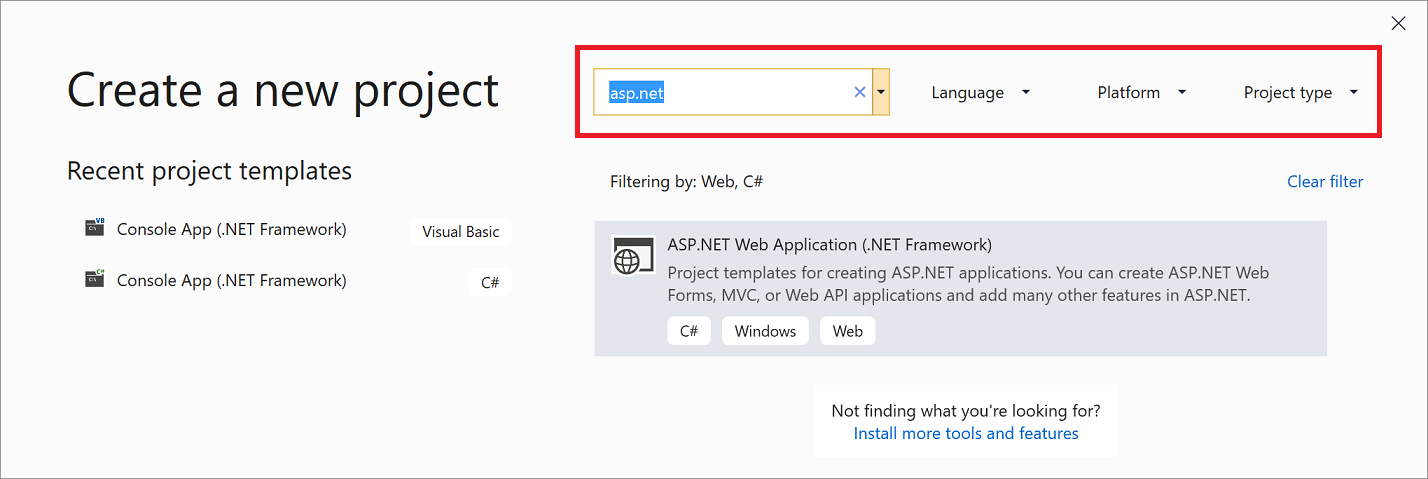
On the Create a new project dialog, a list of your recently selected templates appears on the left. The templates are sorted by most recently used.
If you're not selecting from the recently used templates, you can filter all available project templates by Language (for example, C# or C++), Platform (for example, Windows or Azure), and Project type (for example, Desktop or Web). You can also enter search text into the search box to further filter the templates, for example, asp.net.

The tags that appear under each template correspond to the three dropdown filters (language, platform, and project type).
Tip
If you don't see the template you're looking for, you might be missing a workload for Visual Studio. To install additional workloads, for example, Azure Development or Mobile Development with .NET, select the Install more tools and features link to open Visual Studio Installer. From there, select the workloads you want to install, and then select Modify. After that, additional project templates will be available to choose from.

Select a template and then select Next.

The tags that appear under each template correspond to the three dropdown filters (language, platform, and project type).
Tip
If you don't see the template you're looking for, you might be missing a workload for Visual Studio. To install additional workloads, for example, Azure Development or Mobile Development with .NET, select the Install more tools and features link to open Visual Studio Installer. From there, select the workloads you want to install, and then select Modify. After that, additional project templates will be available to choose from.

Select a template and then select Next.
Configure your new project
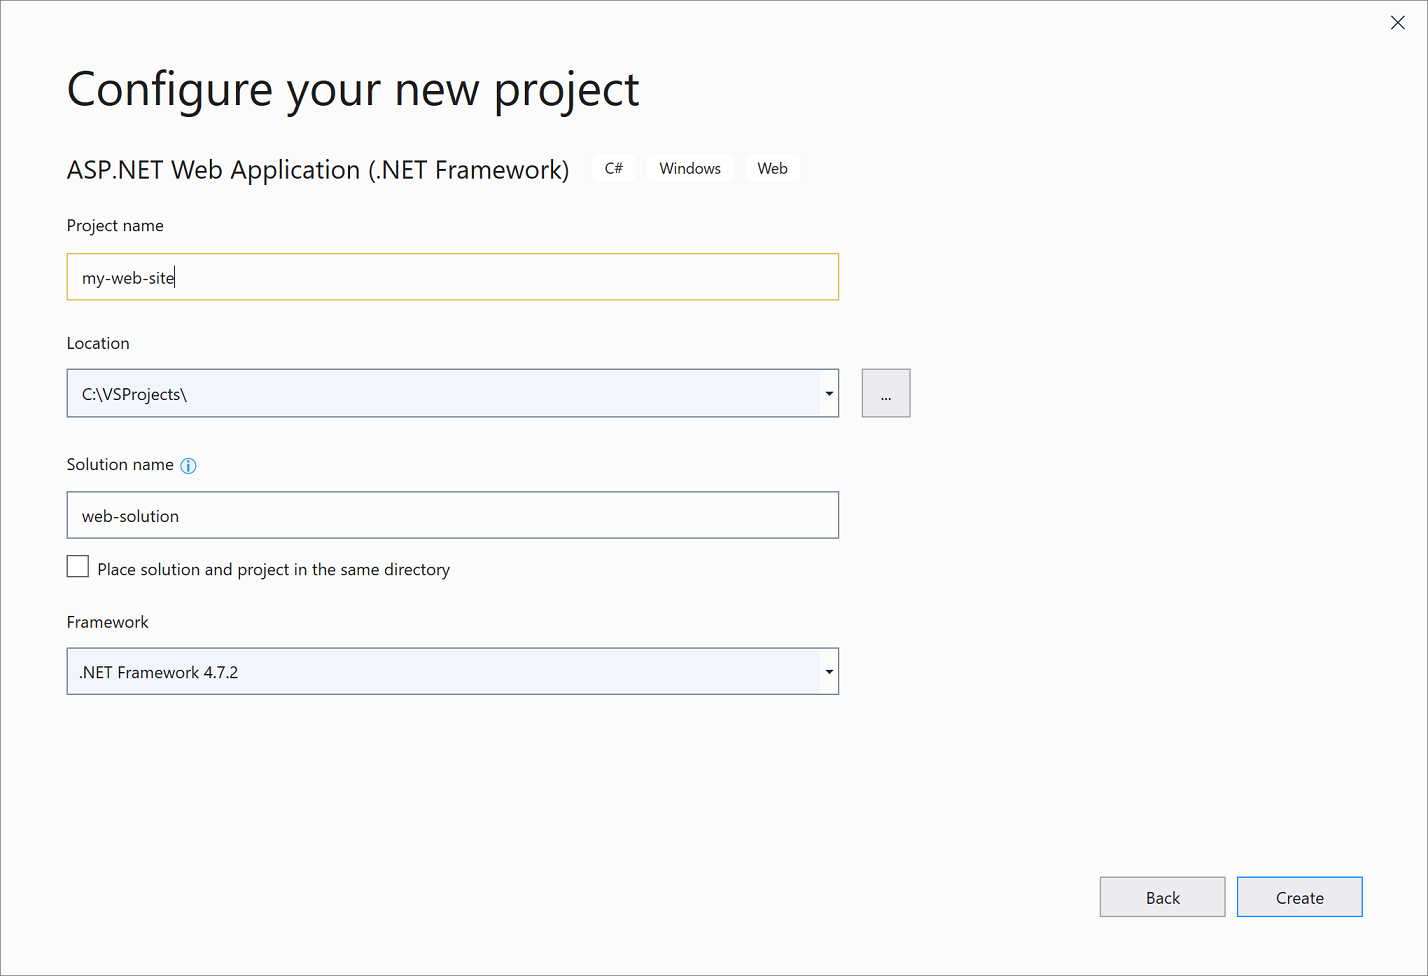
The Configure your new project dialog has options to name your project (and solution), select a disk location, and select a Framework version (if applicable to the template you chose).

Note
If you create a new project when you already have a project or solution open in Visual Studio, an extra configuration option is available. You can choose to create a new solution or add the new project to the solution that's already open.

Select Create to create the new project.
Configure your new project
The Configure your new project dialog has options to name your project (and solution), select a disk location, and more.
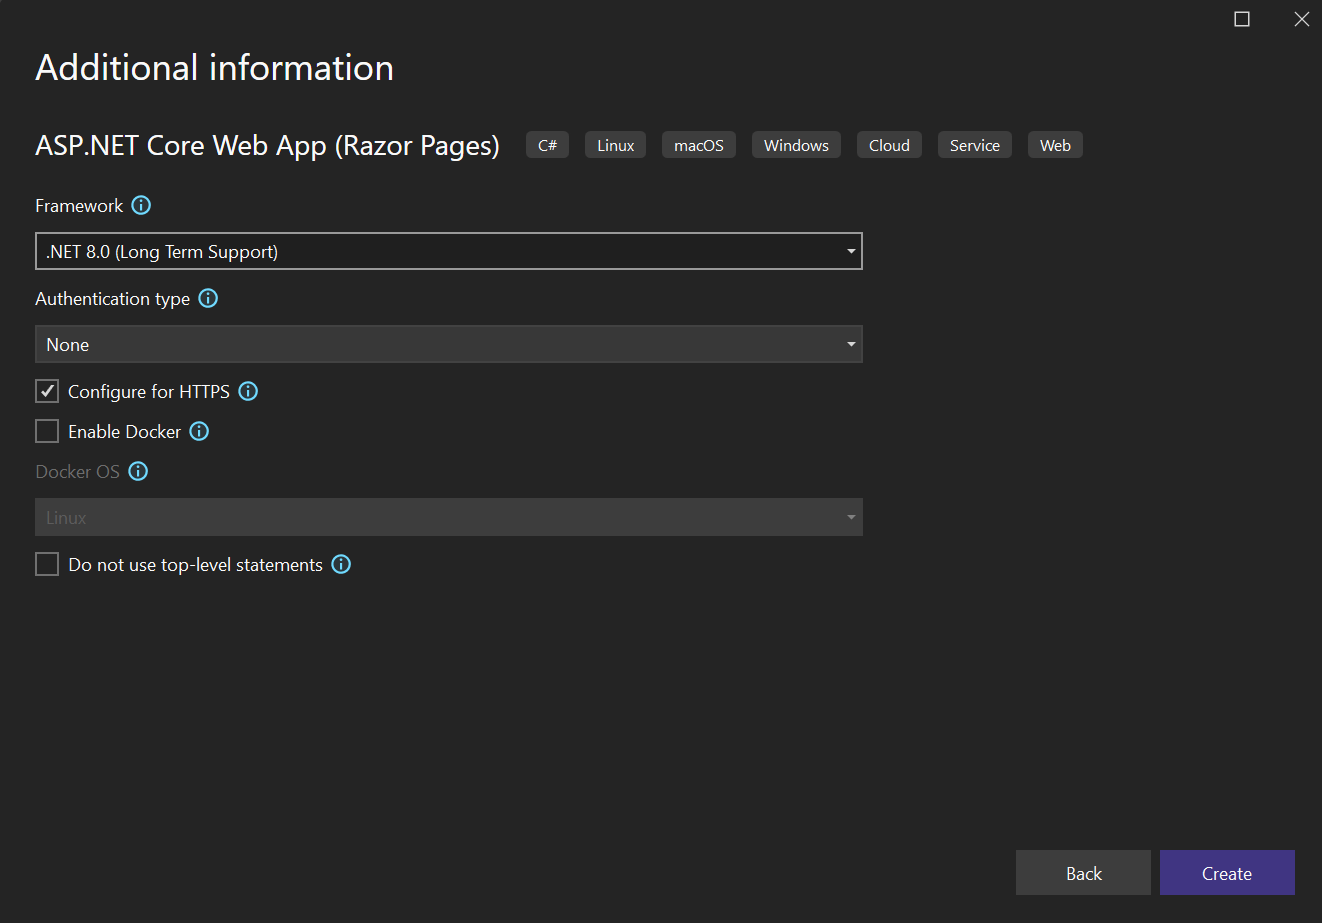
The Additional information dialog includes options to select a Framework version, an authentication type, and more.
Select Create to create the new project.
Add another project to a solution
If you want to add another project to a solution, right-click the solution node in Solution Explorer and then select Add > New Project.
Tip
For an example of a project and solution created from scratch, complete with step-by-step instructions and sample code, see Introduction to projects and solutions.
Related content
Feedback
Coming soon: Throughout 2024 we will be phasing out GitHub Issues as the feedback mechanism for content and replacing it with a new feedback system. For more information see: https://aka.ms/ContentUserFeedback.
Submit and view feedback for

