How to send requests to the Azure Digital Twins APIs using Postman
Postman is a REST testing tool that provides key HTTP request functionalities in a desktop and plugin-based GUI. You can use it to craft HTTP requests and submit them to the Azure Digital Twins REST APIs. This article describes how to configure the Postman REST client to interact with the Azure Digital Twins APIs. This information is specific to the Azure Digital Twins service.
This article contains information about the following steps:
- Use the Azure CLI to get a bearer token that you'll use to make API requests in Postman.
- Set up a Postman collection and configure the Postman REST client to use your bearer token to authenticate. When setting up the collection, you can choose either of these options:
- Add requests to your configured collection and send them to the Azure Digital Twins APIs.
Azure Digital Twins has two sets of APIs that you can work with: data plane and control plane. For more about the difference between these API sets, see Azure Digital Twins APIs and SDKs. This article contains information for both API sets.
Prerequisites
To proceed with using Postman to access the Azure Digital Twins APIs, you need to set up an Azure Digital Twins instance and download Postman. The rest of this section walks you through these steps.
Set up Azure Digital Twins instance
To work with Azure Digital Twins in this article, you'll need an Azure Digital Twins instance and the required permissions for using it. If you already have an Azure Digital Twins instance set up, you can use that instance and skip to the next section. Otherwise, follow the instructions in Set up an instance and authentication. The instructions contain information to help you verify that you've completed each step successfully.
After you set up your instance, make a note of the instance's host name. You can find the host name in the Azure portal.
Download Postman
Next, download the desktop version of the Postman client.
Get bearer token
Now that you've set up Postman and your Azure Digital Twins instance, you'll need to get a bearer token that Postman requests can use to authorize against the Azure Digital Twins APIs.
There are several possible ways to obtain this token. This article uses the Azure CLI to sign into your Azure account and obtain a token.
If you have an Azure CLI installed locally, you can start a command prompt on your machine to run the following commands. Otherwise, you can open an Azure Cloud Shell window in your browser and run the commands there.
First, make sure you're logged into Azure with the appropriate credentials, by running this command:
az loginNext, use the az account get-access-token command to get a bearer token with access to the Azure Digital Twins service. In this command, you'll pass in the resource ID for the Azure Digital Twins service endpoint, in order to get an access token that can access Azure Digital Twins resources.
The required context for the token depends on which set of APIs you're using, so use the following tabs to select between data plane and control plane APIs.
To get a token to use with the data plane APIs, use the following static value for the token context:
0b07f429-9f4b-4714-9392-cc5e8e80c8b0. This value is the resource ID for the Azure Digital Twins service endpoint.az account get-access-token --resource 0b07f429-9f4b-4714-9392-cc5e8e80c8b0Note
If you need to access your Azure Digital Twins instance using a service principal or user account that belongs to a different Microsoft Entra tenant from the instance, you'll need to request a token from the Azure Digital Twins instance's "home" tenant. For more information on this process, see Write app authentication code.
Copy the value of
accessTokenin the result, and save it to use in the next section. This value is your token value that you'll provide to Postman to authorize your requests.
Tip
This token is valid for at least five minutes and a maximum of 60 minutes. If you run out of time allotted for the current token, you can repeat the steps in this section to get a new one.
Next, you'll set up Postman to use this token to make API requests to Azure Digital Twins.
About Postman collections
Requests in Postman are saved in collections (groups of requests). When you create a collection to group your requests, you can apply common settings to many requests at once. Common settings can greatly simplify authorization if you plan to create more than one request against the Azure Digital Twins APIs, as you only have to configure these details once for the entire collection.
When working with Azure Digital Twins, you can get started by importing a pre-built collection of all the Azure Digital Twins requests. You may want to import this collection if you're exploring the APIs and want to set up a project quickly with request examples.
Alternatively, you can also choose to start from scratch, by creating your own empty collection and populating it with individual requests that call only the APIs you need.
The following sections describe both of these processes. The rest of the article takes place in your local Postman application, so go ahead and open the Postman application on your computer now.
Import collection of Azure Digital Twins APIs
A quick way to get started with Azure Digital Twins in Postman is to import a pre-built collection of requests for the APIs. Follow the steps below to import a collection of popular Azure Digital Twins data plane API requests containing sample request data.
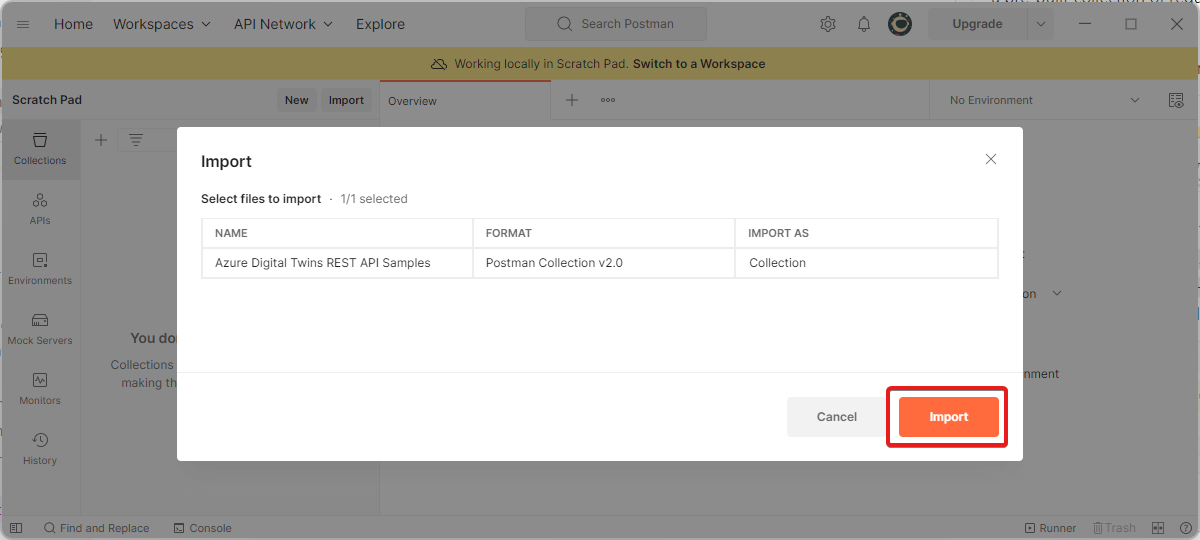
In the Import window that follows, select Link and enter the following URL:
https://raw.githubusercontent.com/microsoft/azure-digital-twins-postman-samples/main/postman_collection.json. Then select Import to confirm.
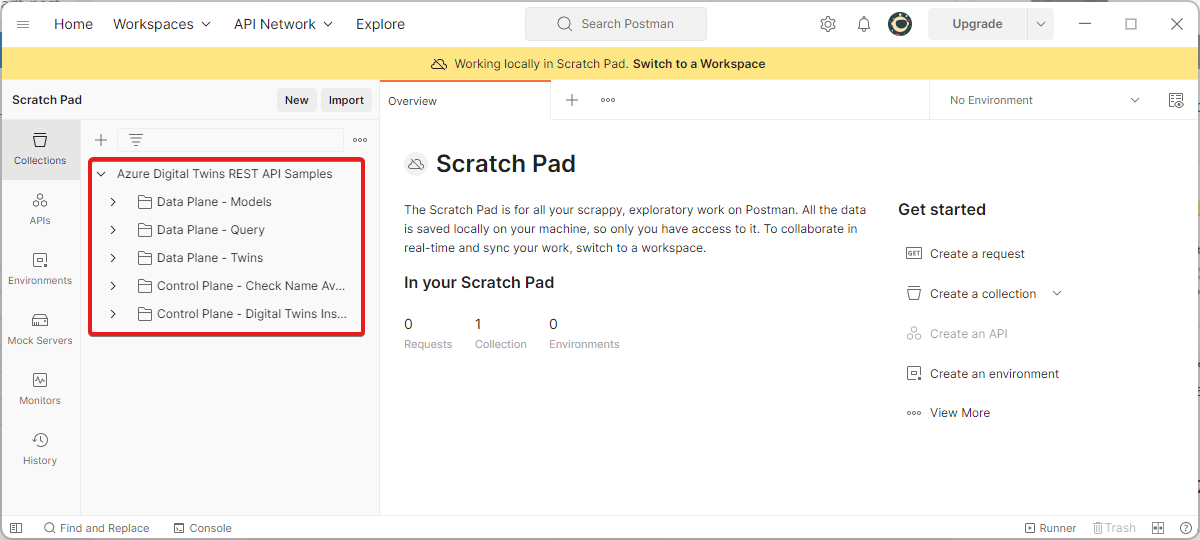
The newly imported collection can now be seen from your main Postman view, in the Collections tab.
Tip
To import the complete set of API calls for a certain version of the Azure Digital Twins APIs (including control plane or data plane), you can also import Swagger files as collections. For links to the Swagger files for the control plane and data plane APIs, see Azure Digital Twins APIs and SDKs.
Next, continue on to the next section to add a bearer token to the collection for authorization and connect it to your Azure Digital twins instance.
Configure authorization
Next, edit the collection you've created to configure some access details. Highlight the collection you've created and select the View more actions icon to display action options. Select Edit.
Follow these steps to add a bearer token to the collection for authorization. Use the token value you gathered in the Get bearer token section in order to use it for all API requests in your collection.
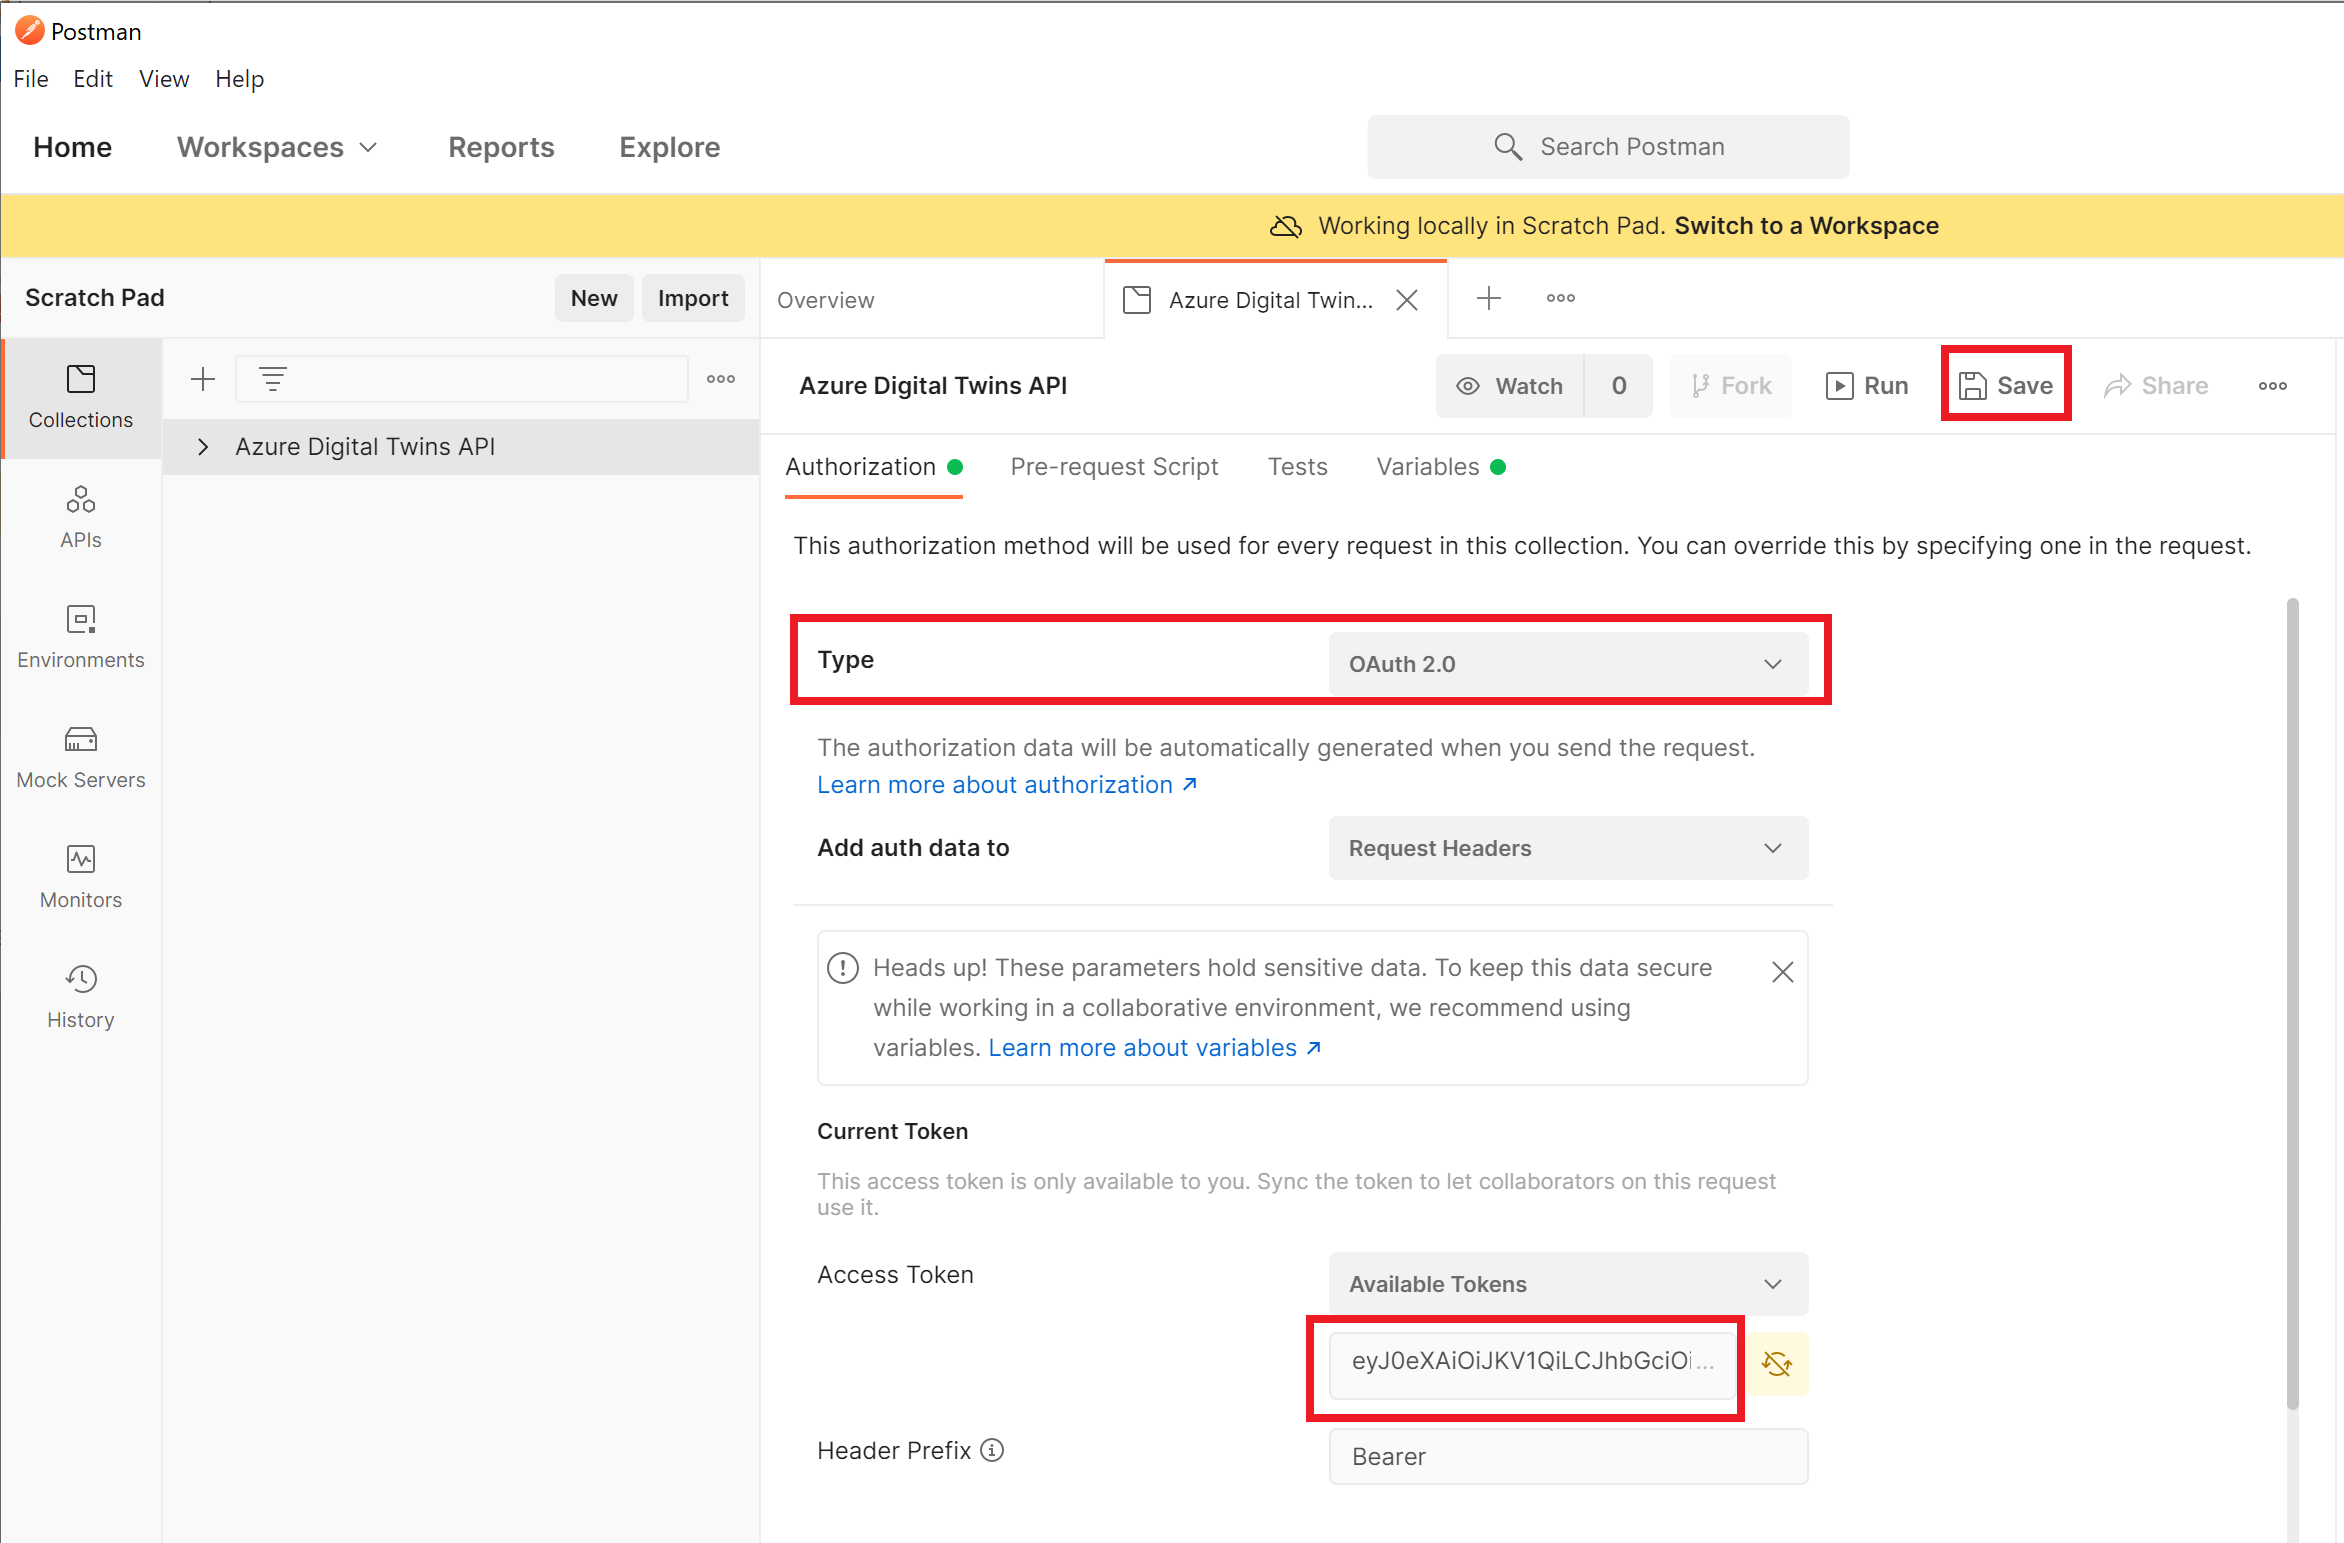
In the edit dialog for your collection, make sure you're on the Authorization tab.
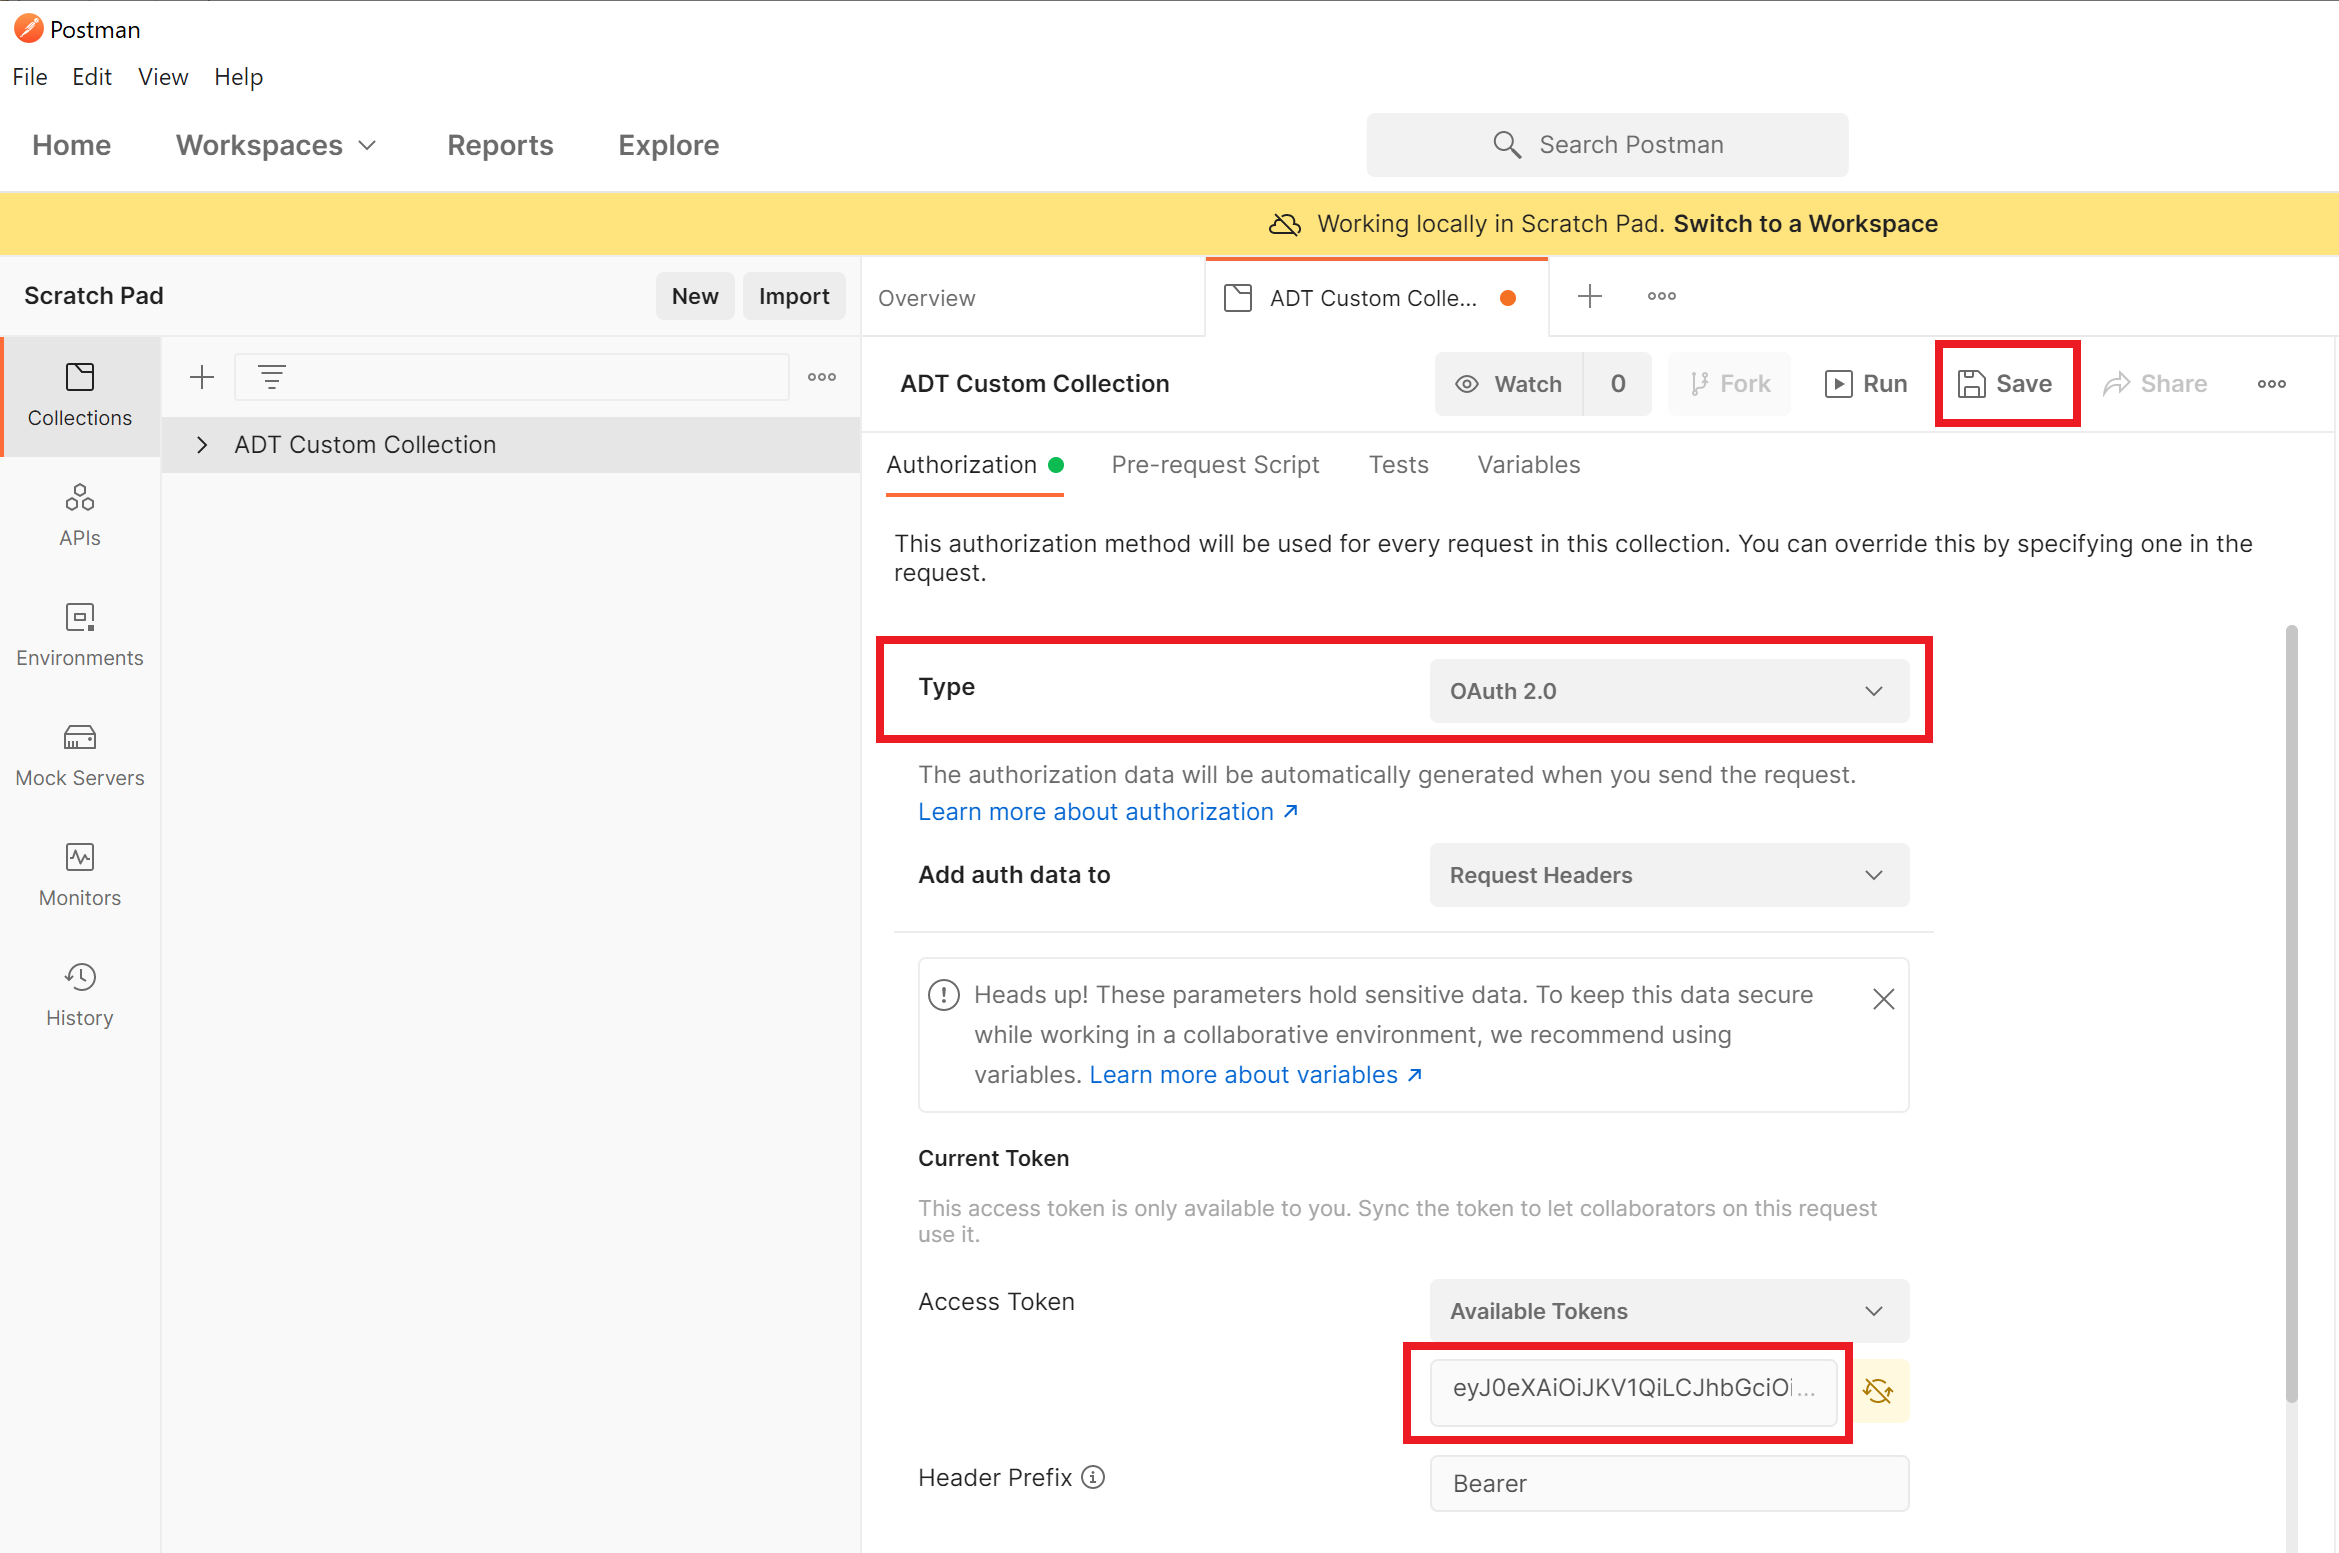
Set the Type to OAuth 2.0 and paste your access token into the Access Token box. You must use the correct token for the type of API you're using, as there are different tokens for data plane APIs versus control plane APIs. Select Save.
Tip
You can choose to turn on token sharing if you want to store the token with the request on Postman cloud, and potentially share your token with others.
Other configuration
You can help the collection connect easily to your Azure Digital Twins resources by setting some variables provided with the collection. When many requests in a collection require the same value (like the host name of your Azure Digital Twins instance), you can store the value in a variable that applies to every request in the collection. The Azure Digital Twins collection comes with pre-created variables that you can set at the collection level.
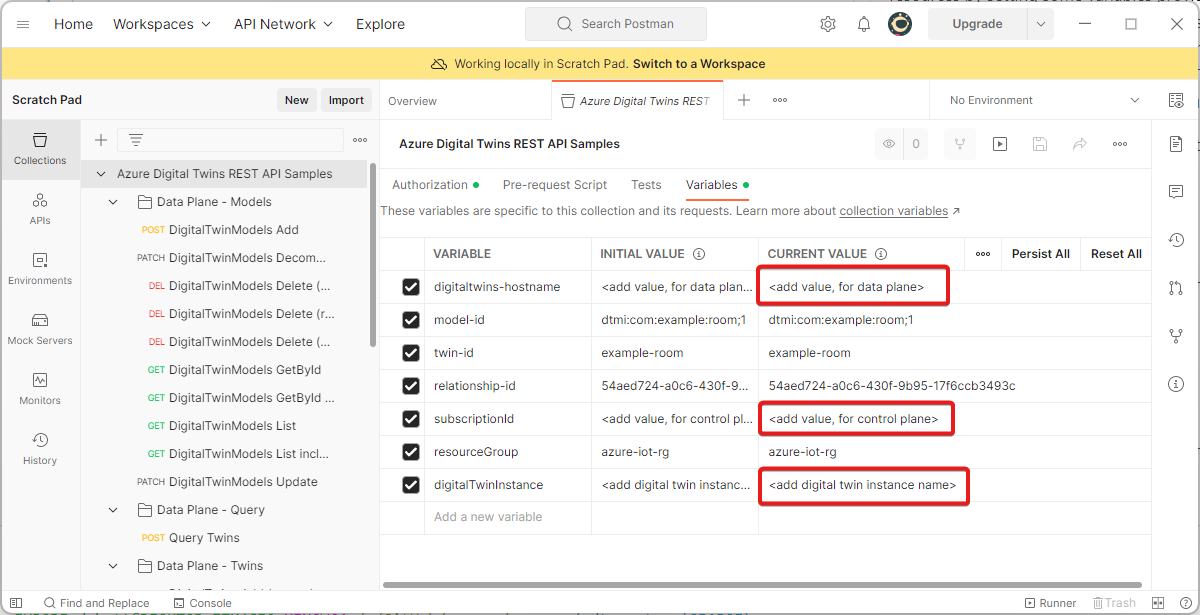
Still in the edit dialog for your collection, move to the Variables tab.
Use the following table to set the values of the variables in the collection:
Variable API set Description digitaltwins-hostnameData plane The host name of your Azure Digital Twins instance. You can find this value on the overview page for your instance in the Portal. subscriptionIdControl plane Your Azure subscription ID. digitalTwinInstanceControl plane The name of your Azure Digital Twins instance. If your collection has extra variables, fill and save those values as well.
Select Save.
When you're finished with the above steps, you're done configuring the collection. You can close the editing tab for the collection if you want.
Explore requests
Next, explore the requests inside the Azure Digital Twins API collection. You can expand the collection to view the pre-created requests (sorted by category of operation).
Different requests require different information about your instance and its data. To see all the information required to craft a particular request, look up the request details in the Azure Digital Twins REST API reference documentation.
You can edit the details of a request in the Postman collection using these steps:
Select it from the list to pull up its editable details.
Most of the requests in the sample collection are pre-configured to run without making any further changes.
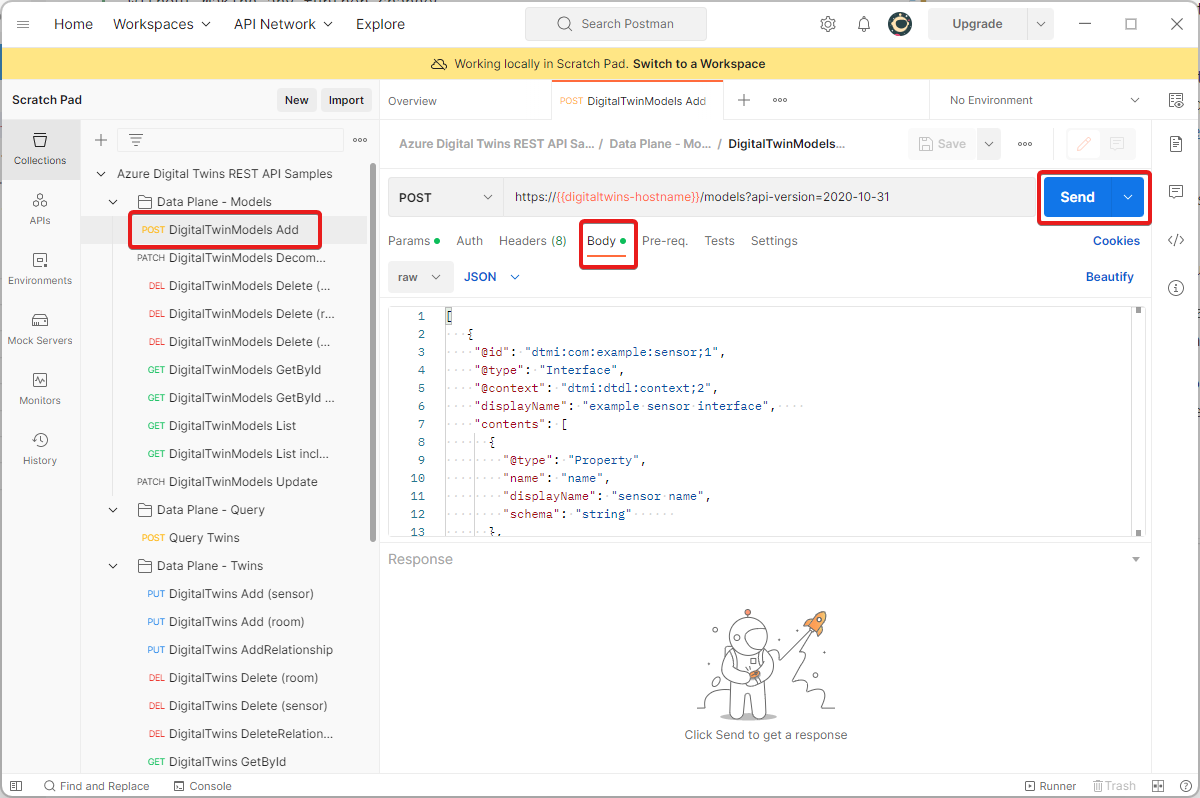
The following screenshot shows the DigitalTwinModels Add API. On the Body tab you can see the JSON payload that defines the new model to add:
Fill in values for the variables listed in the Params tab under Path Variables.
To run the request, use the Send button.
You can also add your own requests to the collection, using the process described in the Add an individual request section.
Create your own collection
Instead of importing the existing collection of Azure Digital Twins APIs, you can also create your own collection from scratch. You can then populate it with individual requests using the Azure Digital Twins REST API reference documentation.
Create a Postman collection
To create a collection, select the New button in the main Postman window.
Choose a type of Collection.
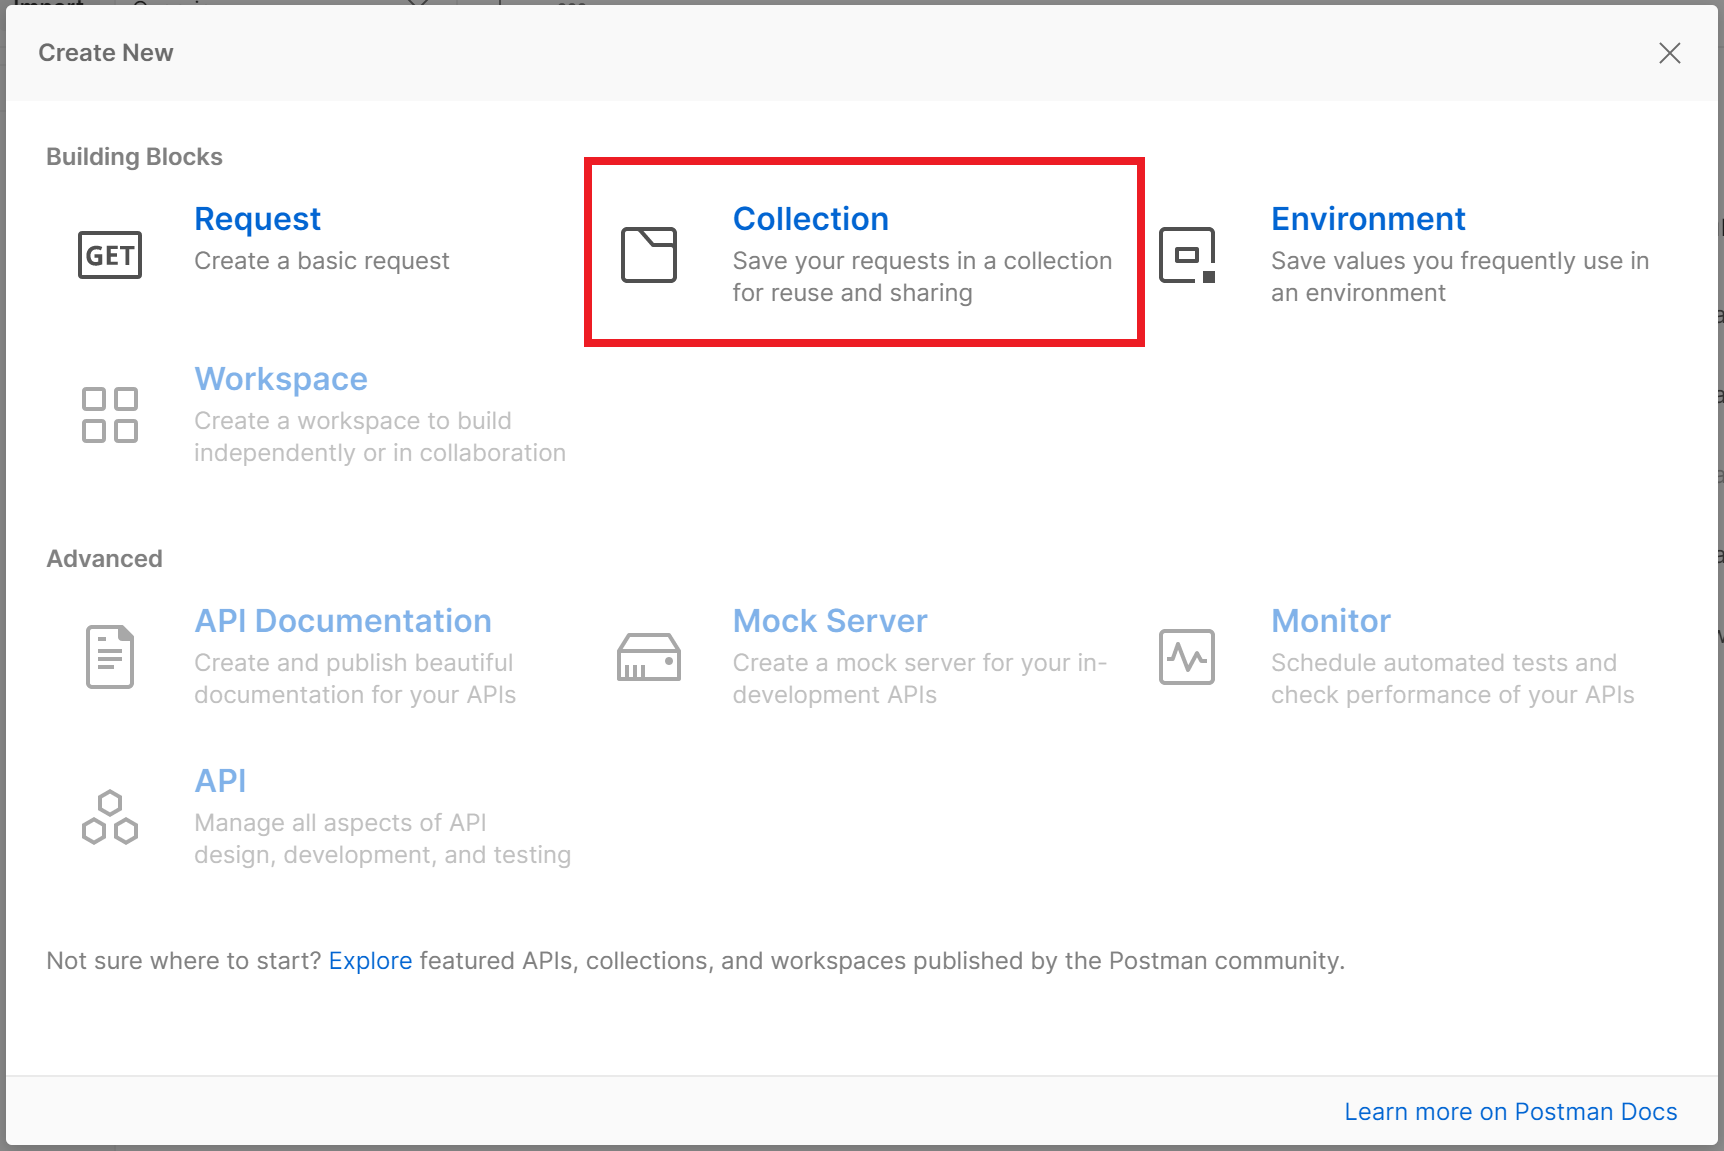
A tab opens. Fill in the details of the new collection. Select the Edit icon next to the collection's default name (New Collection) to replace it with your own choice of name.
Next, continue on to the next section to add a bearer token to the collection for authorization.
Configure authorization
Follow these steps to add a bearer token to the collection for authorization. Use the token value you gathered in the Get bearer token section in order to use it for all API requests in your collection.
Still in the edit dialog for your new collection, move to the Authorization tab.
Set the Type to OAuth 2.0, paste your access token into the Access Token box, and select Save.
When you're finished with the above steps, you're done configuring the collection. You can close the edit tab for the new collection if you want.
The new collection can be seen from your main Postman view, in the Collections tab.
Add an individual request
Now that your collection is set up, you can add your own requests to the Azure Digital Twin APIs.
To create a request, use the New button again.
Choose a type of Request.
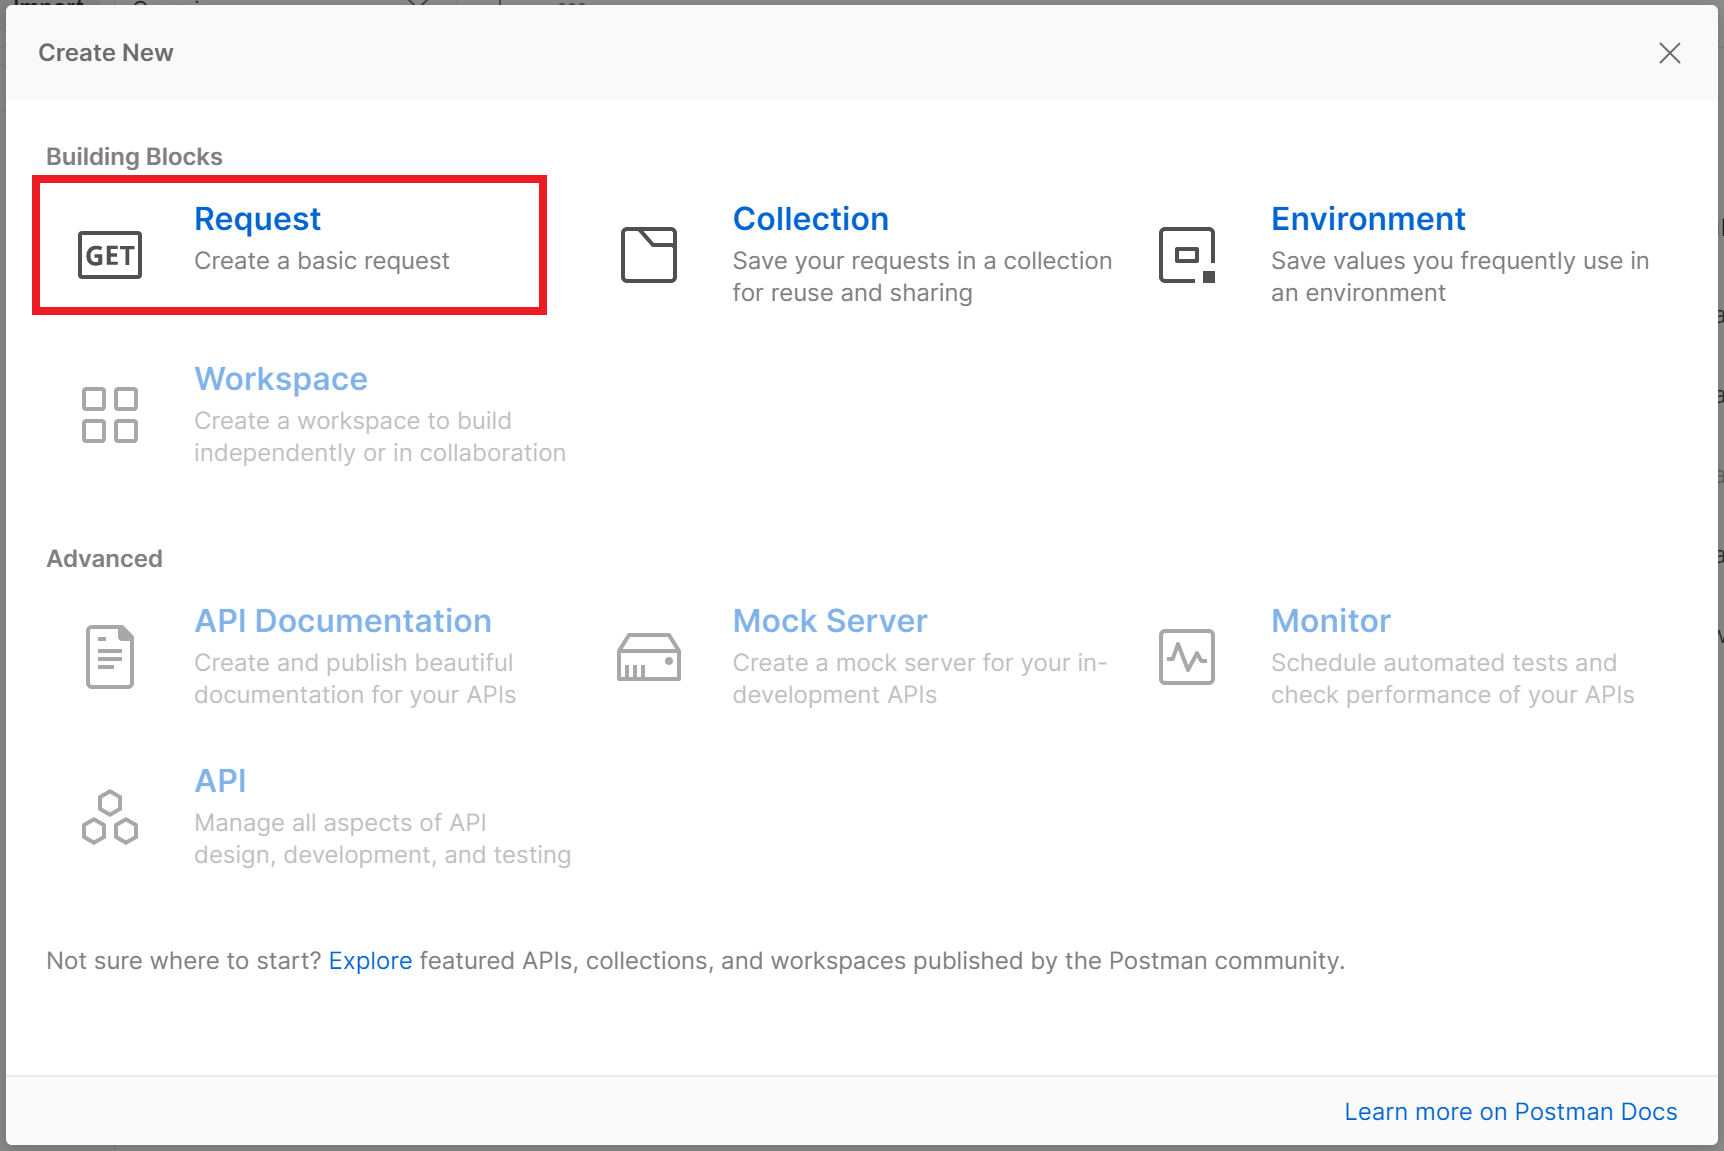
This action opens the SAVE REQUEST window, where you can enter a name for your request, give it an optional description, and choose the collection that it's a part of. Fill in the details and save the request to the collection you created earlier.
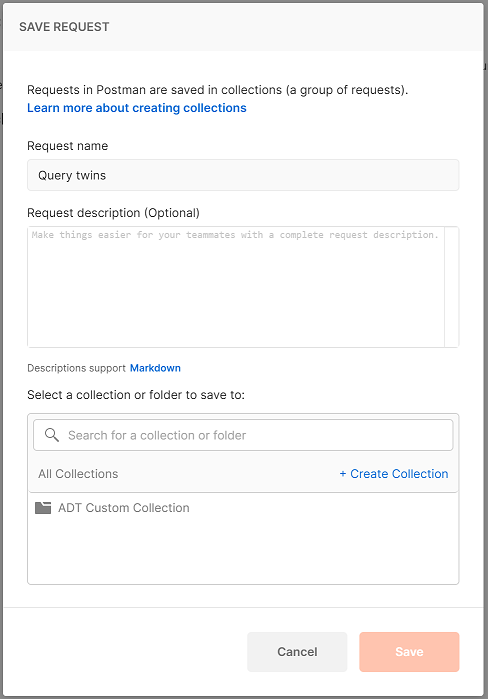
You can now view your request under the collection, and select it to pull up its editable details.
Set request details
To make a Postman request to one of the Azure Digital Twins APIs, you'll need the URL of the API and information about what details it requires. You can find this information in the Azure Digital Twins REST API reference documentation.
To proceed with an example query, this article will use the Azure Digital Twins Query API to query for all the digital twins in an instance.
Get the request URL and type from the reference documentation. For the Query API, this is currently POST
https://digitaltwins-host-name/query?api-version=2020-10-31.In Postman, set the type for the request and enter the request URL, filling in placeholders in the URL as required. Use your instance's host name from the Prerequisites section.
Check that the parameters shown for the request in the Params tab match those described in the reference documentation. For this request in Postman, the
api-versionparameter was automatically filled when the request URL was entered in the previous step. For the Query API, this is the only required parameter, so this step is done.In the Authorization tab, set the Type to Inherit auth from parent. This indicates that this request will use the authorization you set up earlier for the entire collection.
Check that the headers shown for the request in the Headers tab match those described in the reference documentation. For this request, several headers have been automatically filled. For the Query API, none of the header options are required, so this step is done.
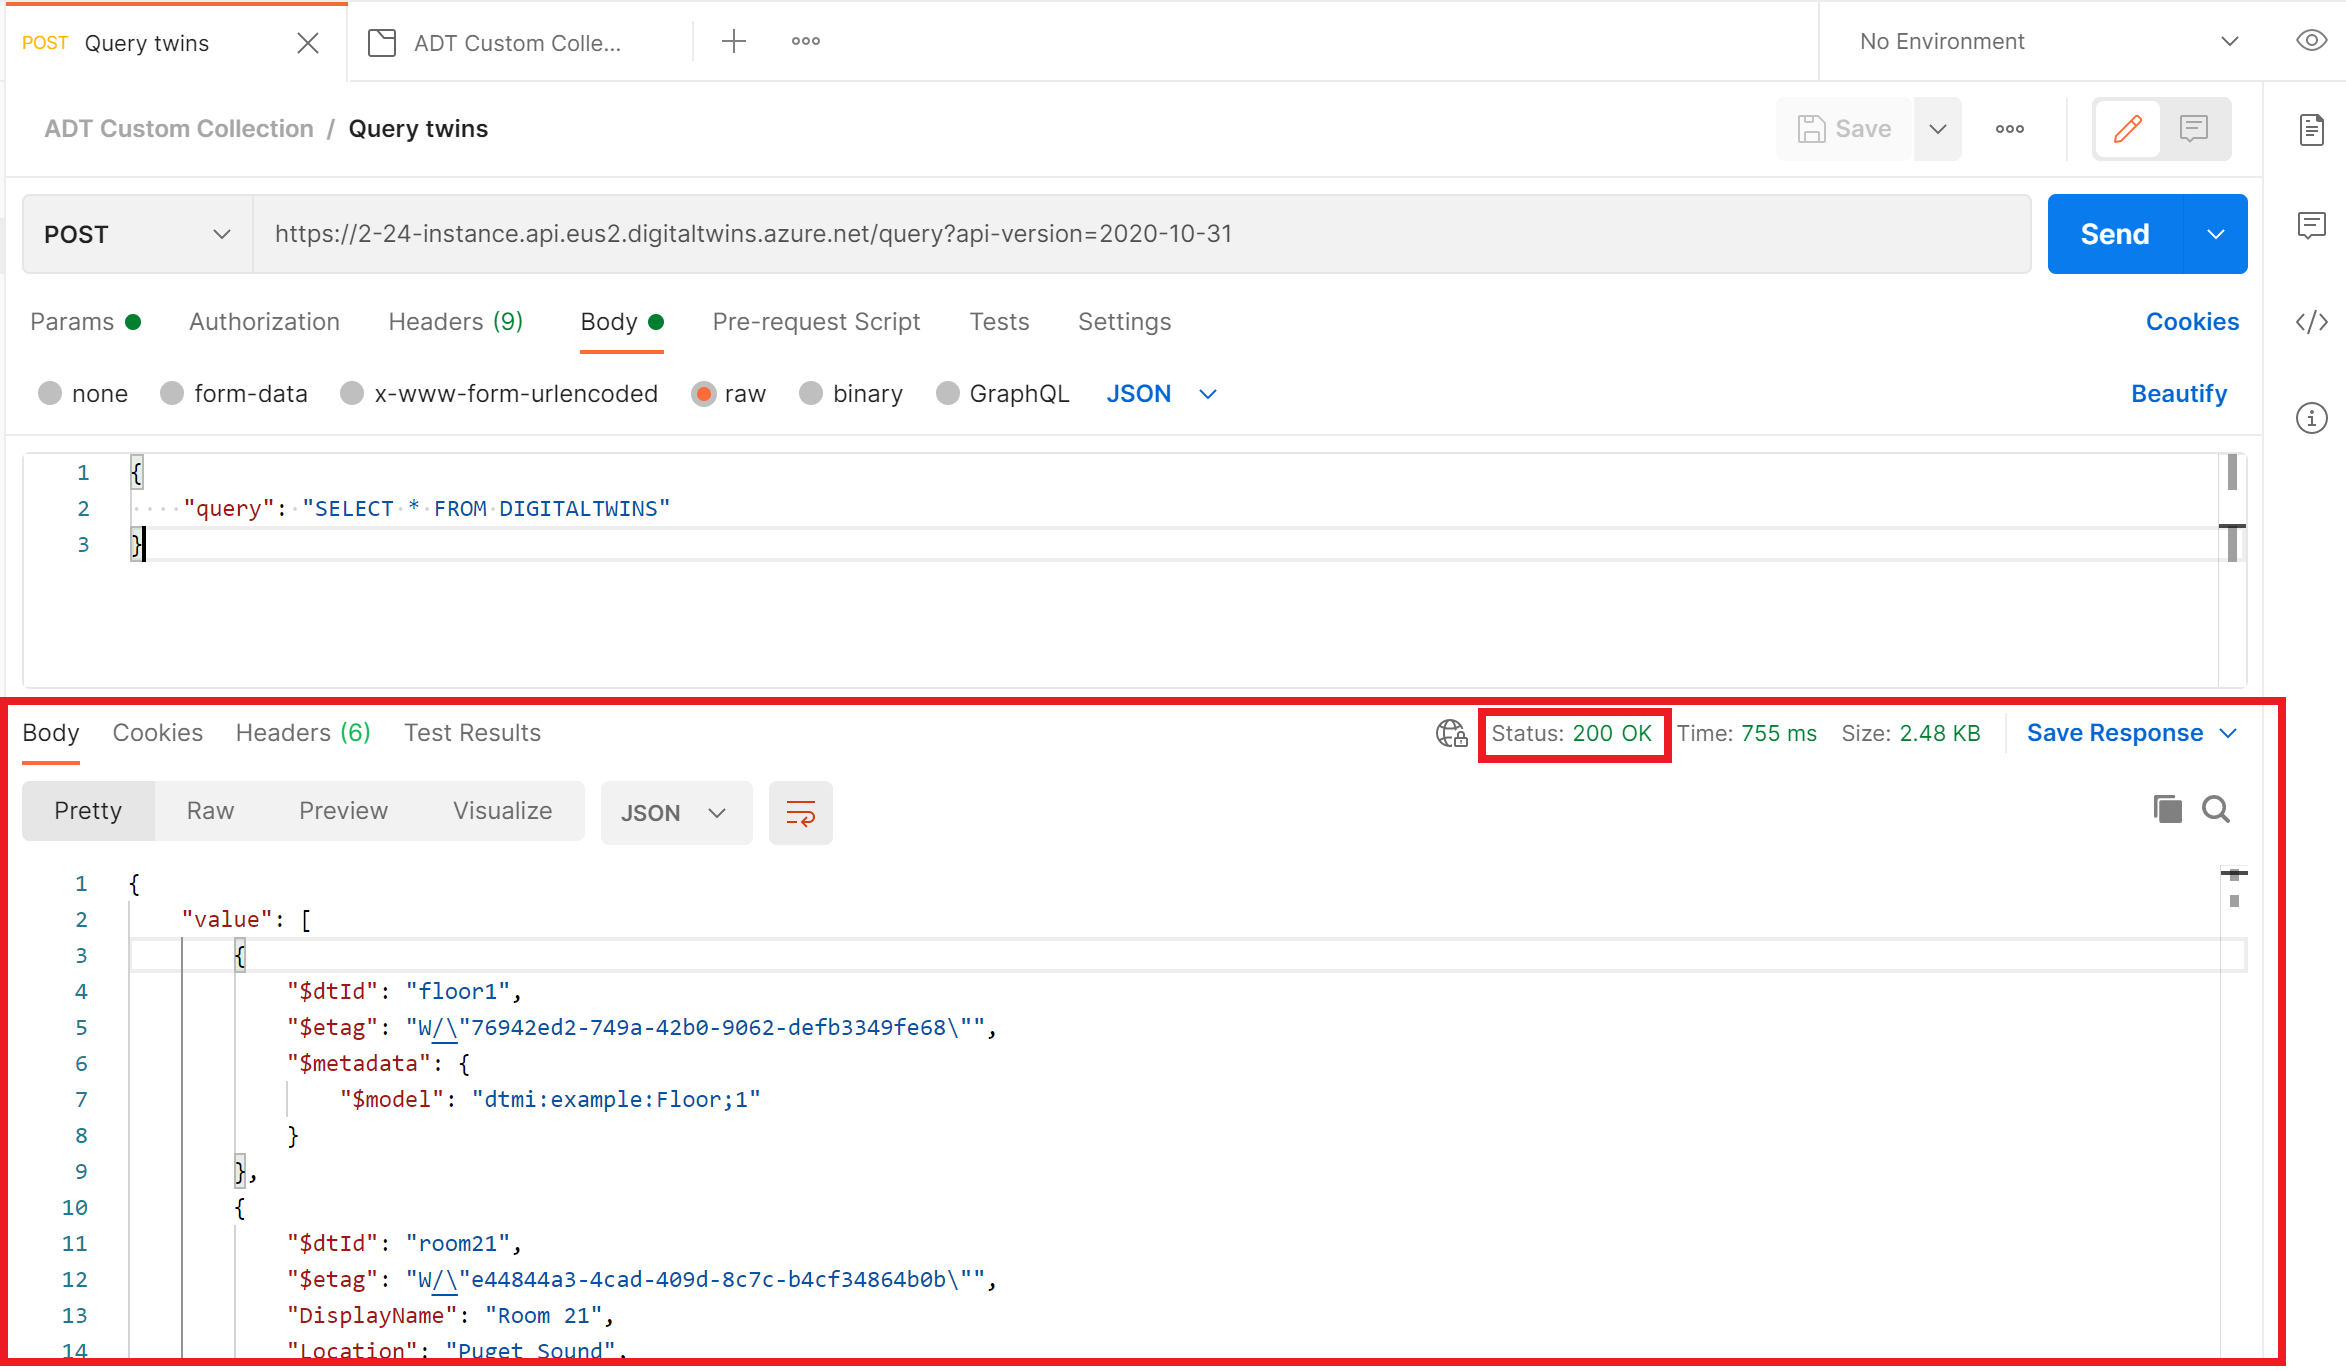
Check that the body shown for the request in the Body tab matches the needs described in the reference documentation. For the Query API, a JSON body is required to provide the query text. Here's an example body for this request that queries for all the digital twins in the instance:
For more information about crafting Azure Digital Twins queries, see Query the twin graph.
Check the reference documentation for any other fields that may be required for your type of request. For the Query API, all requirements have now been met in the Postman request, so this step is done.
After sending the request, the response details will appear in the Postman window below the request. You can view the response's status code and any body text.
You can also compare the response to the expected response data given in the reference documentation, to verify the result or learn more about any errors that arise.
Next steps
To learn more about the Digital Twins APIs, read Azure Digital Twins APIs and SDKs, or view the reference documentation for the REST APIs.
Feedback
Coming soon: Throughout 2024 we will be phasing out GitHub Issues as the feedback mechanism for content and replacing it with a new feedback system. For more information see: https://aka.ms/ContentUserFeedback.
Submit and view feedback for


