How To: Investigate risk
Identity Protection provides organizations with reporting they can use to investigate identity risks in their environment. These reports include risky users, risky sign-ins, risky workload identities, and risk detections. Investigation of events is key to better understanding and identifying any weak points in your security strategy. All of these reports allow for downloading of events in .CSV format or integration with other security solutions like a dedicated SIEM tool for further analysis.
Organizations can take advantage of the Microsoft Graph API integrations to aggregate data with other sources they may have access to as an organization.
The three reports are found in the Microsoft Entra admin center > Protection > Identity Protection.
Navigating the reports
Each report launches with a list of all detections for the period shown at the top of the report. Each report allows for the addition or removal of columns based on administrator preference. Administrators can choose to download the data in .CSV or .JSON format. Reports can be filtered using the filters across the top of the report.
Selecting individual entries may enable more entries at the top of the report such as the ability to confirm a sign-in as compromised or safe, confirm a user as compromised, or dismiss user risk.
Selecting individual entries expands a details window below the detections. The details view allows administrators to investigate and take action on each detection.
Risky users
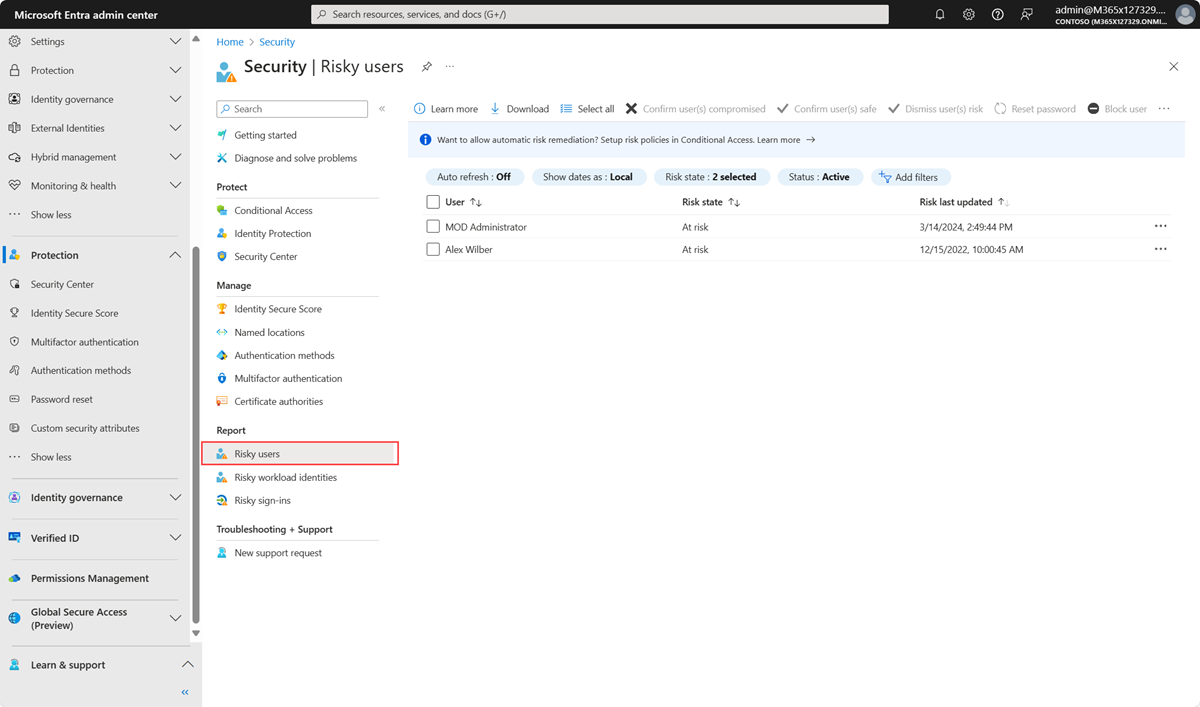
The risky users report lists all users whose accounts are currently or were considered at risk of compromise. Risky users should be investigated and remediated to prevent unauthorized access to resources.
Why is a user at risk?
A user becomes a risky user when:
- They have one or more risky sign-ins.
- There are one or more risks detected on the user’s account, like Leaked Credentials.
How to investigate risky users?
To view and investigate a user’s risky sign-ins, select the “Recent risky sign-ins” tab or the “Users risky sign-ins” link.
To view and investigate risks on a user’s account, select the “Detections not linked to a sign-in” tab or the “User’s risk detections” link.
The Risk history tab also shows all the events that have led to a user risk change in the last 90 days. This list includes risk detections that increased the user’s risk and admin remediation actions that lowered the user’s risk. View it to understand how the user’s risk has changed.

With the information provided by the risky users report, administrators can find:
- Which users are at risk, have had risk remediated, or have had risk dismissed?
- Details about detections
- History of all risky sign-ins
- Risk history
Administrators can then choose to take action on these events. Administrators can choose to:
- Reset the user password
- Confirm user compromise
- Dismiss user risk
- Block user from signing in
- Investigate further using Microsoft Defender for Identity
Understand the scope
- Consider creating a known traveler database for updated organizational travel reporting and use it to cross-reference travel activity.
- Add corporate VPN's and IP Address ranges to named locations to reduce false positives.
- Review the logs to identify similar activities with the same characteristics. This could be an indication of more compromised accounts.
- If there are common characteristics, like IP address, geography, success/failure, and so on..., consider blocking these with a Conditional Access policy.
- Review which resource may have been compromised, such as potential data downloads or administrative modifications.
- Enable self-remediation policies through Conditional Access
- If you see that the user performed other risky activities, such as downloading a large volume of files from a new location, this is a strong indication of a possible compromise.
Risky sign-ins
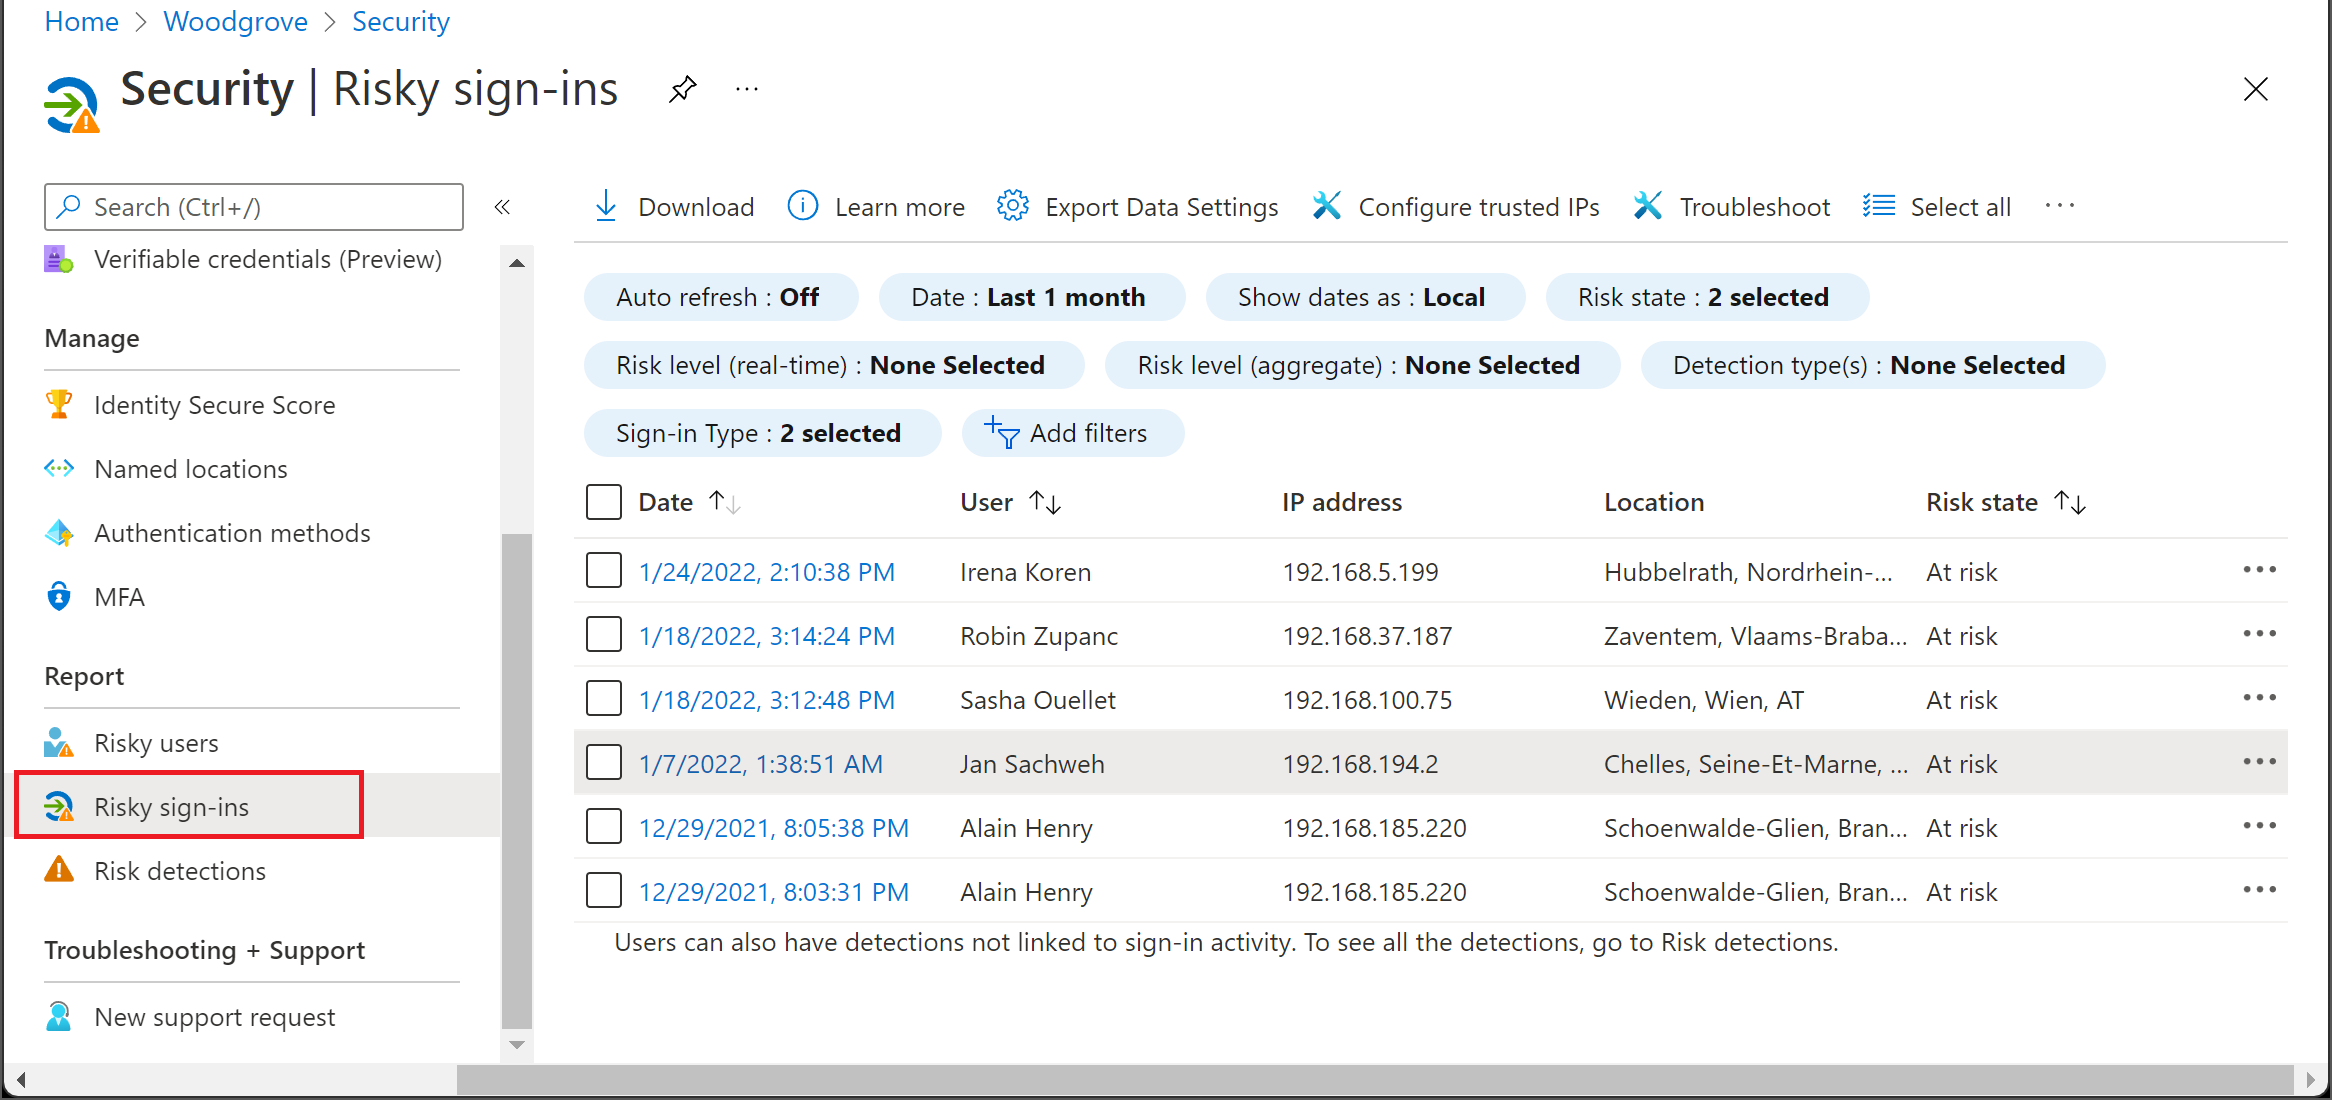
The risky sign-ins report contains filterable data for up to the past 30 days (one month).
With the information provided by the risky sign-ins report, administrators can find:
- Which sign-ins are classified as at risk, confirmed compromised, confirmed safe, dismissed, or remediated.
- Real-time and aggregate risk levels associated with sign-in attempts.
- Detection types triggered
- Conditional Access policies applied
- MFA details
- Device information
- Application information
- Location information
Administrators can then choose to take action on these events. Administrators can choose to:
- Confirm sign-in compromise
- Confirm sign-in safe
Note
Identity Protection evaluates risk for all authentication flows, whether it be interactive or non-interactive. The risky sign-in report now shows both interactive and non-interactive sign-ins. Use the "sign-in type" filter to modify this view.
Risk detections
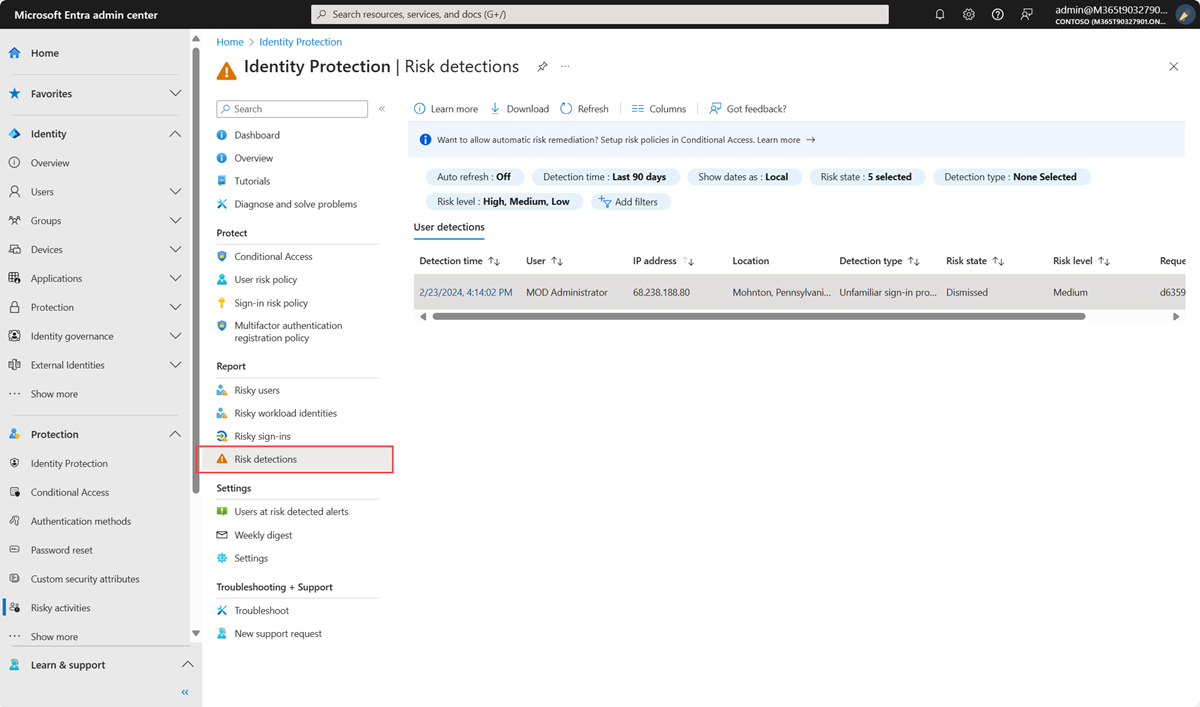
The risk detections report contains filterable data for up to the past 90 days (three months).
With the information provided by the risk detections report, administrators can find:
- Information about each risk detection including type.
- Other risks triggered at the same time
- Sign-in attempt location
- Link out to more detail from Microsoft Defender for Cloud Apps.
Administrators can then choose to return to the user's risk or sign-ins report to take actions based on information gathered.
Note
Our system may detect that the risk event that contributed to the risk user risk score was a false positives or the user risk was remediated with policy enforcement such as completing an MFA prompt or secure password change. Therefore our system will dismiss the risk state and a risk detail of “AI confirmed sign-in safe” will surface and it will no longer contribute to the user’s risk.
Investigation framework
Organizations may use the following frameworks to begin their investigation into any suspicious activity. Investigations may require having a conversation with the user in question, review of the sign-in logs, or review of the audit logs to name a few.
- Check the logs and validate whether the suspicious activity is normal for the given user.
- Look at the user’s past activities including at least the following properties to see if they're normal for the given user.
- Application
- Device - Is the device registered or compliant?
- Location - Is the user traveling to a different location or accessing devices from multiple locations?
- IP address
- User agent string
- If you have access to other security tools like Microsoft Sentinel, check for corresponding alerts that might indicate a larger issue.
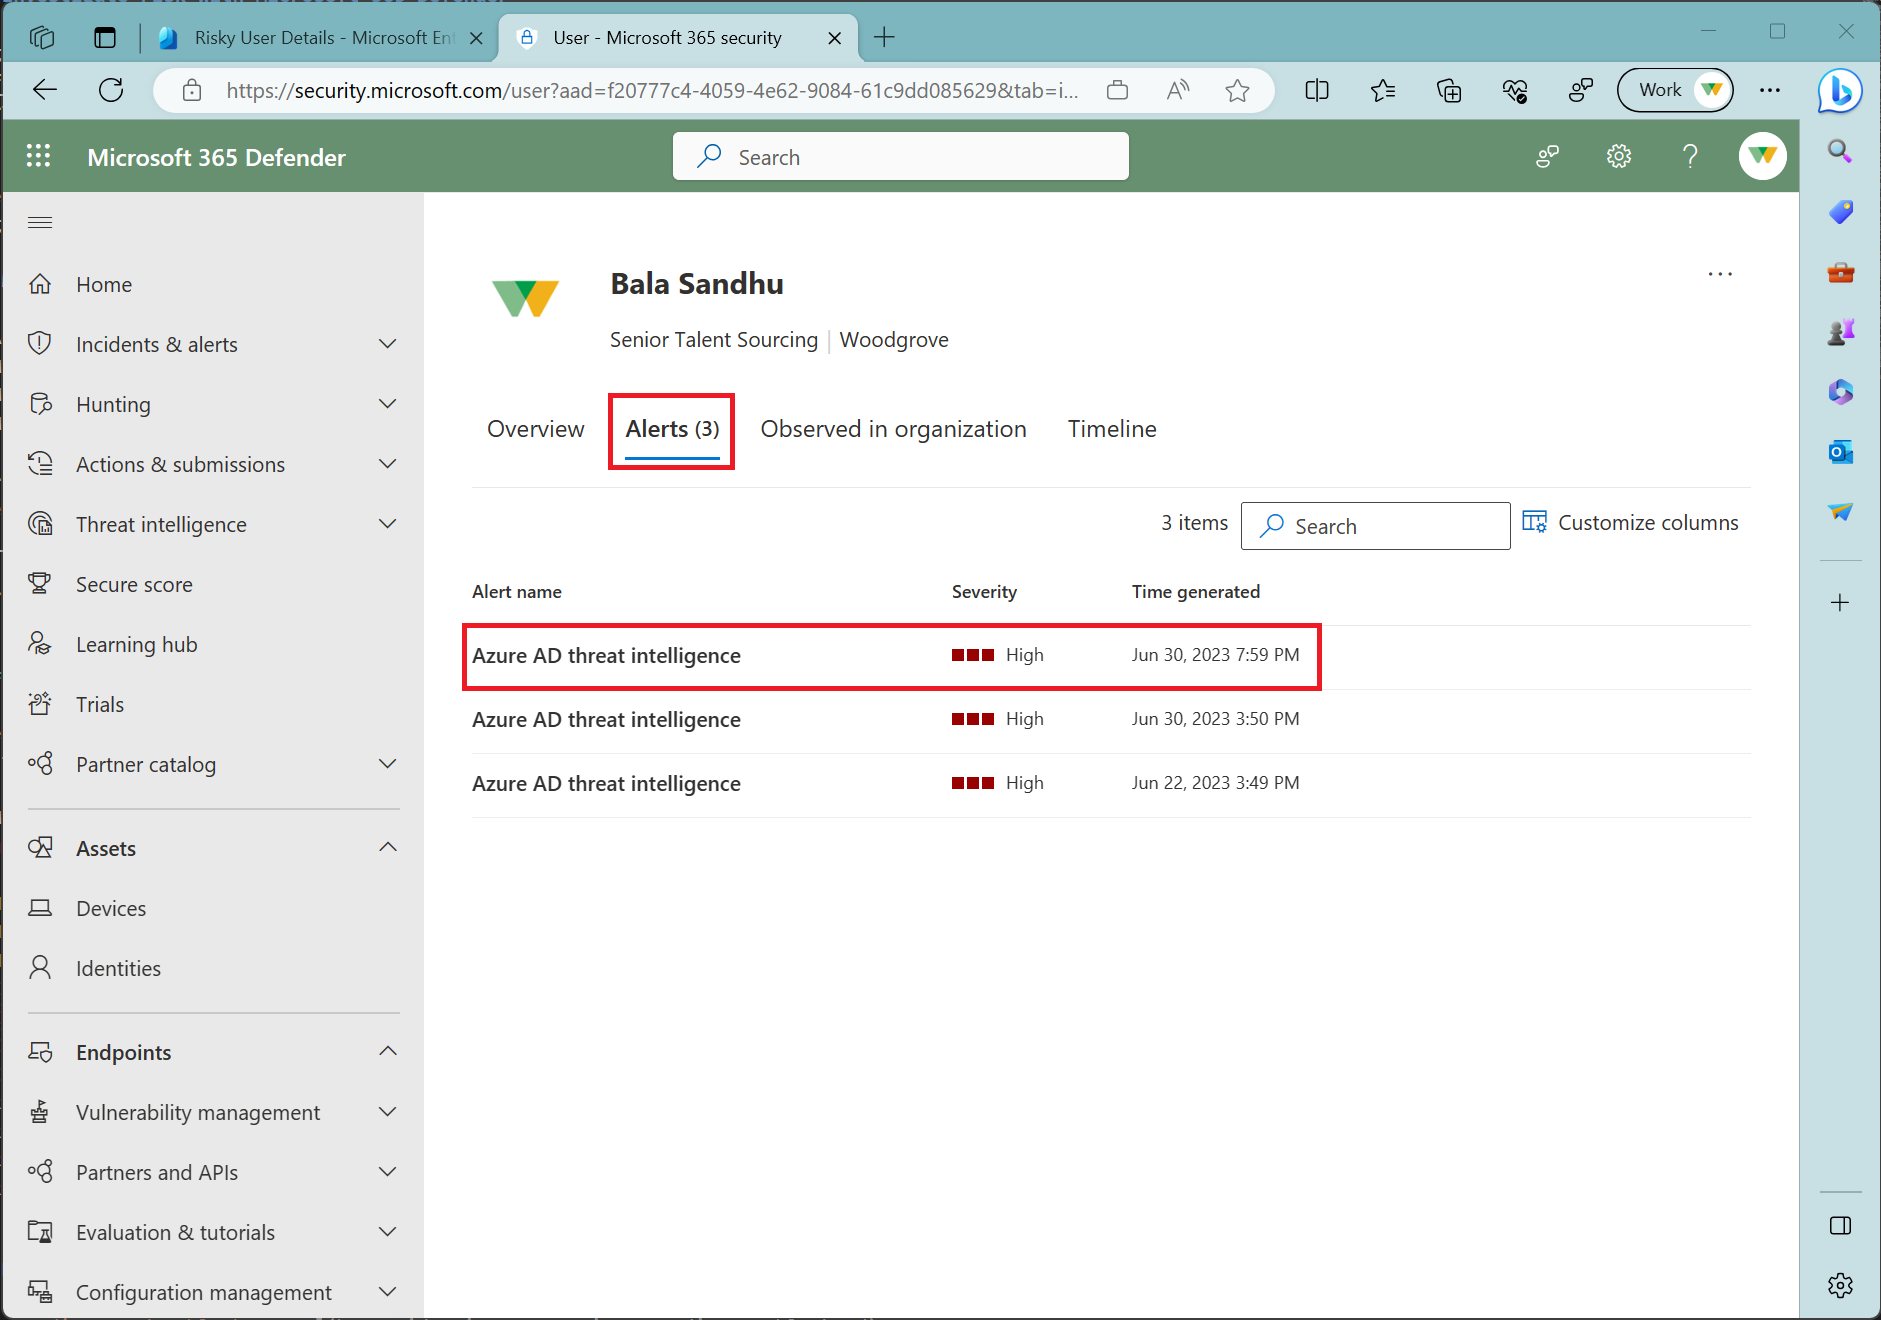
- Organizations with access to Microsoft 365 Defender can follow a user risk event through other related alerts and incidents and the MITRE ATT&CK chain.
- Select the user in the Risky users report.
- Select the ellipsis (...) in the toolbar then choose Investigate with Microsoft 365 Defender.
- Look at the user’s past activities including at least the following properties to see if they're normal for the given user.
- Reach out to the user to confirm if they recognize the sign-in. Methods such as email or Teams may be compromised.
- Confirm the information you have such as:
- Application
- Device
- Location
- IP address
- Confirm the information you have such as:
Important
If you suspect an attacker can impersonate the user, reset their password, and perform MFA; you should block the user and revoke all refresh and access tokens.
Investigate Microsoft Entra threat intelligence detections
To investigate a Microsoft Entra Threat Intelligence risk detection, follow these steps:
If more information is shown for the detection:
- Sign-in was from a suspicious IP Address:
- Confirm if the IP address shows suspicious behavior in your environment.
- Does the IP generate a high number of failures for a user or set of users in your directory?
- Is the traffic of the IP coming from an unexpected protocol or application, for example Exchange legacy protocols?
- If the IP address corresponds to a cloud service provider, rule out that there are no legitimate enterprise applications running from the same IP.
- This account was the victim of a password spray attack:
- Validate that no other users in your directory are targets of the same attack.
- Do other users have sign-ins with similar atypical patterns seen in the detected sign-in within the same time frame? Password spray attacks may display unusual patterns in:
- User agent string
- Application
- Protocol
- Ranges of IPs/ASNs
- Time and frequency of sign-ins
- This detection was triggered by a real-time rule:
- Validate that no other users in your directory are targets of the same attack. This can be found by the TI_RI_#### number assigned to the rule.
- Real-time rules protect against novel attacks identified by Microsoft's threat intelligence. If multiple users in your directory were targets of the same attack, investigate unusual patterns in other attributes of the sign in.
Investigate risk with Microsoft 365 Defender
Organizations who have deployed Microsoft 365 Defender and Microsoft Defender for Identity gain extra value from Identity Protection signals. This value comes in the form of enhanced correlation with other data from other parts of the organization and extra automated investigation and response.
In Microsoft 365 Defender Security Professionals and Administrators can make connections to suspicious activity from areas like:
- Alerts in Defender for Identity
- Microsoft Defender for Endpoint
- Microsoft Defender for Cloud
- Microsoft Defender for Cloud Apps
For more information about how to investigate suspicious activity using Microsoft 365 Defender, see the articles Investigate assets in Microsoft Defender for Identity and Investigate incidents in Microsoft 365 Defender.
For more information about these alerts and their structure, see the article Understanding security alerts.
Investigation status
When security personnel investigate risks in Microsoft 365 Defender and Defender for Identity the following states and reasons are returned to Identity Protection in the portal and APIs.
| Microsoft 365 Defender status | Microsoft 365 Defender classification | Microsoft Entra ID Protection risk state | Risk detail in Microsoft Entra ID Protection |
|---|---|---|---|
| New | False positive | Confirmed safe | M365DAdminDismissedDetection |
| New | Benign true positive | Confirmed safe | M365DAdminDismissedDetection |
| New | True positive | Confirmed compromised | M365DAdminDismissedDetection |
| In Progress | Not set | At risk | |
| In Progress | False positive | Confirmed safe | M365DAdminDismissedDetection |
| In Progress | Benign true positive | Confirmed safe | M365DAdminDismissedDetection |
| In Progress | True positive | Confirmed compromised | M365DAdminDismissedDetection |
| Resolved | Not set | Dismissed | M365DAdminDismissedDetection |
| Resolved | False positive | Confirmed safe | M365DAdminDismissedDetection |
| Resolved | Benign true positive | Confirmed safe | M365DAdminDismissedDetection |
| Resolved | True positive | Remediated | M365DAdminDismissedDetection |
Next steps
Feedback
Coming soon: Throughout 2024 we will be phasing out GitHub Issues as the feedback mechanism for content and replacing it with a new feedback system. For more information see: https://aka.ms/ContentUserFeedback.
Submit and view feedback for


