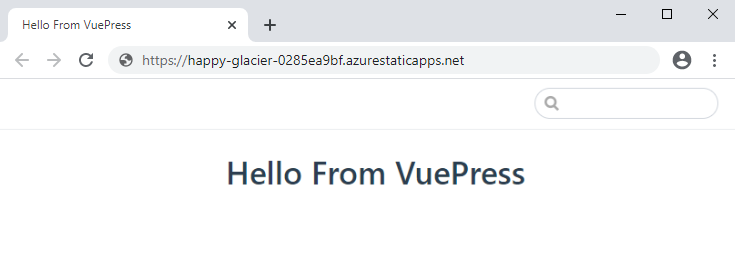
Tutorial: Publish a VuePress site to Azure Static Web Apps
This article demonstrates how to create and deploy a VuePress web application to Azure Static Web Apps. The final result is a new Azure Static Web Apps application with the associated GitHub Actions that give you control over how the app is built and published.
In this tutorial, you learn how to:
- Create a VuePress app
- Setup an Azure Static Web Apps
- Deploy the VuePress app to Azure
Prerequisites
- An Azure account with an active subscription. If you don't have one, you can create an account for free.
- A GitHub account. If you don't have one, you can create an account for free.
- A Git setup installed. If you don't have one, you can install Git.
- Node.js installed.
Create a VuePress App
Create a VuePress app from the Command Line Interface (CLI):
Create a new folder for the VuePress app.
mkdir static-siteAdd a README.md file the folder.
echo '# Hello From VuePress' > README.mdInitialize the package.json file.
npm init -yAdd VuePress as a
devDependency.npm install --save-dev vuepressOpen the package.json file in a text editor and add a build command to the
scriptssection.... "scripts": { "build": "vuepress build" } ...Create a .gitignore file to exclude the node_modules folder.
echo 'node_modules' > .gitignoreInitialize a Git repo.
 git init
 git add -A
 git commit -m "initial commit"
Push your application to GitHub
You need a repository on GitHub to connect to Azure Static Web Apps. The following steps show you how to create a repository for your site.
Create a blank GitHub repo (don't create a README) from https://github.com/new named vuepress-static-app.
Add the GitHub repository as a remote to your local repo. Make sure to add your GitHub username in place of the
<YOUR_USER_NAME>placeholder in the following command.git remote add origin https://github.com/<YOUR_USER_NAME>/vuepress-static-appPush your local repo up to GitHub.
git push --set-upstream origin main
Deploy your web app
The following steps show you how to create a new static site app and deploy it to a production environment.
Create the application
Go to the Azure portal
Select Create a Resource
Search for Static Web Apps
Select Static Web Apps
Select Create
On the Basics tab, enter the following values.
Property Value Subscription Your Azure subscription name. Resource group my-vuepress-group Name vuepress-static-app Plan type Free Region for Azure Functions API and staging environments Select a region closest to you. Source GitHub Select Sign in with GitHub and authenticate with GitHub.
Enter the following GitHub values.
Property Value Organization Select your desired GitHub organization. Repository Select vuepress-static-app. Branch Select main. Note
If you don't see any repositories, you may need to authorize Azure Static Web Apps on GitHub. Browse to your GitHub repository and go to Settings > Applications > Authorized OAuth Apps, select Azure Static Web Apps, and then select Grant. For organization repositories, you must be an owner of the organization to grant the permissions.
In the Build Details section, select VuePress from the Build Presets drop-down and keep the default values.
Review and create
Select Review + Create to verify the details are all correct.
Select Create to start the creation of the App Service Static Web App and provision a GitHub Actions for deployment.
Once the deployment completes, select Go to resource.
On the resource screen, select the URL link to open your deployed application. You may need to wait a minute or two for the GitHub Actions to complete.

Clean up resources
If you're not going to continue to use this application, you can delete the Azure Static Web App resource through the following steps:
- Open the Azure portal
- In the top search bar, search for your application by the name you provided earlier
- Click on the app
- Click on the Delete button
- Click Yes to confirm the delete action
Next steps
Feedback
Coming soon: Throughout 2024 we will be phasing out GitHub Issues as the feedback mechanism for content and replacing it with a new feedback system. For more information see: https://aka.ms/ContentUserFeedback.
Submit and view feedback for