Quickstart: Create an interactive search map with Azure Maps
This quickstart demonstrates how to use Azure Maps to create a map that gives users an interactive search experience. It walks you through these basic steps:
- Create your own Azure Maps account.
- Get your Azure Maps subscription key to use in the demo web application.
- Download and open the demo map application.
This quickstart uses the Azure Maps Web SDK, however the Azure Maps service can be used with any map control, such as these popular open-source map controls that the Azure Maps team has created plugin's for.
Prerequisites
If you don't have an Azure subscription, create a free account before you begin.
Sign in to the Azure portal.
Create an Azure Maps account
Create a new Azure Maps account with the following steps:
Select Create a resource in the upper left-hand corner of the Azure portal.
Type Azure Maps in the Search services and Marketplace box.
Select Azure Maps in the drop-down list that appears, then select the Create button.
On the Create an Azure Maps Account resource page, enter the following values then select the Create button:
- The Subscription that you want to use for this account.
- The Resource group name for this account. You may choose to Create new or Select existing resource group.
- The Name of your new Azure Maps account.
- The Pricing tier for this account. Select Gen2.
- Read the License and Privacy Statement, then select the checkbox to accept the terms.
Get the subscription key for your account
Once your Azure Maps account is successfully created, retrieve the subscription key that enables you to query the Maps APIs.
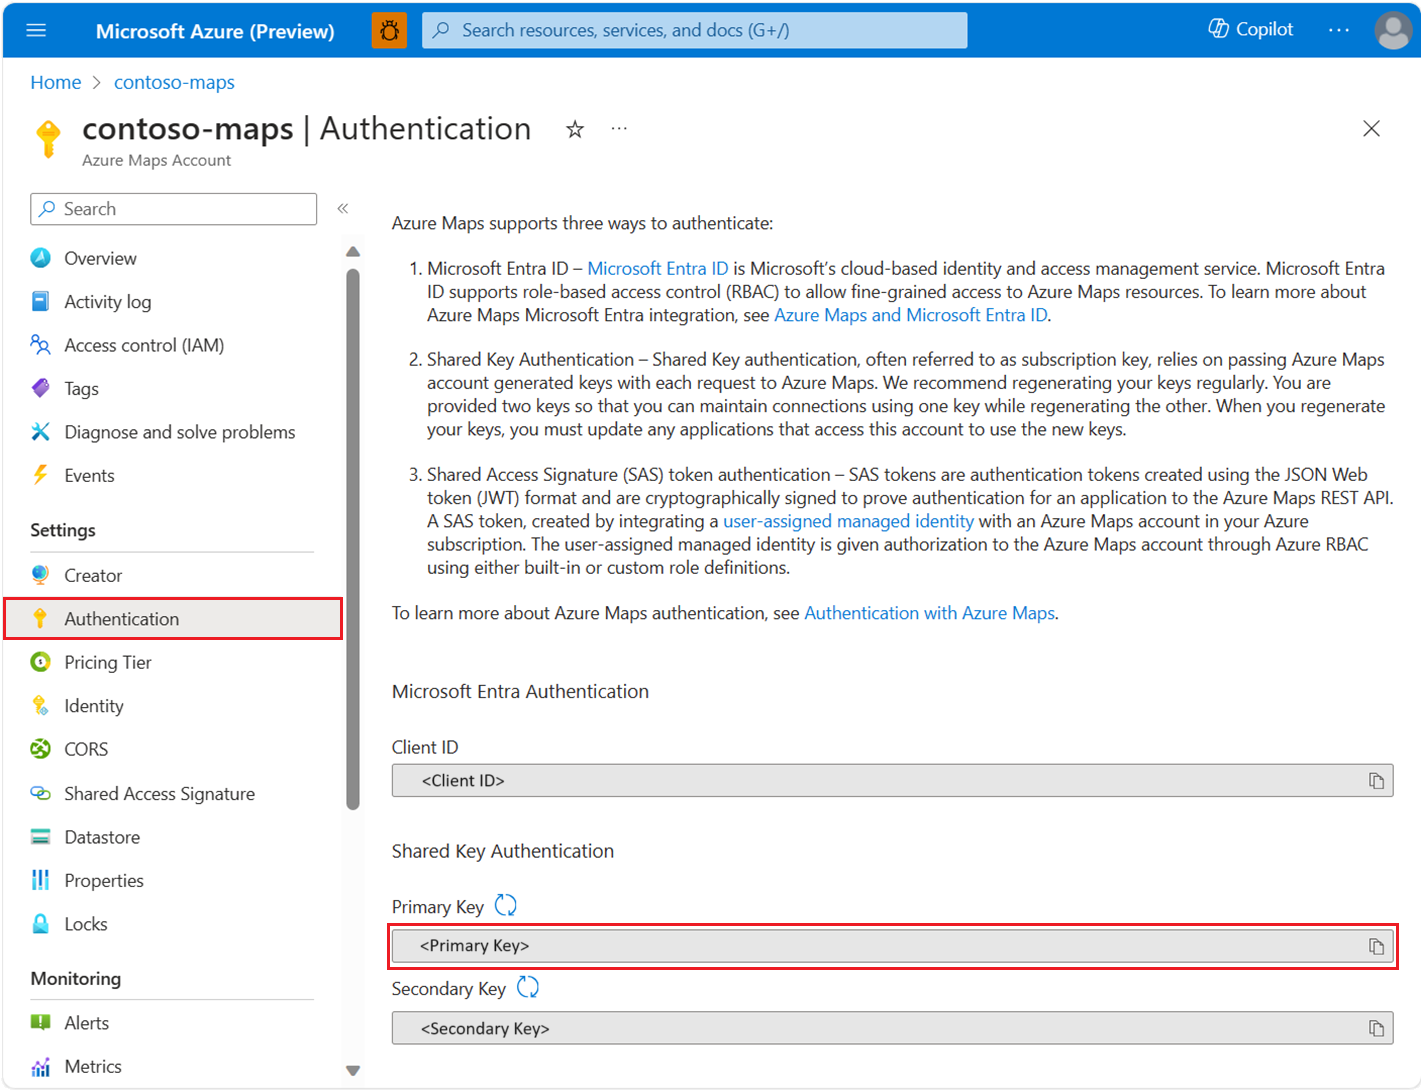
- Open your Maps account in the portal.
- In the settings section, select Authentication.
- Copy the Primary Key and save it locally to use later in this tutorial.
Note
This quickstart uses the Shared Key authentication approach for demonstration purposes, but the preferred approach for any production environment is to use Microsoft Entra ID authentication.
Download and update the Azure Maps demo
- Copy the contents of the file: Interactive Search Quickstart.html.
- Save the contents of this file locally as AzureMapDemo.html. Open it in a text editor.
- Add the Primary Key value you got in the preceding section
- Comment out all of the code in the
authOptionsfunction, this code is used for Microsoft Entra authentication. - Uncomment the last two lines in the
authOptionsfunction, this code is used for Shared Key authentication, the approach being used in this quickstart. - Replace
<Your Azure Maps Key>with the subscription key value from the preceding section.
- Comment out all of the code in the
Open the demo application
Open the file AzureMapDemo.html in a browser of your choice.
Observe the map shown of the City of Los Angeles. Zoom in and out to see how the map automatically renders with more or less information depending on the zoom level.
Change the default center of the map. In the AzureMapDemo.html file, search for the variable named center. Replace the longitude, latitude pair value for this variable with the new values [-74.0060, 40.7128]. Save the file and refresh your browser.
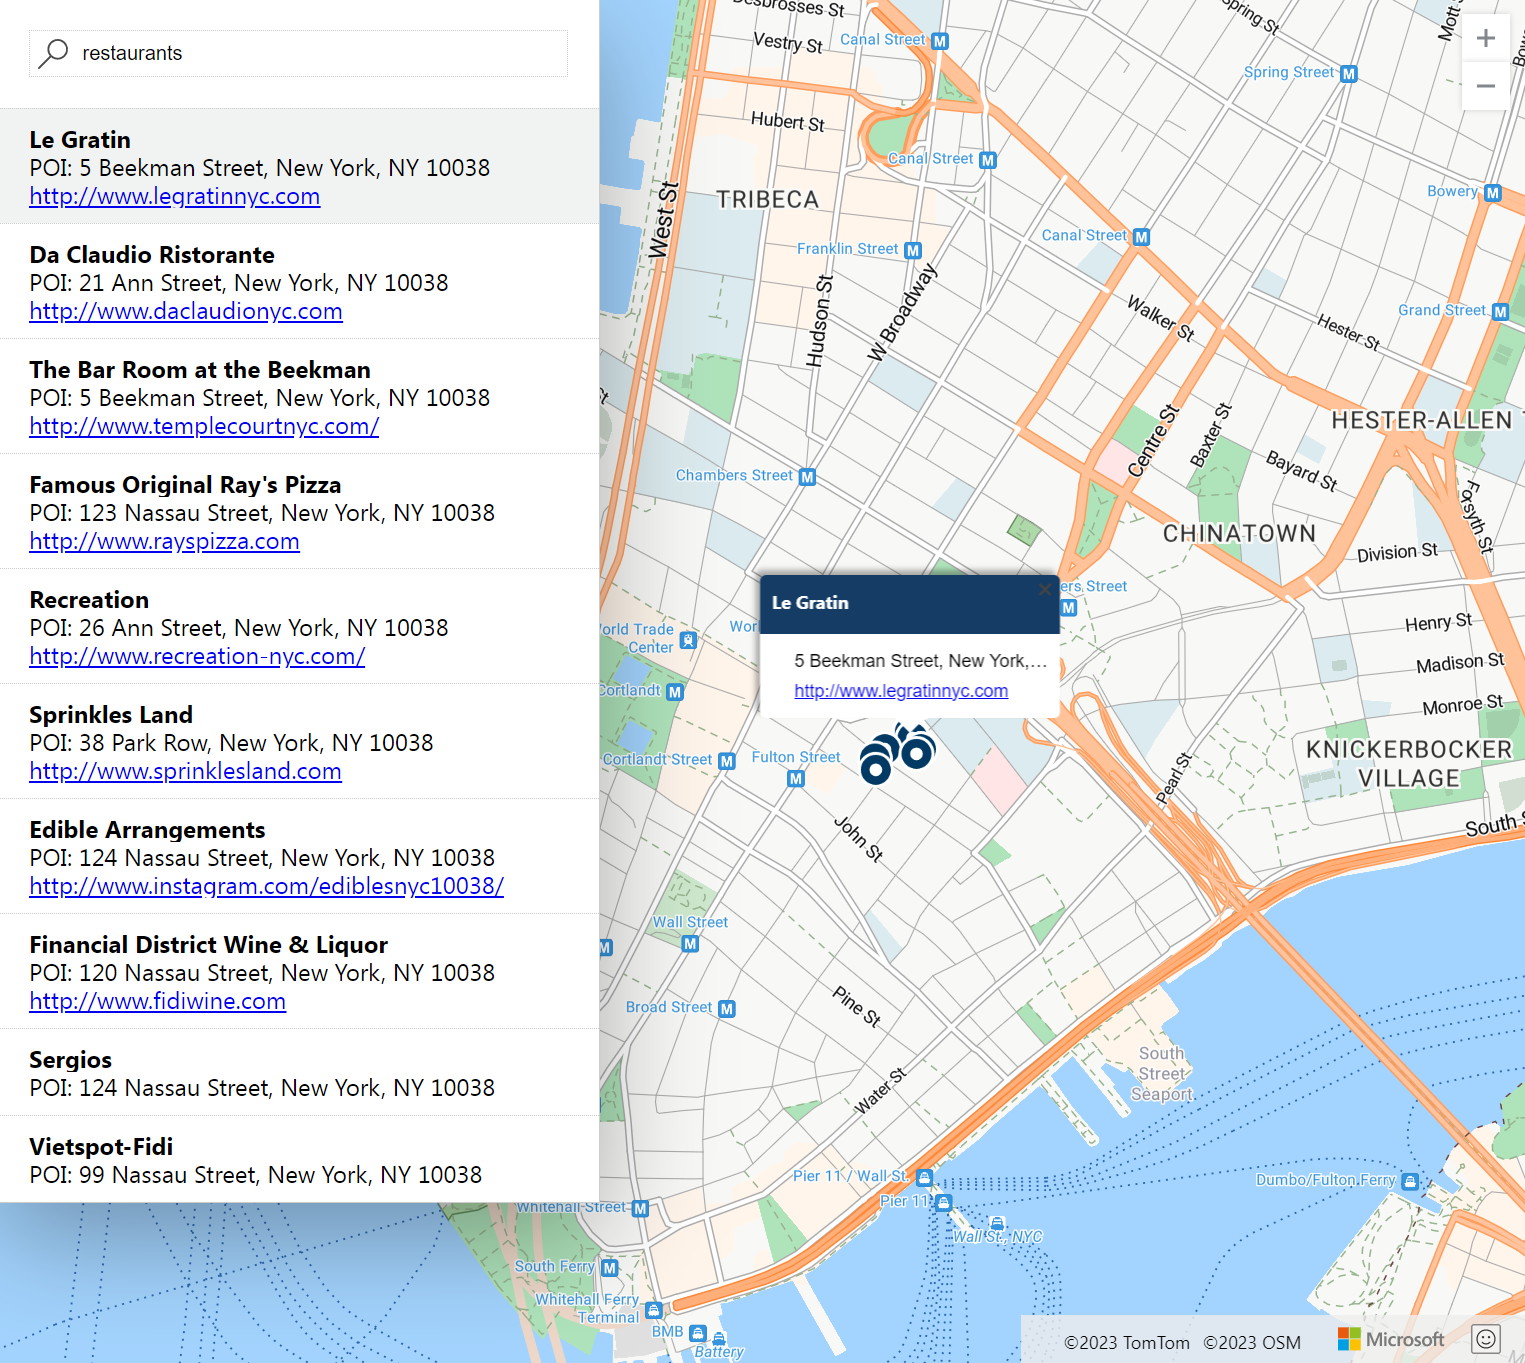
Try out the interactive search experience. In the search box on the upper-left corner of the demo web application, search for restaurants.
Move your mouse over the list of addresses and locations that appear below the search box. Notice how the corresponding pin on the map pops out information about that location. For privacy of private businesses, fictitious names and addresses are shown.
Clean up resources
Important
The tutorials listed in the Next Steps section detail how to use and configure Azure Maps with your account. Don't clean up the resources created in this quickstart if you plan to continue to the tutorials.
If you don't plan to continue to the tutorials, take these steps to clean up the resources:
- Close the browser that runs the AzureMapDemo.html web application.
- Navigate to the Azure portal. Select All resources from the main portal page, or select the menu icon in the upper left-hand corner then All resources.
- Select your Azure Maps account, then select Delete at the top of the page.
For more code examples and an interactive coding experience, see these articles:
Next steps
In this quickstart, you created an Azure Maps account and a demo application. Take a look at the following tutorials to learn more about Azure Maps:
Feedback
Coming soon: Throughout 2024 we will be phasing out GitHub Issues as the feedback mechanism for content and replacing it with a new feedback system. For more information see: https://aka.ms/ContentUserFeedback.
Submit and view feedback for


