Quickstart: Create an HDInsight on AKS cluster pool using Azure portal
HDInsight on AKS introduces the concept of cluster pools and clusters, which allow you to realize the complete value of data lakehouse.
Cluster pools are a logical grouping of clusters and maintain a set of clusters in the same pool, which helps in building robust interoperability across multiple cluster types. It can be created within an existing virtual network or outside a virtual network.
A cluster pool in HDInsight on AKS corresponds to one cluster in AKS infrastructure.
Clusters are individual compute workloads, such as Apache Spark, Apache Flink, or Trino, which can be created in the same cluster pool.
For every cluster type, you must have a cluster pool. It can be created independently or you can create new cluster pool during cluster creation. In this quickstart, you learn how to create a cluster pool using the Azure portal.
Prerequisites
Ensure that you have completed the subscription prerequisites before creating a cluster pool.
Create a cluster pool
The following steps explain the cluster pool creation independently. The same options are available for cluster pool during cluster creation.
Sign in to Azure portal.
In the Azure portal search bar, type HDInsight on AKS cluster pool and select Azure HDInsight on AKS cluster pools from the drop-down list.
Click + Create.
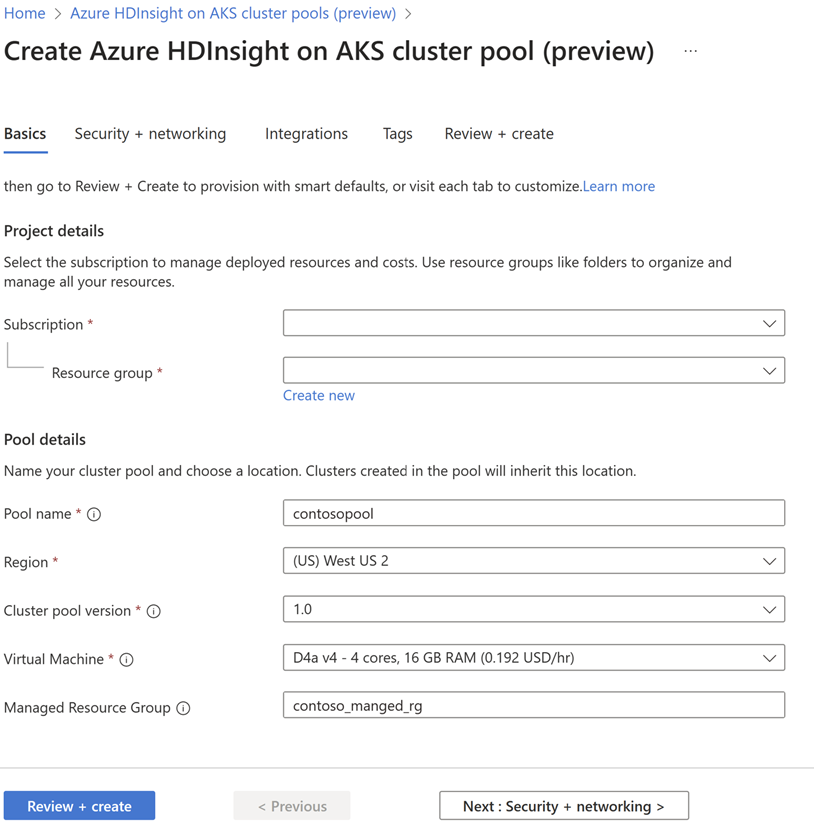
On the Basics tab, enter the following information:
Property Description Subscription From the drop-down list, select the Azure subscription under which you want to create HDInsight on AKS cluster pool. Resource group From the drop-down list, select an existing resource group, or select Create new. Pool name Enter the name of the cluster pool to be created. Cluster pool name length can't be more than 26 characters. It must start with an alphabet, end with an alphanumeric character, and must only contain alphanumeric characters and hyphens. Region From the drop-down list, select the region for the cluster pool. Check region availability. For cluster pools in a virtual network, the region for the virtual network and the cluster pool must be same. Cluster pool version From the drop-down list, select the HDInsight on AKS cluster pool version. Virtual machine From the drop-down list, select the virtual machine size for the cluster pool based on your requirement. Managed resource group (Optional) Provide a name for managed resource group. It holds ancillary resources created by HDInsight on AKS. Select Next: Security + networking to continue.
On the Security + networking page, provide the following information:
Property Description Virtual network (VNet) From the drop-down list, select a virtual network, which is in the same region as the cluster pool. Subnet From the drop-down list, select the name of the subnet that you plan to associate with the cluster pool. Egress path From the drop-down list, select the egress path for your cluster. Private AKS Enable private AKS to ensure that network traffic between the AKS Control plane / Kube API server and Clusters remains on a private network. Select Next: Integrations to continue.
On the Integrations page, provide the following information:
Property Description Log Analytics (Optional) Select this option to enable Log analytics to view insights and logs directly in your cluster by sending metrics and logs to a Log Analytics Workspace. You can also enable this option post cluster pool creation. Azure Managed Prometheus (Optional) Enable Azure managed Prometheus to view insights and logs directly in your cluster by sending metrics and logs to an Azure Monitor workspace. You can also enable this option post cluster pool creation. Select Next: Review + create to continue.
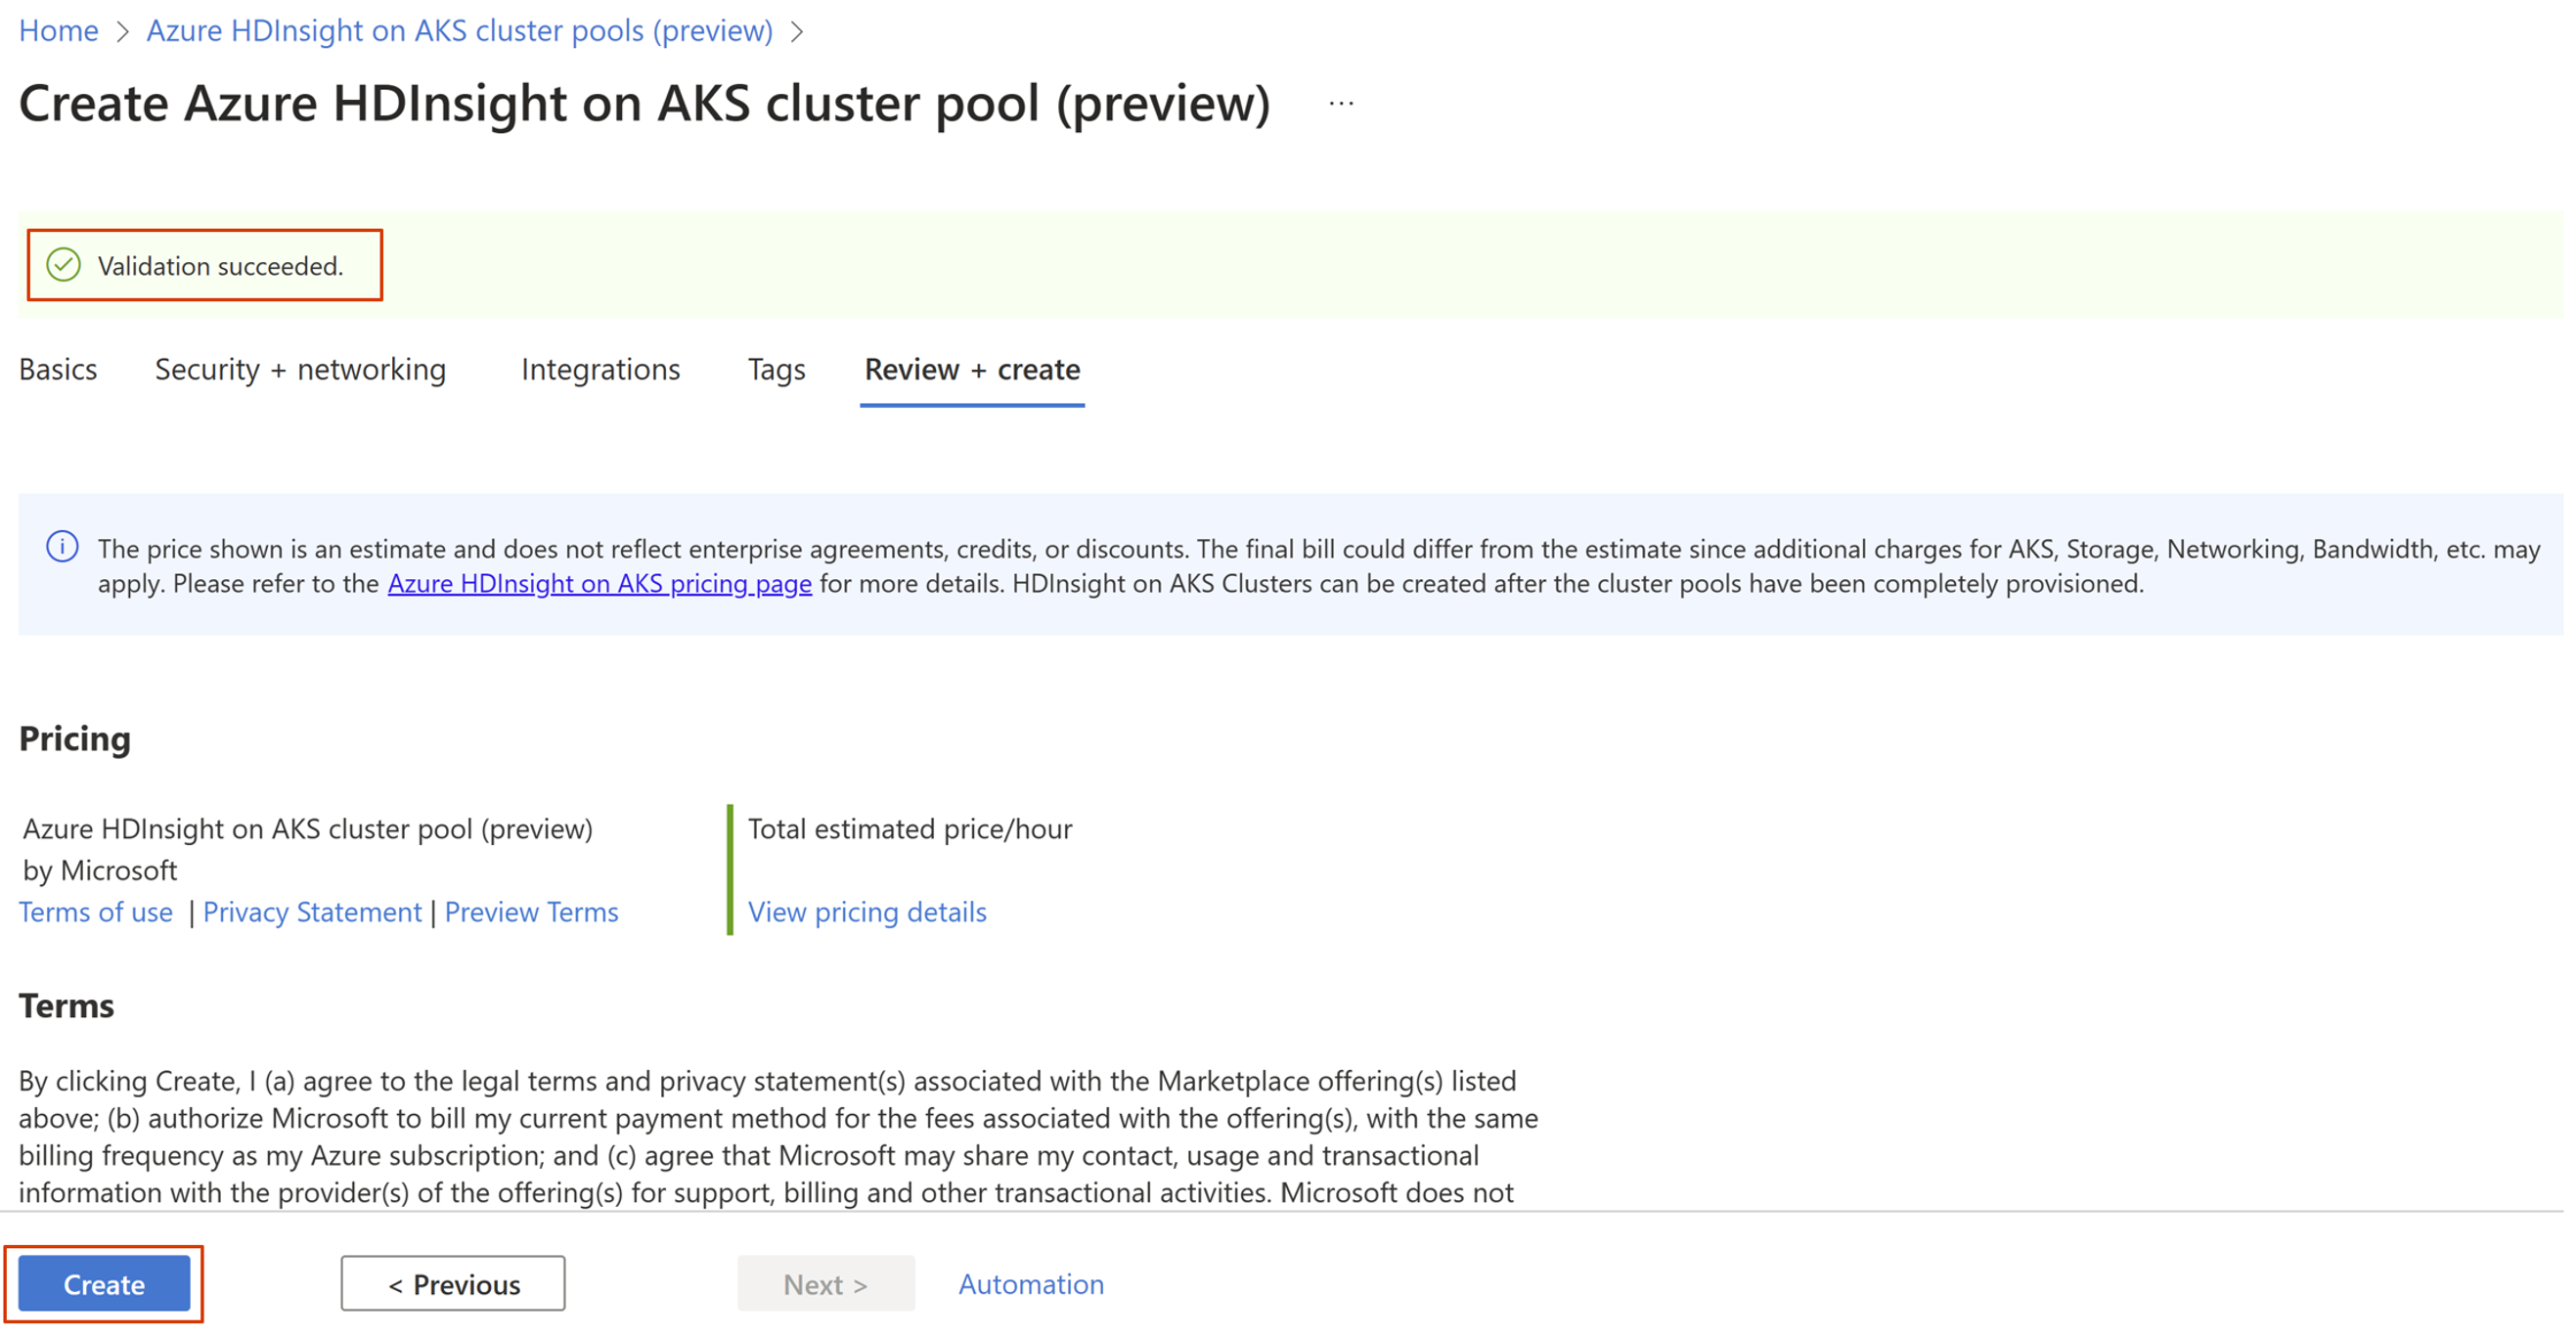
On the Review + create page, look for the Validation succeeded message at the top of the page and then click Create.
The Deployment is in process page is displayed while the cluster pool is being created, and the Your deployment is complete page is displayed once the cluster pool is fully deployed and ready for use.
If you navigate away from the page, you can check the status of the deployment by clicking Notifications icon in the Azure portal.
Once the cluster pool deployment completes, continue to use the Azure portal to create a Trino, Flink, and Spark cluster.
Clean up resources
When no longer needed, clean up unnecessary resources to avoid Azure charges. You can remove the resource group, cluster pool, and all other resources in the resource group.
- Select the Resource group.
- On the page for the resource group, select Delete resource group.
- When prompted, type the name of the resource group and then select Delete.
Note
To delete a cluster pool, ensure there are no active clusters in the cluster pool.
Tip
For troubleshooting any deployment errors, you can refer this page.
Next steps
Feedback
Coming soon: Throughout 2024 we will be phasing out GitHub Issues as the feedback mechanism for content and replacing it with a new feedback system. For more information see: https://aka.ms/ContentUserFeedback.
Submit and view feedback for


