Set up inbound calling
Omnichannel for Customer Service offers a suite of capabilities that extend the power of Dynamics 365 Customer Service Enterprise to enable organizations to instantly connect and engage with their customers across digital messaging channels. An additional license is required to access Omnichannel for Customer Service. For more information, see the Dynamics 365 Customer Service pricing overview and Dynamics 365 Customer Service pricing plan pages.
Configure inbound calling to set up the voice channel in Customer Service. You can enable your customer service representatives to communicate with customers on the phone to resolve issues using the voice channel.
Prerequisites
Ensure that the following prerequisites are met:
- Voice channel is provisioned. More information: Provision Omnichannel for Customer Service
- Unified routing is enabled. More information: Provision unified routing
- Acquire a phone number. See: Manage phone numbers.
Set up a voice workstream
Important
If the enhanced voice experience is available for your region, you can create new workstreams that support the voice-enabled Copilots. For existing deployments, make sure that you update your existing workstreams to support voice Copilots.
Do the following to configure a workstream for voice:
On the left pane, select Workstreams, and then on the Create a workstream dialog, enter the following.
Enter the following details for the workstream:
- Name: An intuitive name, such as Contoso voice workstream.
- Type: Select Voice.
Note
By default, Owner and Channel are predefined and unavailable, and only push is available for work distribution mode.
Select Create. The workstream that you created is displayed.

Configure a voice channel
To configure the voice channel, you'll need to associate the workstream with a phone number for routing the calls. You can view the list of available phone numbers by selecting Phone numbers in the left pane.
Go to the workstream that you created, and on the page that appears, select Set up voice.
On the Phone number page, select a number from the list, and select Next.
Note
- Only those numbers are displayed that have inbound calls enabled and are not already associated with any other workstream. Use the steps in Acquire a phone number if you want to configure a new number.
- The voice channel supports anonymous inbound calls on those numbers only that are configured via Azure Communication Services direct routing.
On the Language page, select Add primary language and perform the steps to configure the primary language. More information: Allow customers to choose a language
On the Behaviors tab, turn on the Customer wait time toggle, and select the following options:
- Notify position in queue
- Notify average wait time
Turn on the Channel operating hours toggle, and select an operating hour record. More information: Configure operating hours for your business
Configure the settings for transcription and recording of the calls in the Transcription and recording area. More information: Configure call recordings and transcripts
Select Add for Custom automated messages, then select a default template message as the trigger, and then enter the custom automated message text. For information about automated messages, see Configure automated messages
Turn on the toggle for the agents to be able to transfer calls and consult with external numbers and Microsoft Teams users. See Transfer calls to external numbers and Teams users.
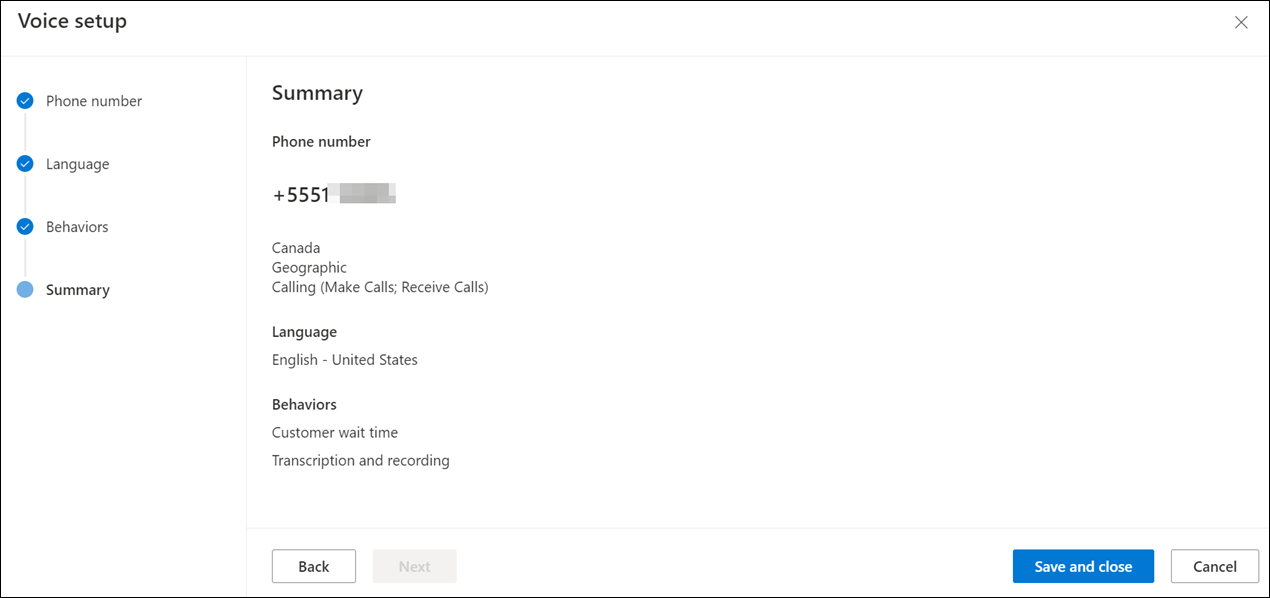
On the Summary page, select Save and close.
The phone number is associated with the workstream.

Transfer calls to external numbers and Teams users
You see the following transfer and consult options:
- Enhanced voice options: Actions available for workstreams created in or migrated to the enhanced voice experience.
- Existing voice options: Actions available for works treams that aren't migrated to the enhanced voice channel.
- Set the toggles for External phone number and External Microsoft Teams users in Consult and Transfer. This allows agents to consult with other agents or Teams subject matter experts during an ongoing call, and also enables them to transfer calls.
- Select the Use bridged transfers checkbox. The following actions will occur when an agent transfers a call to an external phone number or a Microsoft Teams user:
- Call ends for the primary agent as soon as the secondary agent or Teams user accepts or rejects a call.
- The caller ID on the call to the external number is the Dynamics phone number.
- The customer hears a transfer message followed by hold music. The original call continues.
- The recording and transcription will continue when the call is transferred.
- Customers cannot send DTMF inputs to external numbers.
- Post conversation survey, if configured, will be triggered once the external agent or Teams user hangs up.
- If the Use bridged transfers checkbox is not selected, the following actions will occur when an agent transfers a call to an external phone number or a Microsoft Teams user:
- Call ends for the primary agent as soon as the secondary agent or Teams user accepts or rejects a call.
- The caller ID on the call to the external user is the customer's phone number.
- The customer hears a transfer message followed by ringing. A new call begins.
- Customers can send DTMF inputs to external numbers.
- The recording and transcription is stopped.
- Post conversation call survey isn't sent to the customer.
Create queues for voice channels
In Customer Service, work items are assigned to a queue and agent with the help of unified routing. Unified routing is an intelligent, scalable, and enterprise grade routing and assignment capability that can assign the incoming work item to the best suited queue and agent while adhering to work item requirements and matching them with the agent's capabilities using round robin routing. More information: Overview of unified routing
In this section, we'll cover information on how to create a queue for the voice channel and routing rules to evaluate conditions and assign work items.
Create a queue for the voice channel
In the left pane, select Queues, and then complete the following steps to create a queue for the voice channel:
On the Queues page, select New, and on Create a queue dialog, enter the following details.
- Name: Specify a name.
- Type: Select Voice.
- Group number: Enter a number.
Select Create. The queue is created.
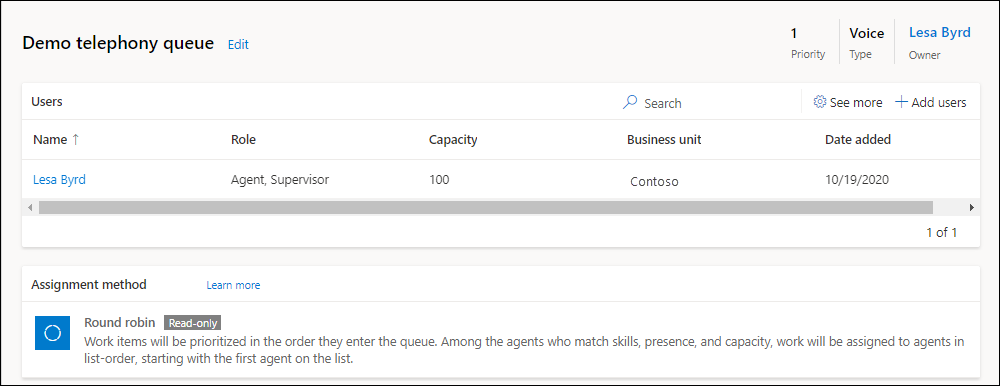
On the queue page, select Add users, and on the Add users flyout menu that appears, select the users and select Add.
Note
- You can add only those users who are configured for unified routing.
- After 20 minutes of being added to a queue, agents must refresh their dashboards to be able to receive calls.

Configure user input recognition
The Voice channel supports Dual-tone Multi-frequency(DTMF) recognition to allow customers to provide input to IVR and human agents using the phone keypad. This is supported through Azure Communication Services. See: Gathering user input with Recognize action to configure DTMF recognition.
The supported configurations for the voice channel are as follows:
Agents can send DTMF input to a phone number in the E.164 format only.
Agents can send the following DTMF tones:
  private readonly static HashSet<string> ValidDTMFValues = new HashSet<string>

  {

   "0", "1", "2", "3", "4", "5", "6", "7", "8", "9", "*", "#", "A", "B", "C", "D"

  };
Note
The DTMF input isn't supported if the call is transferred to an external phone number in the existing voice experience.
Configure call overflow for the voice queue
With call overflow, you can reduce the wait time for customer calls by setting options for voice queues. More information: Manage overflow
Assignment rules for a queue
By default, the assignment method for a voice queue is round robin. In the round robin method, work items will be prioritized in the order they enter the queue. Among the agents who match skills, presence, and capacity, work will be assigned to agents in the order they're listed. The agent listed on the top is assigned first. You can also choose highest capacity or create custom assignment methods. More information: Assignment methods
For a simple and quick voice call routing, you don't need to set up any rules for unified routing. By default, all the incoming voice calls will be routed to the "default voice queue" and will be assigned to the agents with the round robin assignment method.
Configure routing rules for the voice workstream
Go to the workstream for which you've configured the voice channel and do the following steps:
In the Routing rules area, in the Route to queues option, select Create ruleset.
On the Create route-to-queues ruleset dialog, provide a name and description, and then select Create.
On the page that appears, select Create rule.
On the Create rule page, enter a rule name, and in Conditions, define the set of conditions using the conversation entity and related entity attributes.
In Route to queues, select the queue that you created and to which the voice call must be routed when the conditions specified are met.
To configure percentage-based distribution of work items, see Percentage-based allocation of work to queues
Select Create. The rule is created and appears in the list of rules.
Create as many rules as your business requires.
Configure work classification rules
You can configure work classification rules for the voice workstream to add detailed information to incoming work items. This information can be used to route the calls optimally. More information: Configure work classification
See also
Overview of voice channel in Omnichannel for Customer Service
Overview of unified routing
Assignment methods
Set up outbound calling
Configure outbound and inbound profiles
Manage phone numbers
Use voicemail to handle overflow of calls
Feedback
Coming soon: Throughout 2024 we will be phasing out GitHub Issues as the feedback mechanism for content and replacing it with a new feedback system. For more information see: https://aka.ms/ContentUserFeedback.
Submit and view feedback for
