Get started with Storage Explorer
Overview
Microsoft Azure Storage Explorer is a standalone app that makes it easy to work with Azure Storage data on Windows, macOS, and Linux.
In this article, we demonstrate several ways of connecting to and managing your Azure storage accounts.
Prerequisites
The following versions of Windows support the latest versions of Storage Explorer:
- Windows 11
- Windows 10
Other requirements include:
- Your Windows installation must support 64-bit applications (starting with Storage Explorer 1.30.0).
- You must have a .NET 8 runtime installed (starting with Storage Explorer 1.34.0) which matches the architecture of your Storage Explorer install. The Storage Explorer installer will install a .NET 8 runtime if you do not already have one installed, but it may not be the latest version available. It is your responsibility to keep your .NET install up to date. You can download the latest .NET 8 runtime from here.
Download and install
To download and install Storage Explorer, see Azure Storage Explorer.
Connect to a storage account or service
Storage Explorer provides several ways to connect to Azure resources:
- Sign in to Azure to access your subscriptions and their resources
- Attach to an individual Azure Storage resource
Sign in to Azure
Note
To fully access resources after you sign in, Storage Explorer requires both management (Azure Resource Manager) and data layer permissions. This means that you need Microsoft Entra permissions to access your storage account, the containers in the account, and the data in the containers. If you have permissions only at the data layer, consider choosing the Sign in using Microsoft Entra ID option when attaching to a resource. For more information about the specific permissions Storage Explorer requires, see the Azure Storage Explorer troubleshooting guide.
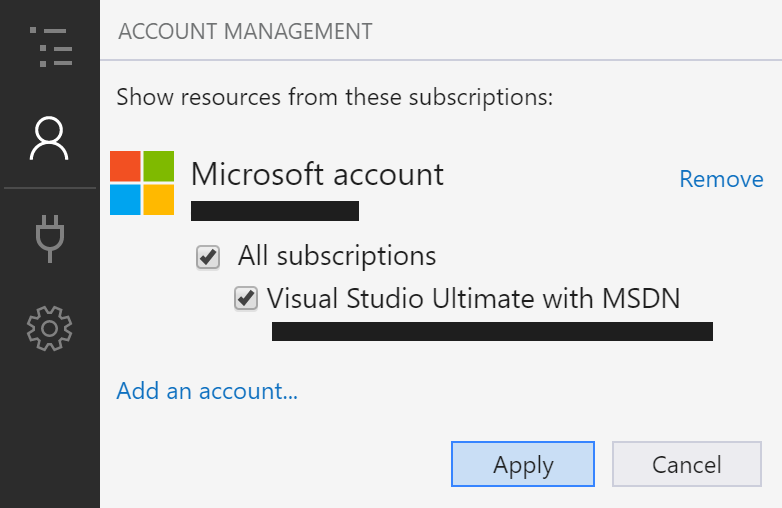
In Storage Explorer, select View > Account Management or select the Manage Accounts button.
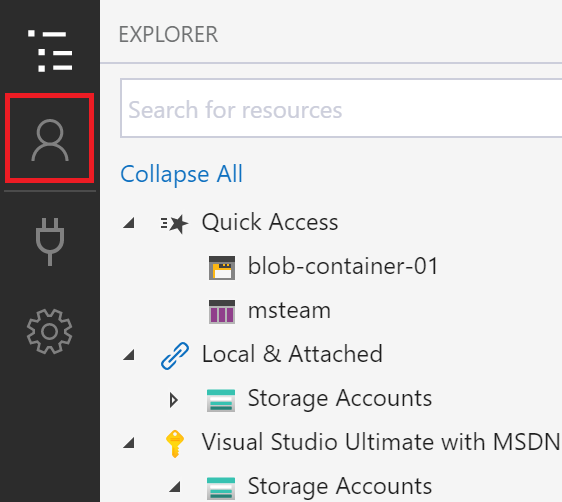
ACCOUNT MANAGEMENT now displays all the Azure accounts you're signed in to. To connect to another account, select Add an account....
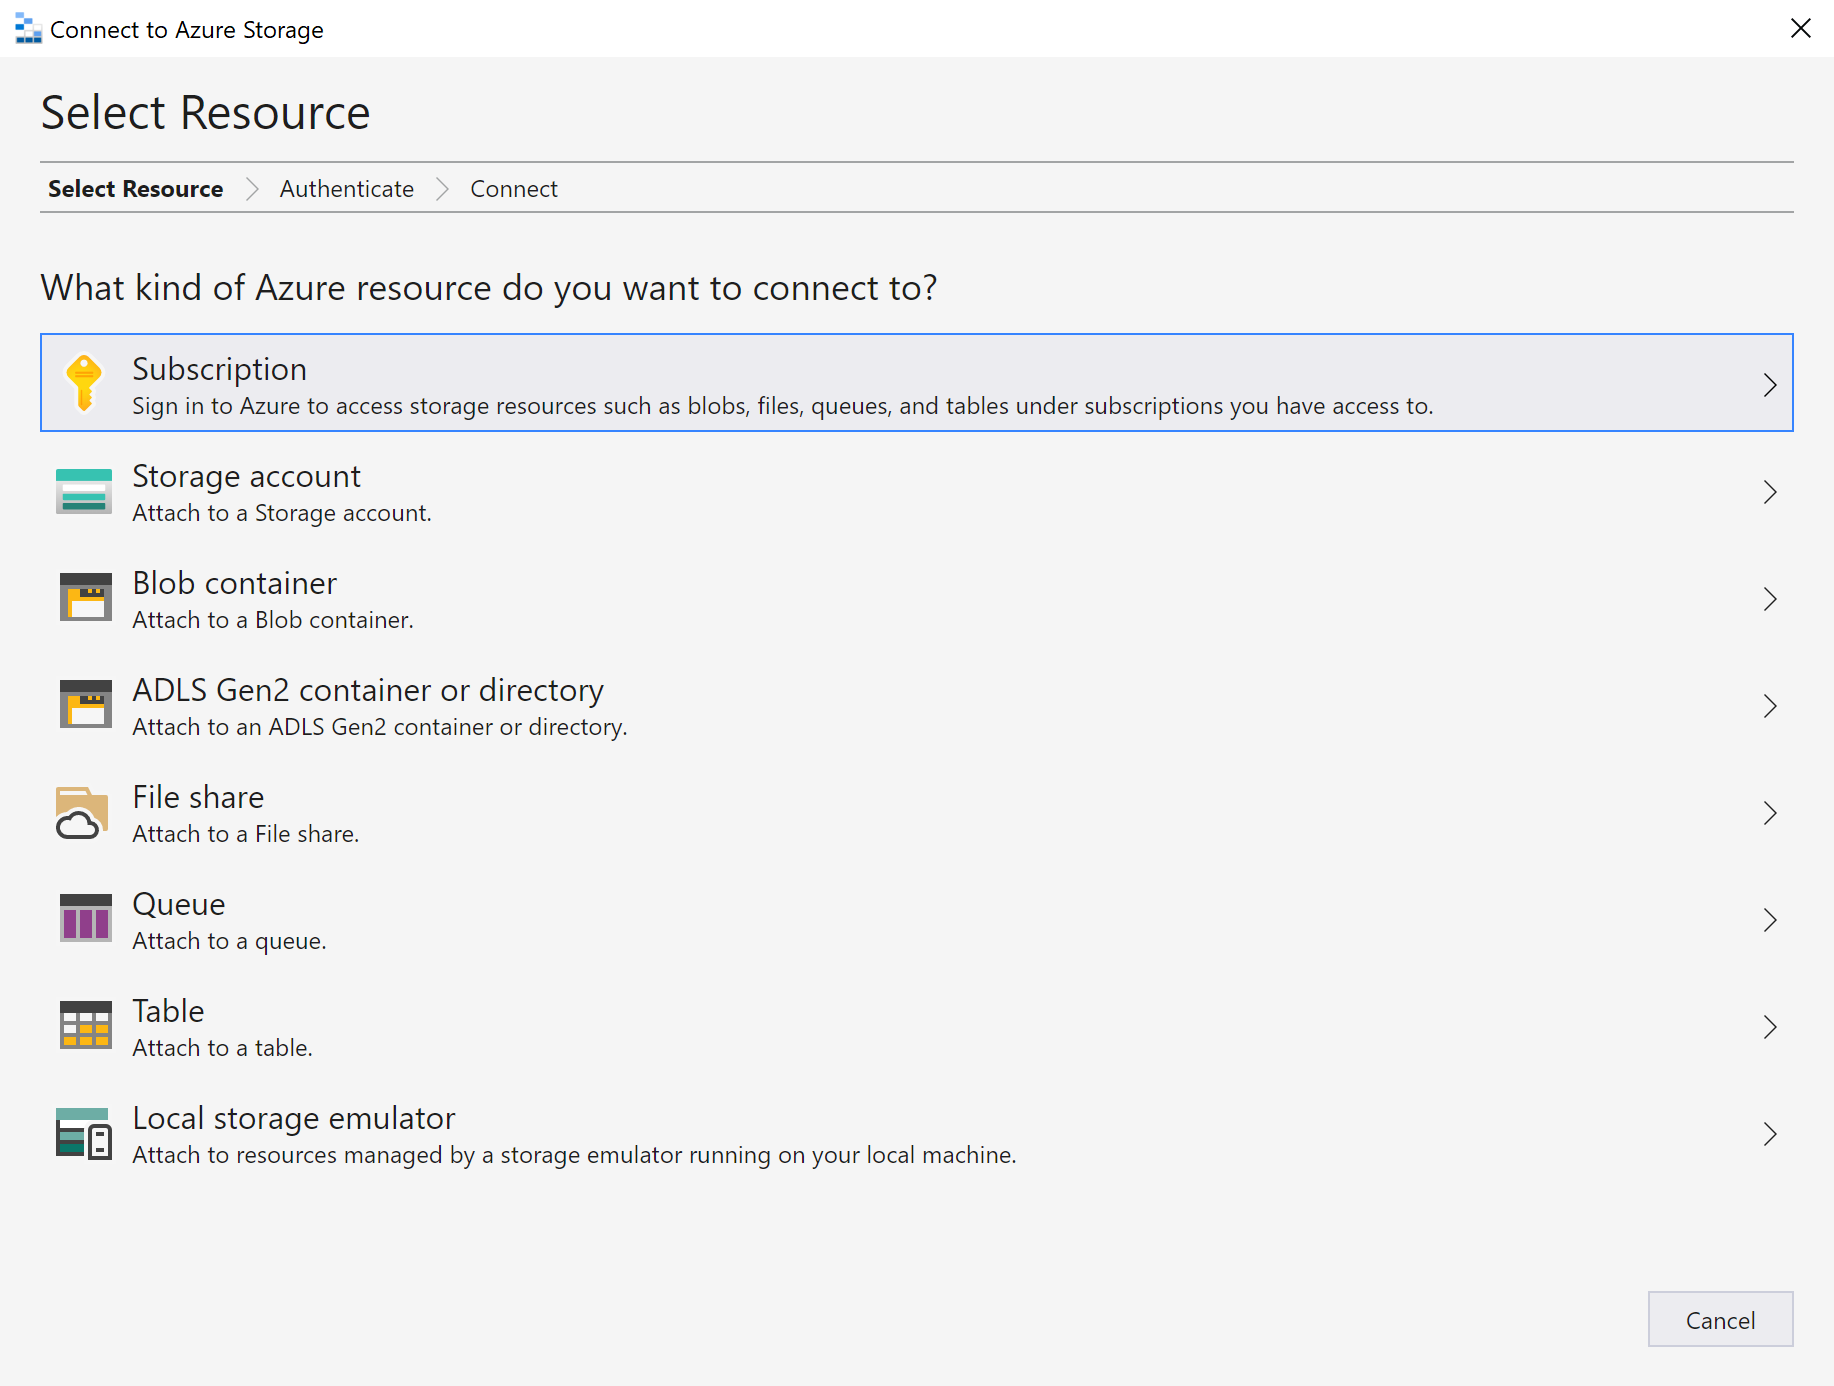
The Connect to Azure Storage dialog opens. In the Select Resource panel, select Subscription.
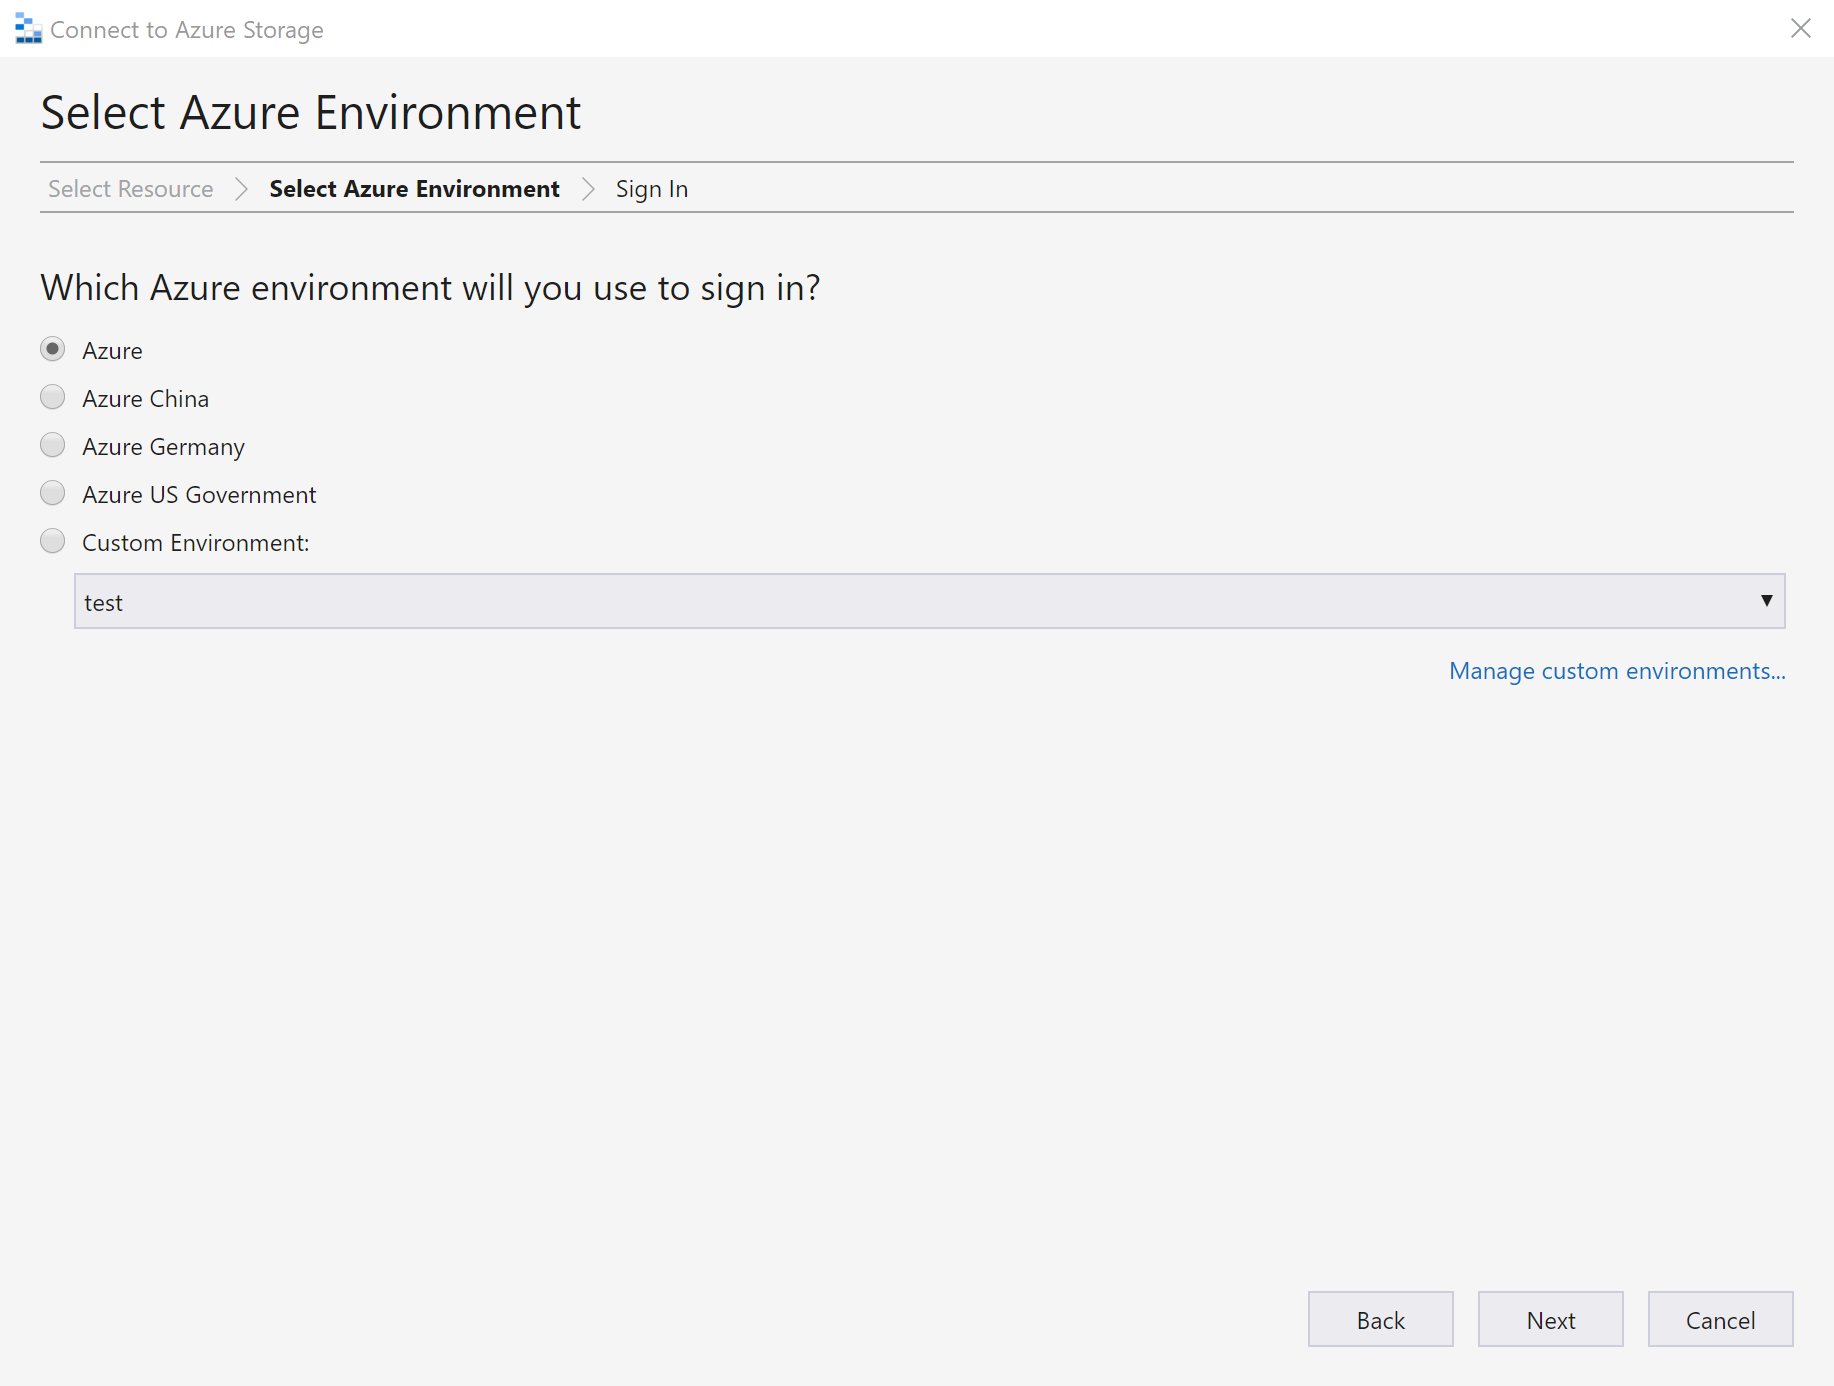
In the Select Azure Environment panel, select an Azure environment to sign in to. You can sign in to global Azure, a national cloud or an Azure Stack instance. Then select Next.
Tip
For more information about Azure Stack, see Connect Storage Explorer to an Azure Stack subscription or storage account.
Storage Explorer opens a webpage for you to sign in.
After you successfully sign in with an Azure account, the account and the Azure subscriptions associated with that account appear under ACCOUNT MANAGEMENT. Select the Azure subscriptions that you want to work with, and then select Apply.
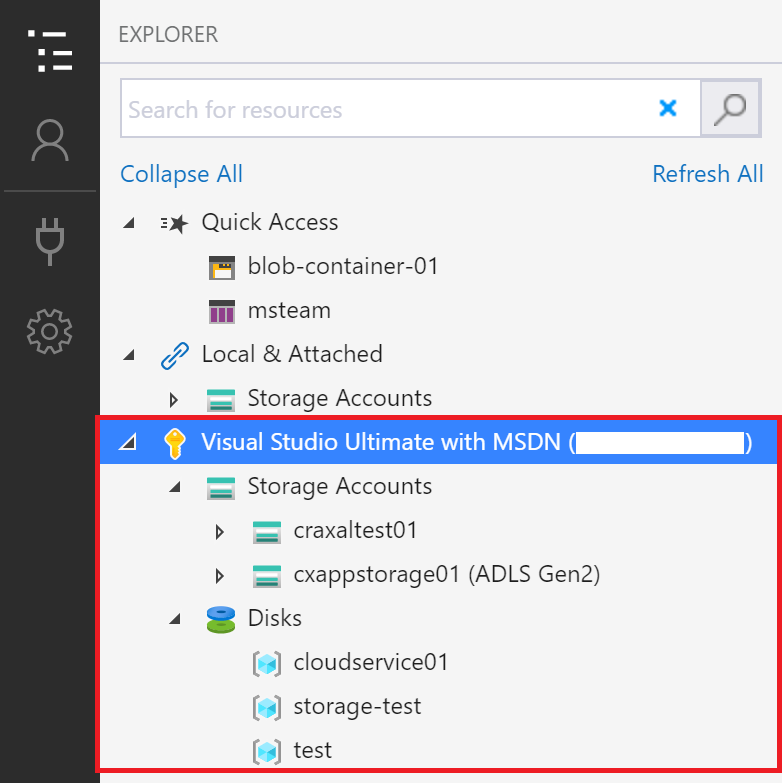
EXPLORER displays the storage accounts associated with the selected Azure subscriptions.
Attach to an individual resource
Storage Explorer lets you connect to individual resources, such as an Azure Data Lake Storage Gen2 container, using various authentication methods. Some authentication methods are only supported for certain resource types.
| Resource type | Microsoft Entra ID | Account Name and Key | Shared Access Signature (SAS) | Public (anonymous) |
|---|---|---|---|---|
| Storage accounts | Yes | Yes | Yes (connection string or URL) | No |
| Blob containers | Yes | No | Yes (URL) | Yes |
| Gen2 containers | Yes | No | Yes (URL) | Yes |
| Gen2 directories | Yes | No | Yes (URL) | Yes |
| File shares | No | No | Yes (URL) | No |
| Queues | Yes | No | Yes (URL) | No |
| Tables | Yes | No | Yes (URL) | No |
Storage Explorer can also connect to a local storage emulator using the emulator's configured ports.
To connect to an individual resource, select the Connect button in the left-hand toolbar. Then follow the instructions for the resource type you want to connect to.
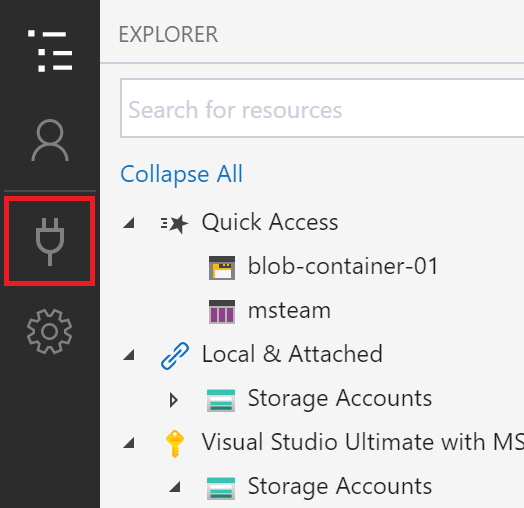
When a connection to a storage account is successfully added, a new tree node appears under Local & Attached > Storage Accounts.
For other resource types, a new node is added under Local & Attached > Storage Accounts > (Attached Containers). The node appears under a group node matching its type. For example, a new connection to an Azure Data Lake Storage Gen2 container appears under Blob Containers.
If Storage Explorer couldn't add your connection, or if you can't access your data after successfully adding the connection, see the Azure Storage Explorer troubleshooting guide.
The following sections describe the different authentication methods you can use to connect to individual resources.
Microsoft Entra ID
Storage Explorer can use your Azure account to connect to the following resource types:
- Blob containers
- Azure Data Lake Storage Gen2 containers
- Azure Data Lake Storage Gen2 directories
- Queues
Microsoft Entra ID is the preferred option if you have data layer access to your resource but no management layer access.
- Sign in to at least one Azure account using the sign-in steps.
- In the Select Resource panel of the Connect to Azure Storage dialog, select Blob container, ADLS Gen2 container, or Queue.
- Select Sign in using Microsoft Entra ID and select Next.
- Select an Azure account and tenant. The account and tenant must have access to the Storage resource you want to attach to. Select Next.
- Enter a display name for your connection and the URL of the resource. Select Next.
- Review your connection information in the Summary panel. If the connection information is correct, select Connect.
Account name and key
Storage Explorer can connect to a storage account using the storage account's name and key.
You can find your account keys in the Azure portal. Open your storage account page and select Settings > Access keys.
- In the Select Resource panel of the Connect to Azure Storage dialog, select Storage account.
- Select Account name and key and select Next.
- Enter a display name for your connection, the name of the account, and one of the account keys. Select the appropriate Azure environment. Select Next.
- Review your connection information in the Summary panel. If the connection information is correct, select Connect.
Shared access signature (SAS) connection string
Storage Explorer can connect to a storage account using a connection string with a Shared Access Signature (SAS). A SAS connection string looks like this:
SharedAccessSignature=sv=2020-04-08&ss=btqf&srt=sco&st=2021-03-02T00%3A22%3A19Z&se=2020-03-03T00%3A22%3A19Z&sp=rl&sig=fFFpX%2F5tzqmmFFaL0wRffHlhfFFLn6zJuylT6yhOo%2FY%3F;
BlobEndpoint=https://contoso.blob.core.windows.net/;
FileEndpoint=https://contoso.file.core.windows.net/;
QueueEndpoint=https://contoso.queue.core.windows.net/;
TableEndpoint=https://contoso.table.core.windows.net/;
- In the Select Resource panel of the Connect to Azure Storage dialog, select Storage account.
- Select Shared access signature (SAS) and select Next.
- Enter a display name for your connection and the SAS connection string for the storage account. Select Next.
- Review your connection information in the Summary panel. If the connection information is correct, select Connect.
Shared access signature (SAS) URL
Storage Explorer can connect to the following resource types using a SAS URI:
- Blob container
- Azure Data Lake Storage Gen2 container or directory
- File share
- Queue
- Table
A SAS URI looks like this:
https://contoso.blob.core.windows.net/container01?sv=2020-04-08&st=2021-03-02T00%3A30%3A33Z&se=2020-03-03T00%3A30%3A33Z&sr=c&sp=rl&sig=z9VFdWffrV6FXU51T8b8HVfipZPOpYOFLXuQw6wfkFY%3F
- In the Select Resource panel of the Connect to Azure Storage dialog, select the resource you want to connect to.
- Select Shared access signature (SAS) and select Next.
- Enter a display name for your connection and the SAS URI for the resource. Select Next.
- Review your connection information in the Summary panel. If the connection information is correct, select Connect.
Local storage emulator
Storage Explorer can connect to an Azure Storage emulator. Currently, there are two supported emulators:
- Azure Storage Emulator (Windows only)
- Azurite (Windows, macOS, or Linux)
If your emulator is listening on the default ports, you can use the Local & Attached > Storage Accounts > Emulator - Default Ports node to access your emulator.
If you want to use a different name for your connection, or if your emulator isn't running on the default ports:
Start your emulator.
Important
Storage Explorer doesn't automatically start your emulator. You must start it manually.
In the Select Resource panel of the Connect to Azure Storage dialog, select Local storage emulator.
Enter a display name for your connection and the port number for each emulated service you want to use. If you don't want to use to a service, leave the corresponding port blank. Select Next.
Review your connection information in the Summary panel. If the connection information is correct, select Connect.
Generate a shared access signature in Storage Explorer
Account level shared access signature
Right-click the storage account you want share, and then select Get Shared Access Signature.
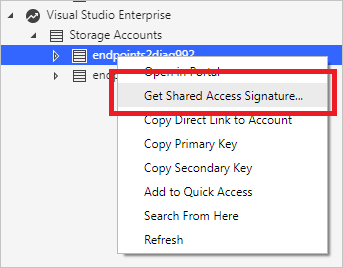
In Shared Access Signature, specify the time frame and permissions you want for the account, and then select Create.
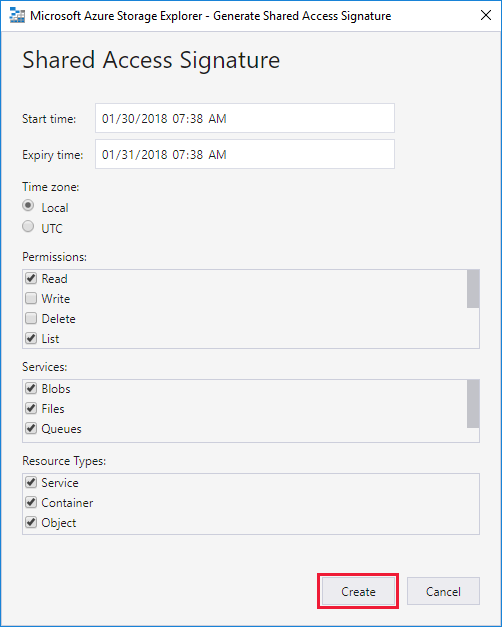
Copy either the Connection string or the raw Query string to your clipboard.
Service level shared access signature
You can get a shared access signature at the service level. For more information, see Get the SAS for a blob container.
Search for storage accounts
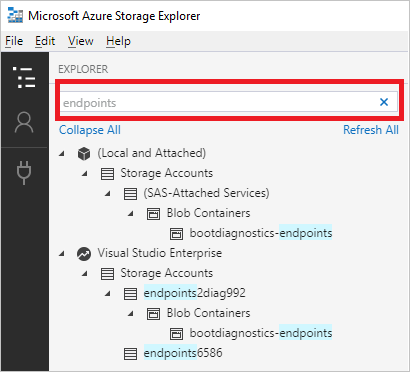
To find a storage resource, you can search in the EXPLORER pane.
As you enter text in the search box, Storage Explorer displays all resources that match the search value you entered up to that point. This example shows a search for endpoints:
Note
To speed up your search, use Account Management to deselect any subscriptions that don't contain the item you're searching for. You can also right-click a node and select Search From Here to start searching from a specific node.
Next steps
Feedback
Coming soon: Throughout 2024 we will be phasing out GitHub Issues as the feedback mechanism for content and replacing it with a new feedback system. For more information see: https://aka.ms/ContentUserFeedback.
Submit and view feedback for