Get started with the Resource Scheduling Optimization Add-in
The Resource Scheduling Optimization Add-in for Dynamics 365 Field Service automatically schedules work orders to the resources that are most available and best qualified. Many field service organizations that perform work orders at their customers' locations benefit from automatic scheduling because it optimizes the routes and travel times of field technicians as they travel from work order to work order.
This article guides you through configuration of Resource Scheduling Optimization to schedule and optimize a group of work orders to a predefined list of resources. You're going to set up a scope, goal, and schedule that runs daily to assign work orders to resources in a territory up to 48 hours in advance to minimize travel time.
For more Field Service videos, see this full playlist.
Prerequisites
Resource Scheduling Optimization is already deployed to your Field Service environment.
You need Field Service-Administrator and Resource Scheduling Optimization security roles and the Field Service-Administrator and Resource Scheduling Optimization-Administrator field security profiles. For more information, see Resource Scheduling Optimization configuration.
Resource Scheduling Optimization uses Universal Resource Scheduling to schedule field service work orders.
Glossary
You'll need to know the following key terms:
- Jobs: Work that needs to be completed like work orders, cases, or projects.
- Resources: Anyone or anything that needs to be scheduled to a job including people, equipment, and facilities.
- Schedules, bookings: Schedules and bookings are used interchangeably and refer to the appointment time slot when a resource is assigned to a job.
- Requirements: The entity related to a job that defines what type of resource is needed to complete the work and gets scheduled.
- Run: The process when Resource Scheduling Optimization performs its scheduling and optimization functions.
- Optimize: Attempt to find the best schedules to reduce travel time and maximize usage.
- Scope: The jobs and resources that Resource Scheduling Optimization considers for optimization.
- Goal: Defines the ideal outcome of a run. For example, minimize travel time, maximize usage, handle high-priority jobs, or schedule jobs as soon as possible. Multiple goals are ranked because sometimes there are trade-offs.
Step 1: Enable Resource Scheduling Optimization
After deploying Resource Scheduling Optimization into your environment, enable the add-in.
Open Resource Scheduling and change to the Settings area.
Go to Administration > Scheduling Parameters > Resource Scheduling Optimization.
Set Enable Resource Scheduling Optimization to Yes.
Select a Default Goal.
Among other uses, a default goal tells Resource Scheduling Optimization what to prioritize by default and it's relevant for single resource optimization. If no default goal exists, create an optimization goal.
Step 2: Verify booking statuses
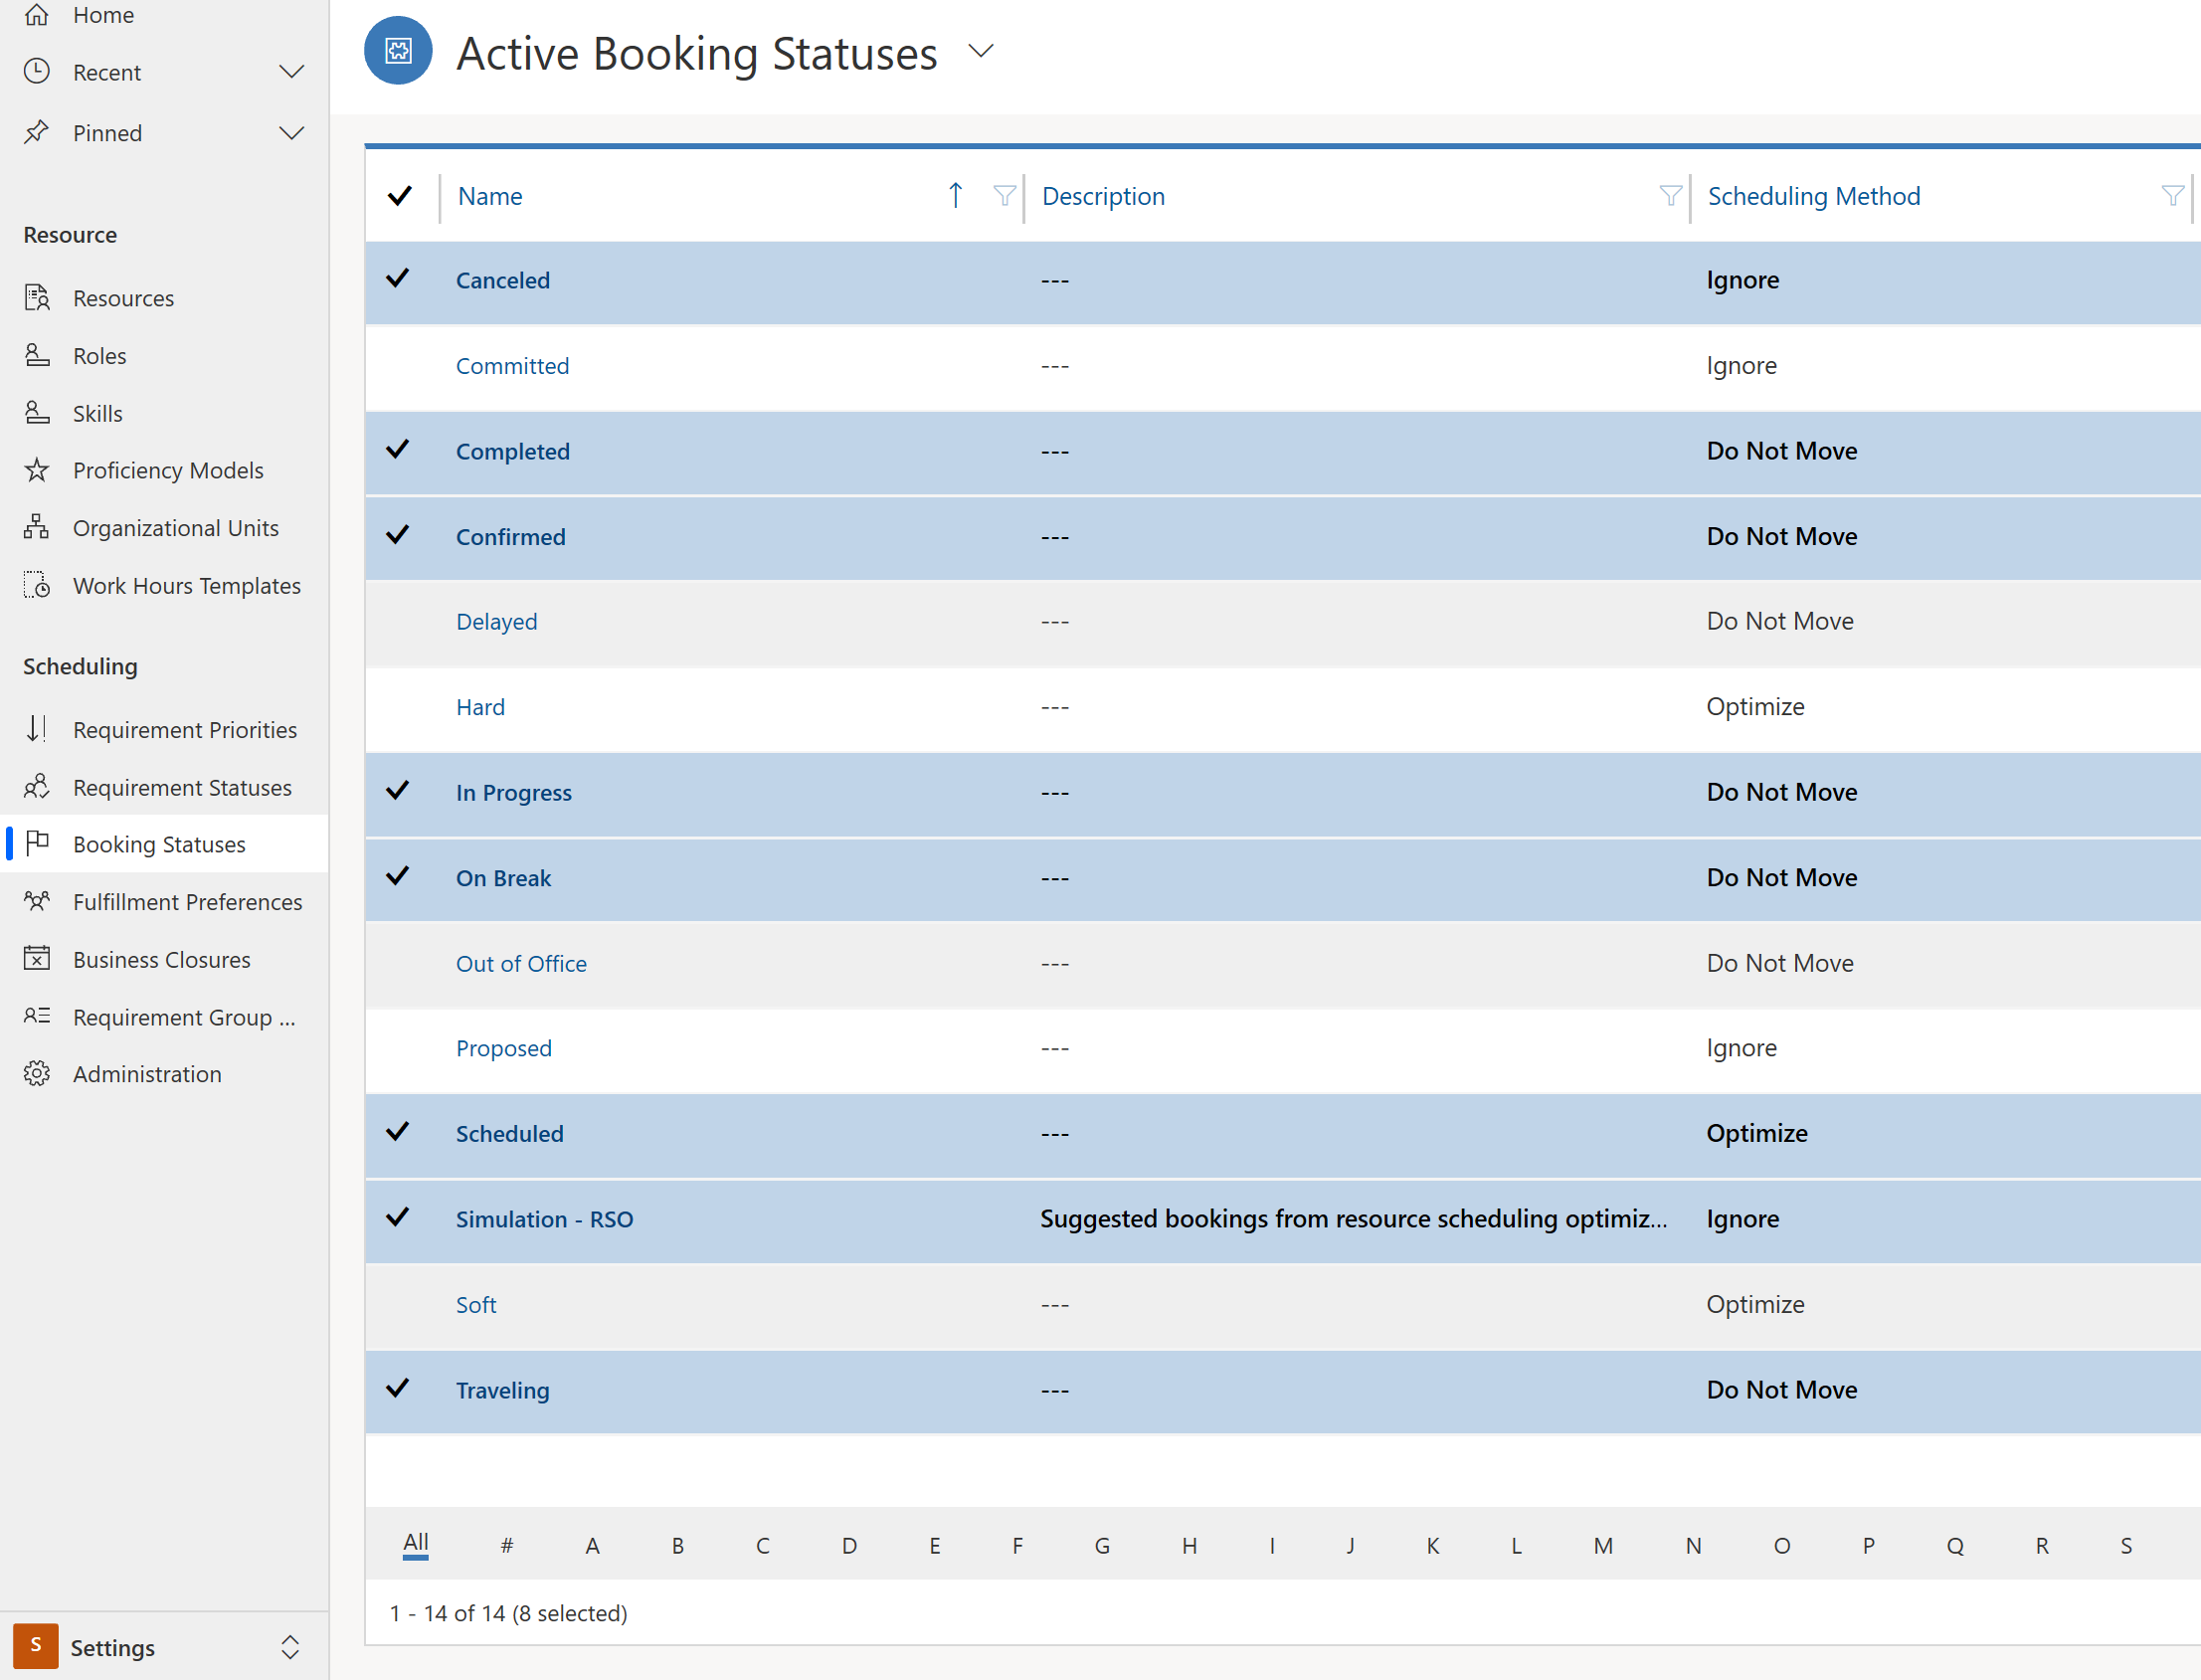
Field Service uses booking statuses, and Resource Scheduling Optimization adds the scheduling methods Ignore, Do Not Move, or Optimize and maps them to the booking statuses. Make sure the highlighted booking statuses match your system.

If they don't match, go to Resource Scheduling Optimization > Optimization Schedules > and select Reset.
Step 3: Set work orders to optimize
In this step, you choose which work orders to optimize.
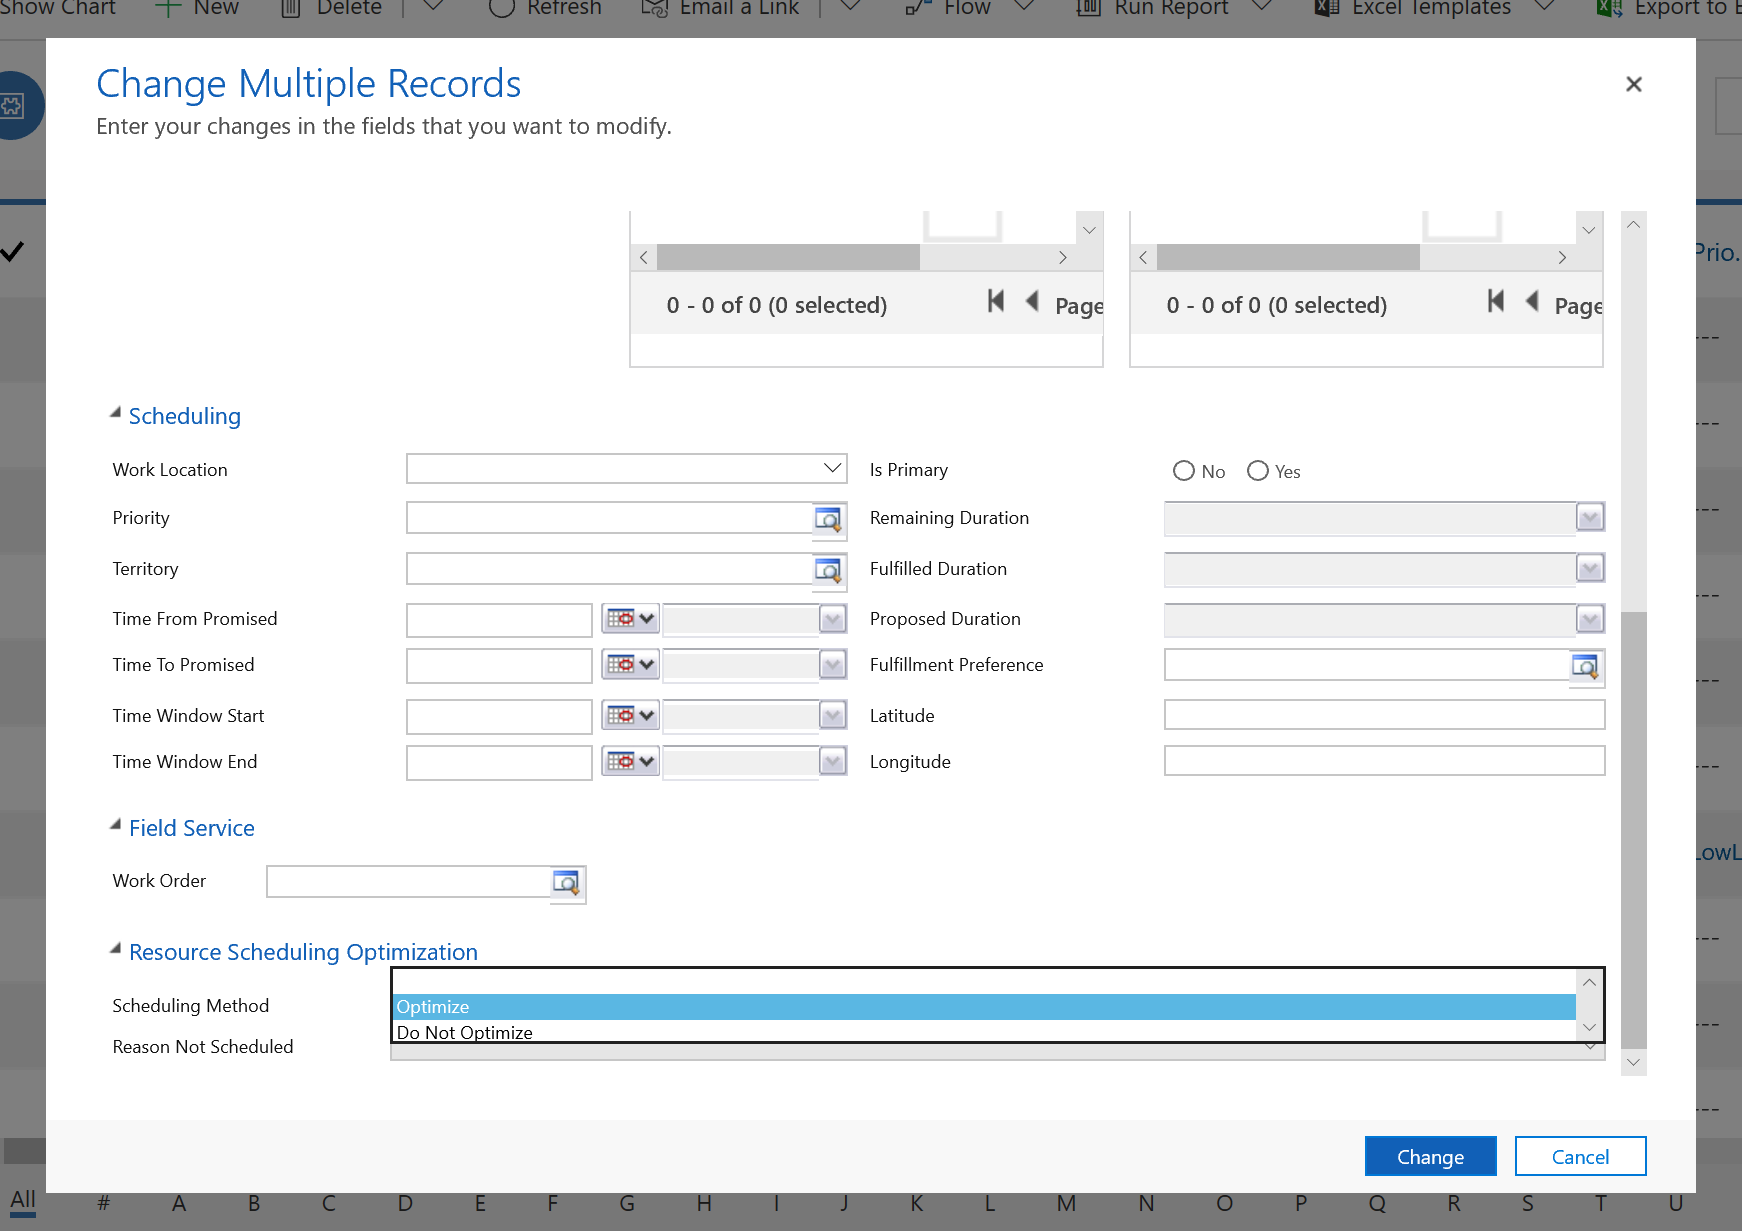
Go to Resource Scheduling > Resource Requirements and select the records to optimize. Select Edit to change them in bulk.

Set the Scheduling Method to Optimize.
Tip
- The system can automatically set work order requirements to be optimized when you create a work order in the Booking Setup Metadata settings.
- You also can change the optimization method individually for a resource requirement record on the Resource Scheduling Optimization tab.
Step 4: Set resources as eligible for optimization
Let's define the resources that are eligible for optimization.
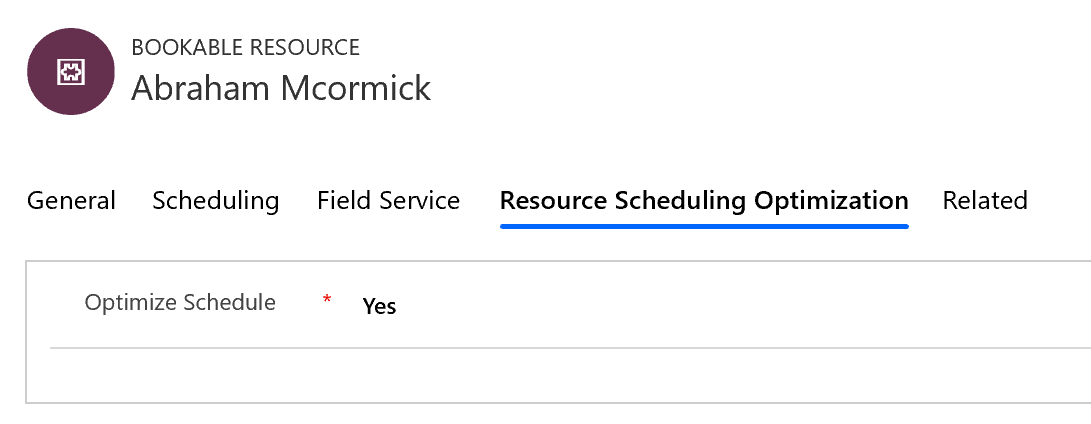
In the Resources list, choose the resources that you want to enable and select Edit.
Set the Optimize Schedule field to Yes.
Similar to requirements, this can be done individually or with a bulk edit.

Step 5: Create an optimization scope
In the following steps, we set up a Resource Scheduling Optimization run and start with an optimization scope.
In the list of apps, select Resource Scheduling Optimization.
Go to Optimization Scopes and select New.
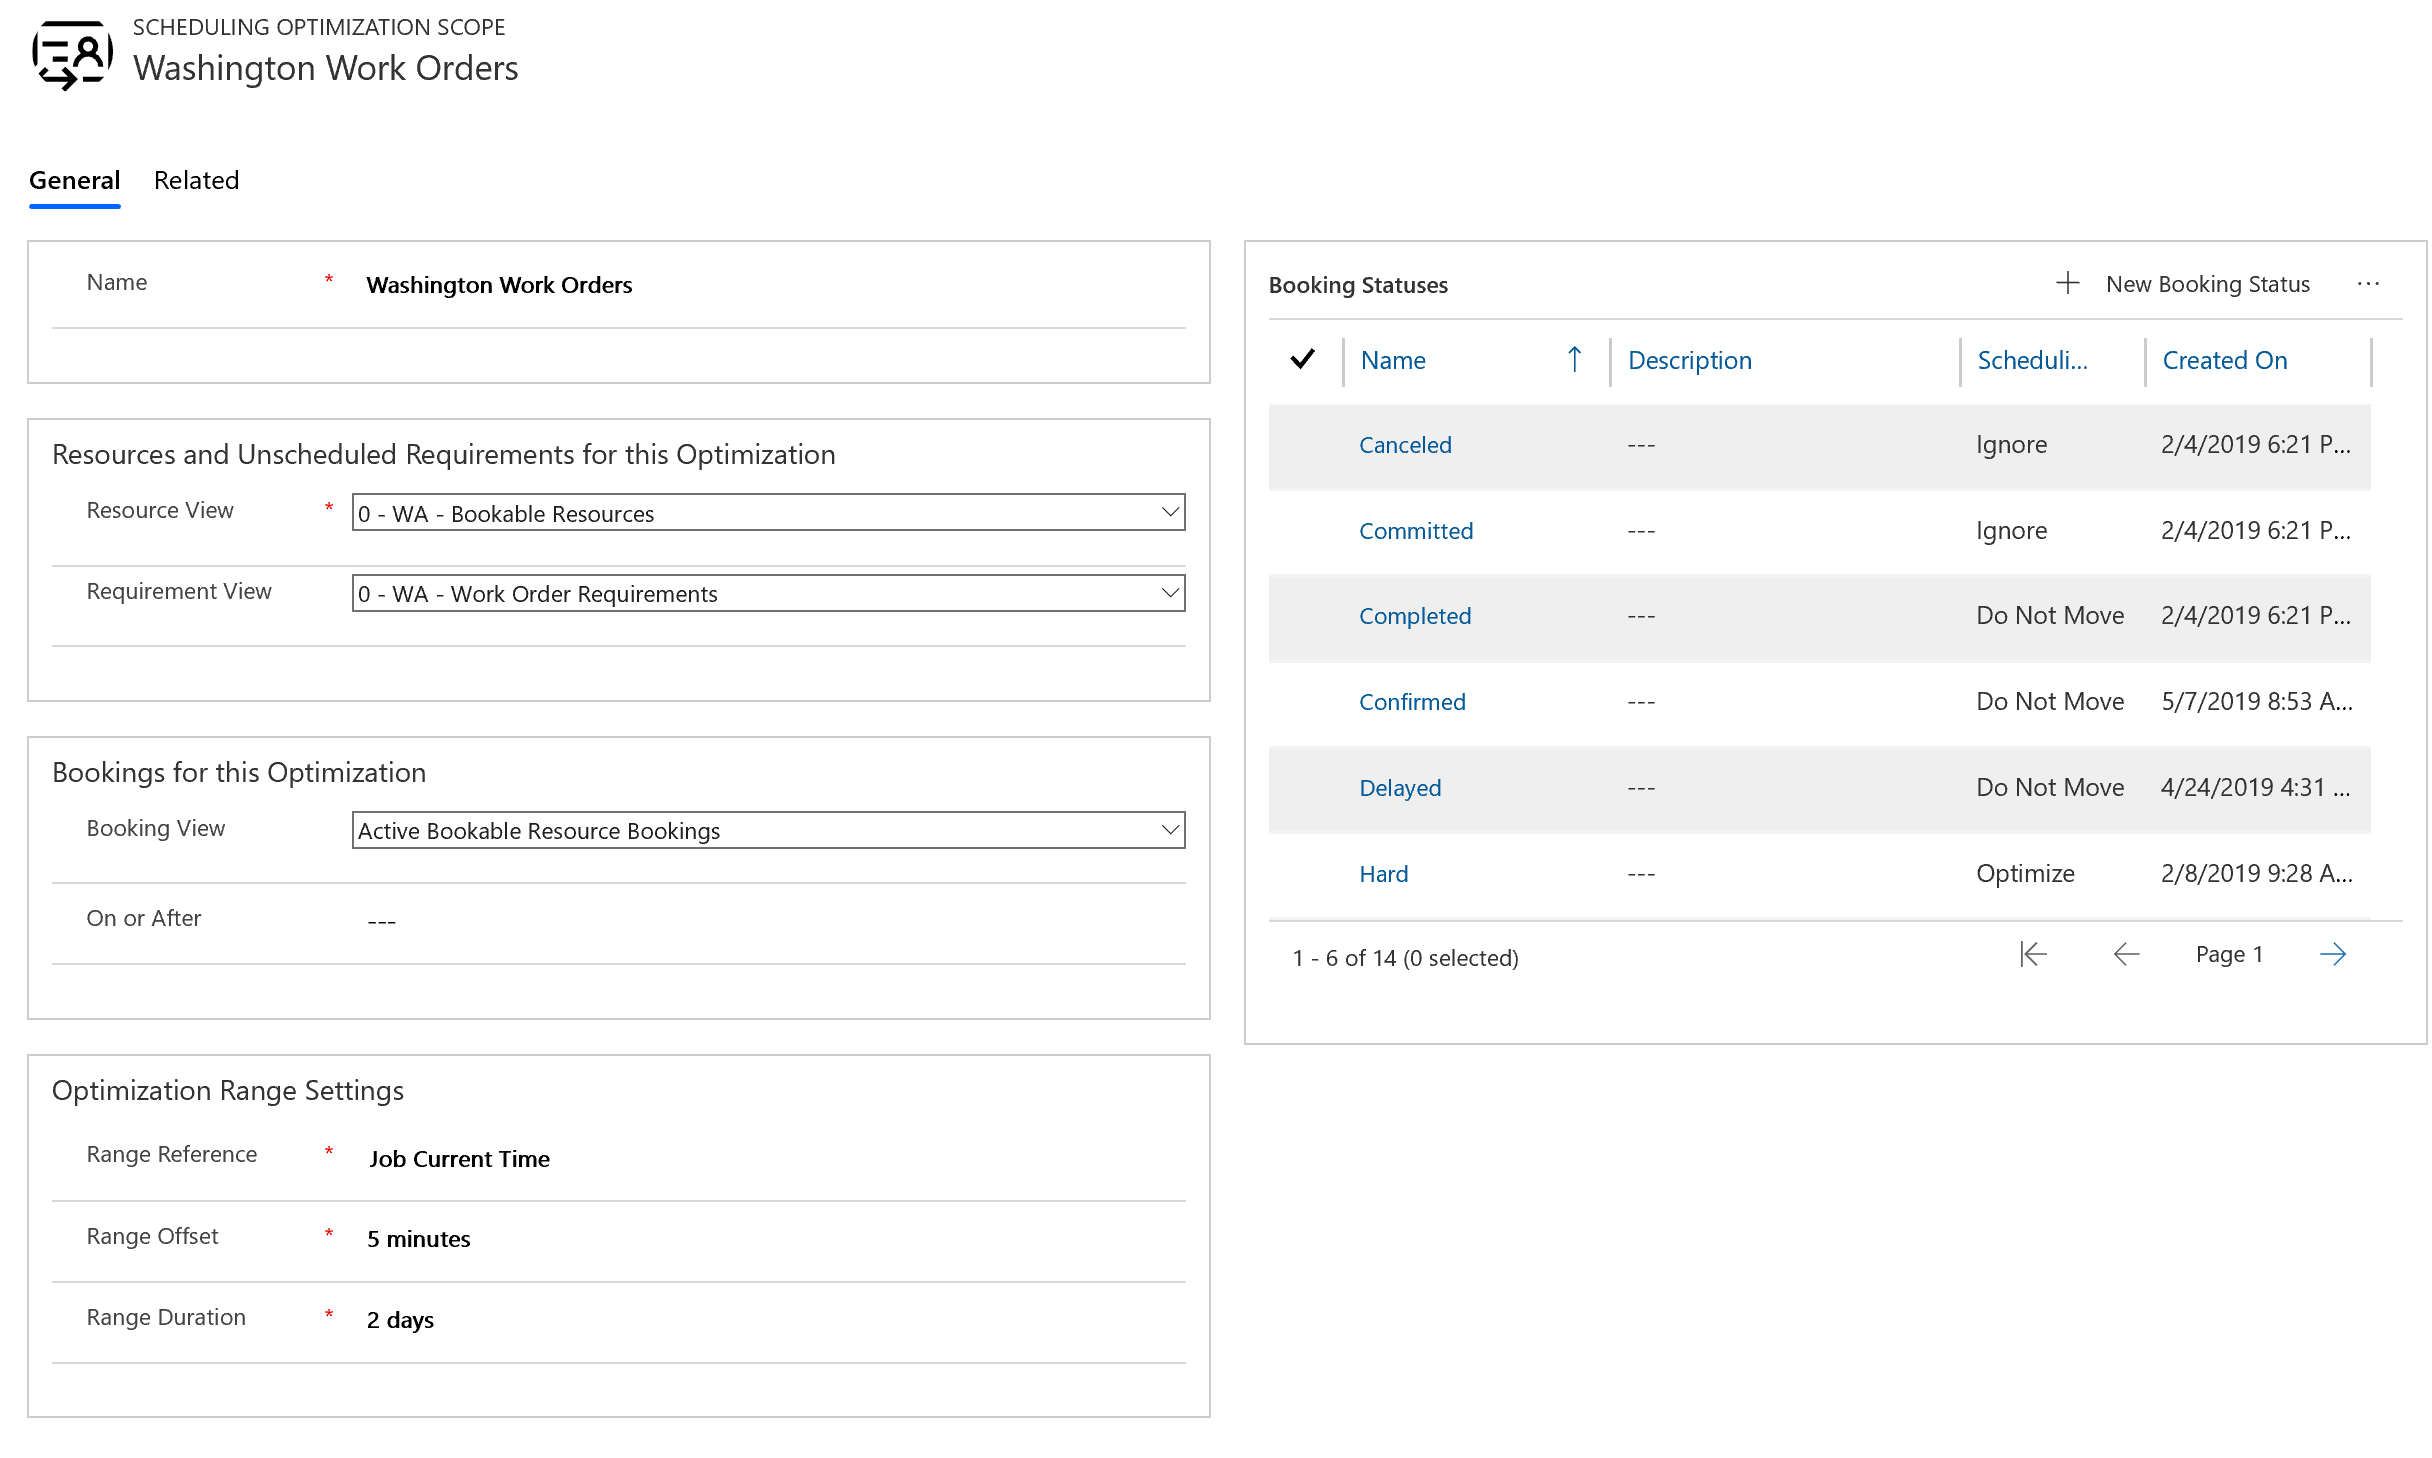
Enter a Name and choose a Resource View and a Requirement View for the optimization scope.
In the Bookings for the Optimization section, select the Active Bookable Resource Bookings view or a similar view for bookings.
Note
By entering a view for unscheduled requirements and bookings, we are configuring Resource Scheduling Optimization to optimize both unscheduled and scheduled jobs. If you only select a booking view, then Resource Scheduling Optimization will only optimize existing bookings and you must schedule the unscheduled jobs manually or with the schedule assistant. By only selecting an unscheduled requirement view, Resource Scheduling Optimization will not move existing bookings and simply attempt to schedule the unscheduled jobs to available time slots.
For Optimization Range Settings, enter the following values:
Range Reference: Job Current Time
Range Offset: This value defines when the first booking after running the optimization can start. Some organizations prefer to schedule jobs starting tomorrow, in which case you'd set it to one day.
Range Duration: This value defines how far into the future the add-in schedules requirements.

Step 6: Create a goal
Now we need to create an optimization goal for the Resource Scheduling Optimization run.
Go to Optimization Goals and select New.
Set the Engine Effort Level for this proof of concept to Very Light, which means that the system completes the run quickly in exchange for accuracy.
Select constraints, for example:
- Schedule Within Working Hours if you have working hours defined.
- Meets Required Characteristics if your requirements and resources both have characteristics.
- Matches Territory if your requirements and resources both belong to the same service territory.
Start with fewer constraints and add more as you successfully run Resource Scheduling Optimization. This makes it easier to troubleshoot if Resource Scheduling Optimization produces unexpected results.
For objectives, select the following order:
- Maximize Total Working Hours
- Minimize Total Travel Time
- Best Matching Skill Level
Step 7: Create a schedule
The last configuration step is to combine your scope and goal into a schedule.
Go to Optimization Schedules and select New.
Choose the Scope and Goal you created.
Set Timer for how often Resource Scheduling Optimization checks if it should run based on the time filter setting.
Enter Valid From and Valid To dates. If you plan to run Resource Scheduling Optimization manually, enter dates in the past.
On the Filter section, enter the time it should run.
Save and Publish the schedule.
Step 8: Run Resource Scheduling Optimization
You can manually run Resource Scheduling Optimization by selecting Run Now on the optimization schedule.
Every time Resource Scheduling Optimization runs, successfully or not, an optimization request record is created.
Step 9: Analyze results
Once the Optimization Request status is Completed, go to the schedule board to see the optimized board.
The system creates a new schedule board tab named after your optimization scope.
A simple example of Resource Scheduling Optimization optimizing travel time is when there's no travel time between two bookings. This means there were two work orders at the same location with the same service account and Resource Scheduling Optimization scheduled them back-to-back.
On the completed scheduling optimization request in the Bookings tab, you'll find a list of bookings created or deleted, and a graph of the total travel time and working time of the optimized bookings.
Congratulations! You have successfully run Resource Scheduling Optimization.
Feedback
Coming soon: Throughout 2024 we will be phasing out GitHub Issues as the feedback mechanism for content and replacing it with a new feedback system. For more information see: https://aka.ms/ContentUserFeedback.
Submit and view feedback for