Provision Omnichannel for Customer Service
Omnichannel for Customer Service offers a suite of capabilities that extend the power of Dynamics 365 Customer Service Enterprise to enable organizations to instantly connect and engage with their customers across digital messaging channels. An additional license is required to access Omnichannel for Customer Service. For more information, see the Dynamics 365 Customer Service pricing overview and Dynamics 365 Customer Service pricing plan pages.
Tip
If you’d like to try Dynamics 365 Customer Service for free, you can sign up for a 30-day trial.
Omnichannel for Customer Service provides a modern, customizable, high-productivity app that lets agents help customers across different channels via a unified interface. It lets organizations choose the channel that suits their business needs. It also ensures that a high level of responsive, quality service is received across channels.
To find out if Omnichannel for Customer Service is available in your region, see International availability.
Looking for an upgrade? See Upgrade Omnichannel for Customer Service for more information.
You can provision the following channels in Omnichannel for Customer Service:
Important
The channels that you want to provision might require a license. More information: Dynamics 365 Licensing Guide.
Prerequisites
Obtain an active subscription of one or more of the following:
To provision the Omnichannel for Customer Service application, Chat for Dynamics 365 Customer Service or Digital Messaging for Dynamics 365 Customer Service
To provision the voice channel, Voice Channel for Dynamics 365 Customer Service
Note
More information: Pricing, Dynamics 365 Licensing Guide, and How to purchase through Volume Licensing. You can also get a free 30-day trial if you have the required prerequisites. More information: Try channels for Dynamics 365 Customer Service.
Set up the prerequisites mentioned in the system requirements. More information: Prerequisites.
Ensure that the provisioning user has the following permissions:
- Microsoft 365 Global admin role. More information: Assign admin roles to user in Microsoft Office 365
- Dynamics 365 System Administrator role on the root business unit for your organization. More information: Assign security roles to a user in Power Platform and Create or edit business units
- Read-Write access in the Client Access License Information (CAL). More information: Create a Read-Write user account in Power Platform
Set up Omnichannel for Customer Service
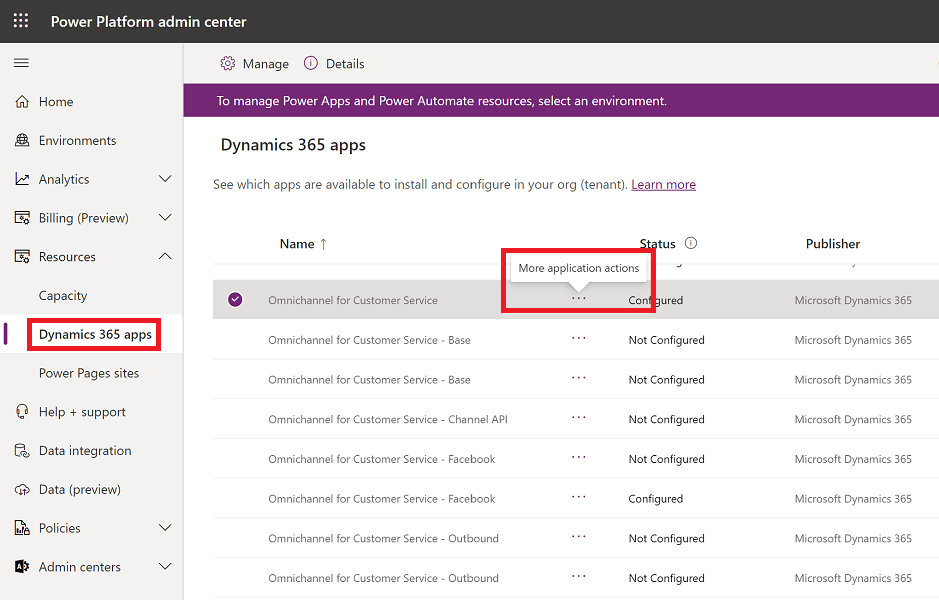
In Power Platform admin center, on the Environments page, select the environment in which you want to set up Omnichannel for Customer Service.
In the left pane, expand Resources, and select Dynamics 365 apps.
Note
Don't select Environments in the left pane and try to navigate to Dynamics 365 apps from there. The correct way to navigate to the Dynamics 365 apps management options is to expand Resources in the left pane and select Dynamics 365 apps.
On the Dynamics 365 apps page, select the ellipsis for More application actions next to Omnichannel for Customer Service, and then select Manage.
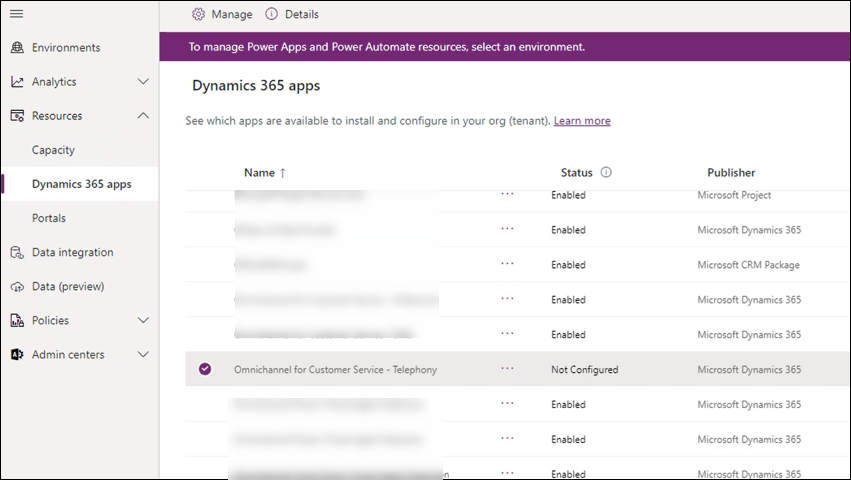
If you're installing the voice channel only, select More commands for Omnichannel for Customer Service - Telephony.
On the Manage Omnichannel for Customer Service message, select OK. The Dynamics 365 Administration Center | Omnichannel page is displayed on a new tab.
Select the Consent on behalf of your organization checkbox.
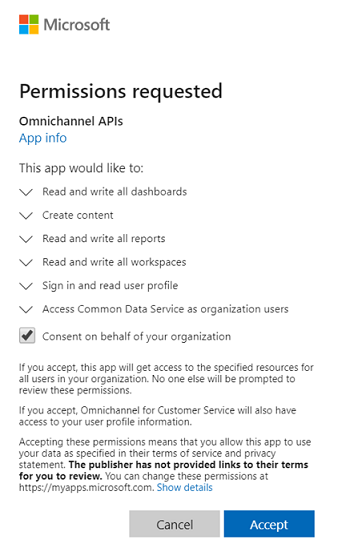
Select Accept to grant data access consent.
For information about app permissions, see Azure app Power BI API permissions and Data access consent to provision Omnichannel for Customer Service.
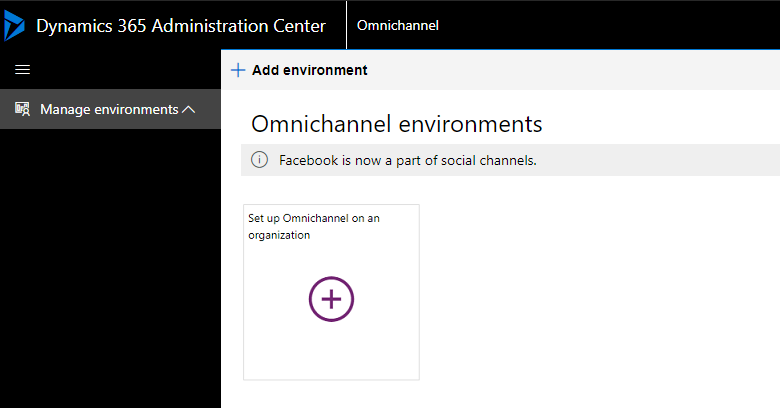
On the Manage Omnichannel Instances page, select Add environment to add an environment. Omnichannel is set up for the organization environment that you add here.
Important
As an admin, you can configure Omnichannel in multiple environments. You can view the status of all organization environments where the Omnichannel app has been configured in the Manage environments view.
Select the environment in the dropdown list, then perform the following steps.

Select Next, and in the Chat section, set the Add chat toggle to Yes to enable the Chat channel.
In the Voice section, set the Add voice toggle to Yes to enable the voice channel. Ensure that you select the Voice and SMS Terms checkbox.
In the SMS section, set the Add SMS toggle to Yes to enable SMS. Select the checkbox to confirm that you agree to the SMS terms.
Important
You must select the checkbox for SMS Terms to enable SMS and proceed with the setup.
In the Social channels section, set the Add social toggle to Yes to enable social channels.
In the Microsoft Teams section, set the Add Microsoft Teams toggle to Yes to enable Microsoft Teams.
On the Confirmation page, verify your selections, and then select Finish to provision Omnichannel for Customer Service in your organization.
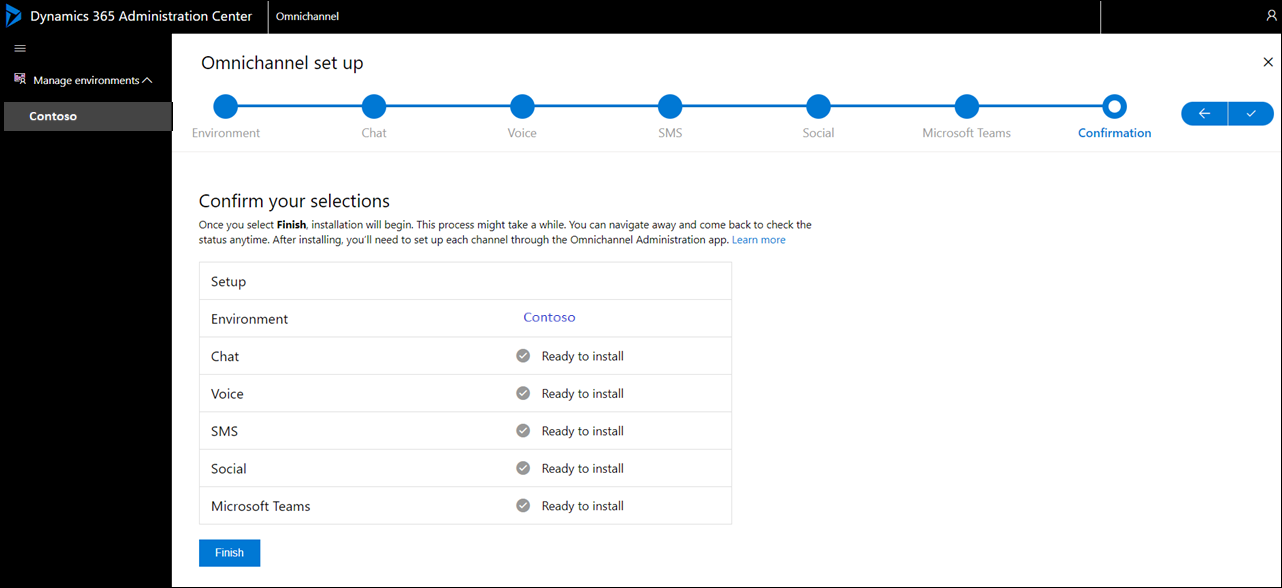
The setup can take several minutes. You can close the window and check after some time, or refresh to check if it's complete. After the setup is complete, the selected channels are enabled in your environment.
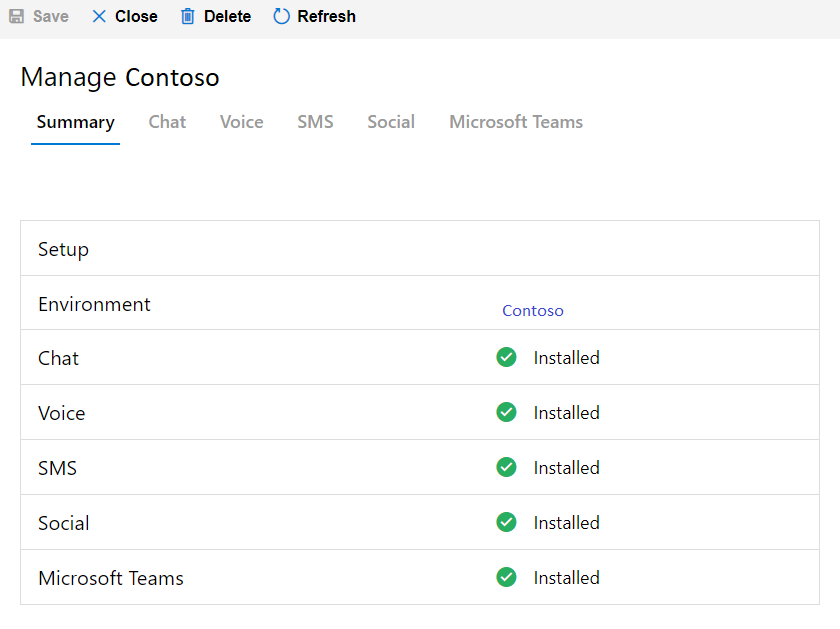
Important
- After you successfully provision Omnichannel for Customer Service, you might see the status as "Not configured" on the Dynamics 365 apps page. You can safely ignore the status.
- If the provisioning of Omnichannel for Customer Service fails and you retry it, you might see an app profile named Omnichannel Upgraded OOB Default app profile on the App profiles page in Power Apps. You can safely delete this app profile that is created.
Update Omnichannel for Customer Service application
After the Omnichannel for Customer Service application is successfully provisioned, you can update the environment by enabling or disabling the required channels.
In the Power Platform Admin Center, on the Environments page, select the environment where you want to set up Omnichannel for Customer Service.
In the left pane, expand Resources, and then select Dynamics 365 Apps.
On the Dynamics 365 apps page, select More commands beside Omnichannel for Customer Service, and then select Manage.
Select OK on the Manage Omnichannel for Customer Service message. The Dynamics 365 Administration Center | Omnichannel page is displayed on a new tab.
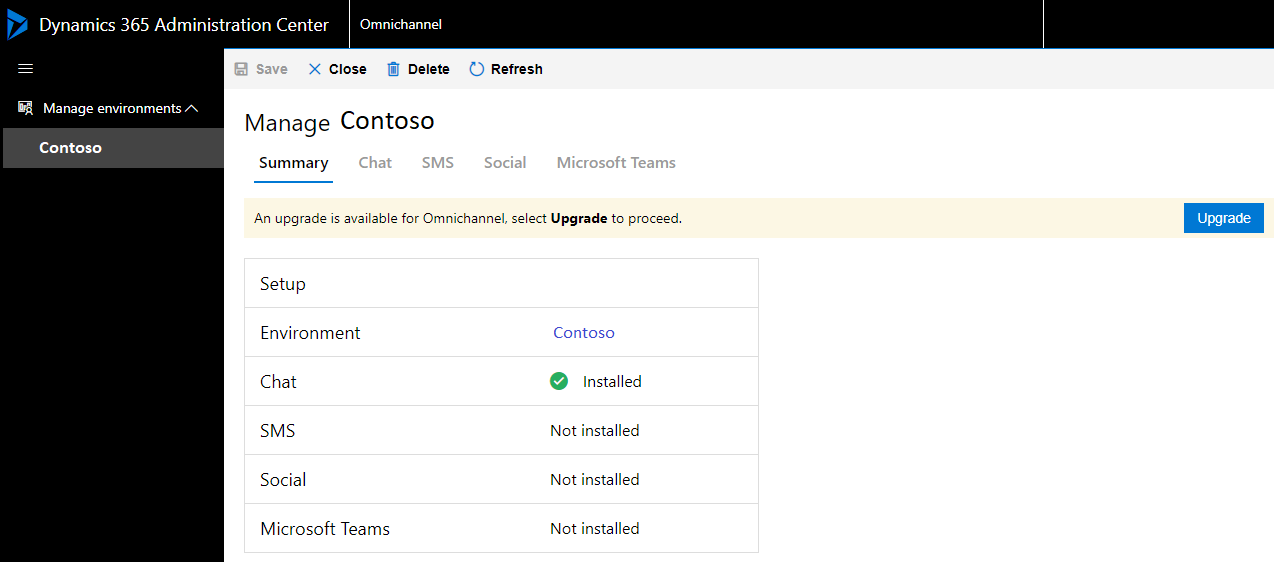
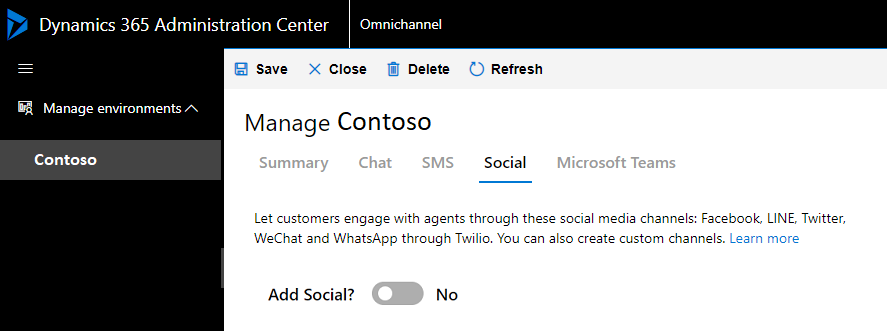
Select the channel to be enabled. For example, in this procedure, we'll enable the Social channels.
On the Social tab, set the toggle to Yes to enable social channels in your environment.
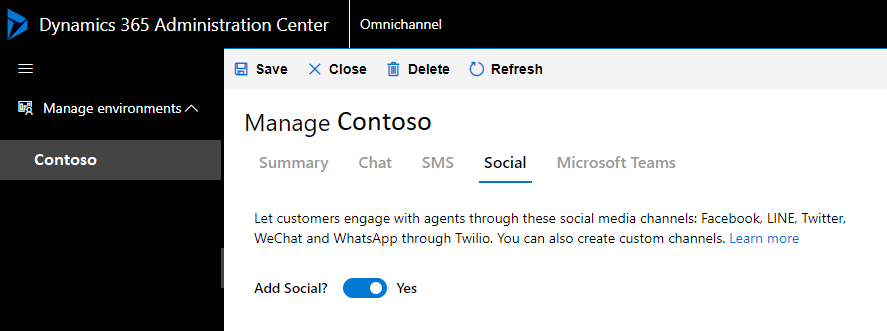
Select Save. After the update is complete, the status is displayed on the Summary tab.
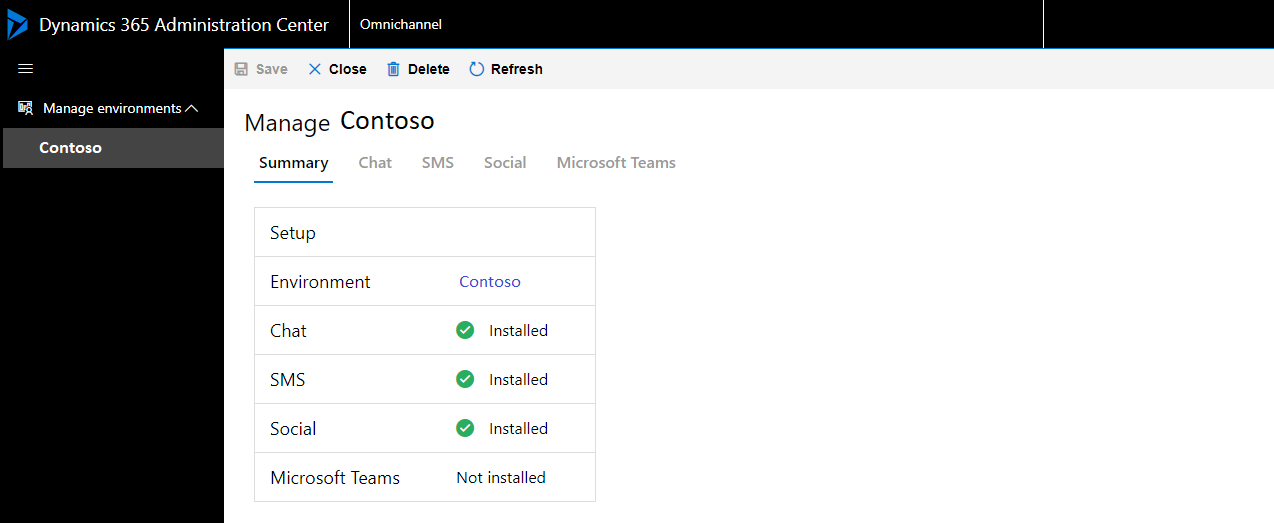
To disable a previously enabled channel, set the toggle to No. For example, in this procedure, we'll disable the Social channel.
On the Social tab, set the toggle to No to disable social channels in your environment. A confirmation message is displayed to remove the channel. Select Remove.
Note
If you disable all channels, Omnichannel for Customer Service will be removed from your organization.
Troubleshoot provisioning
Instance is not available to select on the provisioning application
See also
Upgrade Omnichannel for Customer Service
Create workstreams
Manage users
Feedback
Coming soon: Throughout 2024 we will be phasing out GitHub Issues as the feedback mechanism for content and replacing it with a new feedback system. For more information see: https://aka.ms/ContentUserFeedback.
Submit and view feedback for